9 posts tagged with "Level 1"

View All Tags

· 4 min read
Nitish Sharma

Introducing Alloy Connectors for IgniteConnex

Welcome to Alloy Connectors in IgniteConnex! In this blog, we'll explore how Alloy Connectors can make your life easier, especially if you're a bank or a fintech company. We'll break down what Alloy is, how it can benefit your business, and how to get started using Alloy Connectors.

What is Alloy?

Think of Alloy as a helpful tool that connects you to important information about your customers. It helps you with tasks like checking if your customers are following rules (especially anti-fraud rules) and whether they are good with money. In essence, Alloy helps you work better and faster.

How Can Alloy Help Your Business?

Alloy can be a game-changer for your business in several ways:

  1. Faster Customer Onboarding Alloy makes it quicker and simpler to bring new customers on board.

  2. Less Fraud Risk By using Alloy, you can reduce the chances of losing money to fraud.

  3. Keeping Up with Regulations Alloy helps you stay on the right side of the law by ensuring you follow all the necessary rules and regulations.

  4. Smarter Lending Decisions You can make better lending decisions by using Alloy to understand your customers' financial histories and risk profiles.

How to Get Started with Alloy Connectors


What You Need First

Setup your Alloy Account and keep base url, username and password handy, as all the connectors requires above details. Also,


Note: Each Connector Action has detailed instructions on how to use it, so don't hesitate to consult the documentation.

Alloy: KYC

To initiate the KYC (Know Your Customer) process with Alloy, follow these steps:

  1. Drag the connector action from the connector library into your palette.
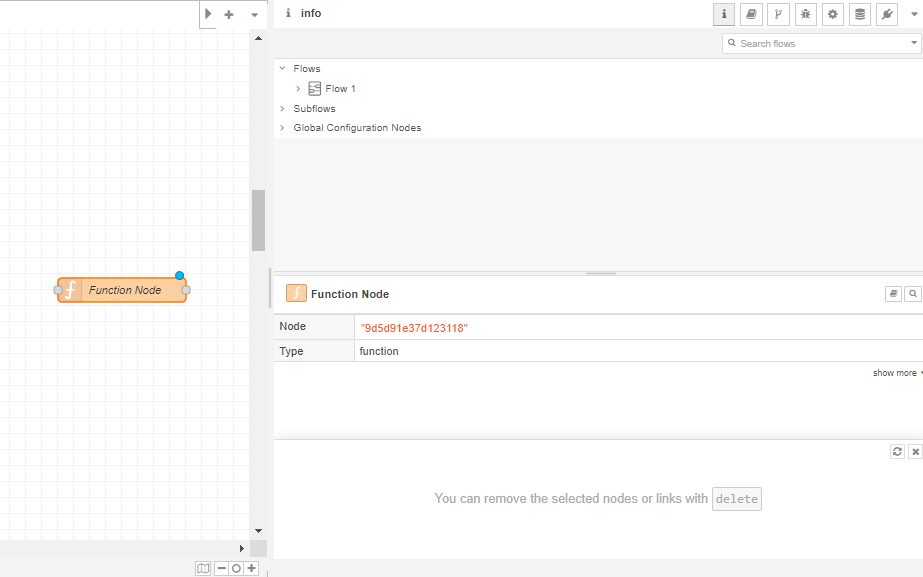
  2. Connect the action to an inject, debugger, and function node, configuring the node for the connector.
  3. For detailed instructions on using this connector, consult the connector documentation available in Alloy.

Upon successful configuration, you will receive a 200 status code along with a JSON response in the debug panel. This response contains valuable entity and evaluation tokens, crucial for subsequent actions.


From above results, you can get entity token and evaluation token that can be used in below connectors to perform furthur actions.

Alloy: Get Entity

The Alloy - Get Entity connector is designed to extract details of an entity using entity token from alloy server.


Alloy: Get Evaluation

An evaluation can show one of multiple statuses in the Alloy dashboard In general, there are three categories: Complete, Pending, and Partial. The Alloy - Get Evaluation connector is designed to extract Evaluation using entity token and evaluation token from alloy server.


Alloy: Upload Document Metadata

The Alloy - Upload Document Metadata connector is designed to upload metadata a document to specific entity at alloy.


Alloy: Upload Document

The Alloy - Upload Document connector is designed to upload a document to specific entity at alloy.


Alloy: Approve Document

The Alloy - Approve Document connector is designed to approve any document available on alloy server.


Alloy: Get Document

The Alloy - Get Document connector is designed to extract specific document from alloy server.


Alloy: Get Documents

The Alloy - Get Documents connector is designed to extract all documents using entity token of user from alloy server.


Overview

Alloy Connectors in IgniteConnex represent a powerful arsenal of tools designed to elevate your business operations. From streamlining customer onboarding to enhancing fraud detection and compliance, Alloy is the partner you need for a brighter financial future. For detailed guidance on utilizing these connectors effectively, refer to the respective connector documentation.

· 4 min read
Vipul Kumar

Introduction

Welcome to the realm of connector development!

Connectors are vital for improving efficiency in various processes. In this study, we'll explore how to create connectors in the Ignite environment, specifically focusing on making a subflow. In this subflow, we'll use two numeric input values, and the final result will be the product of these two variables, demonstrating how connectors can enhance operational results.

What is a Subflow?

Subflow is a way to encapsulate and reuse a group of nodes within a flow. It allows you to create a custom set of nodes and logic and then use that set as a single node within your flows. Subflows are particularly useful when you have a sequence of nodes that you want to use in multiple places in your flows or when you want to modularize and organize your flows for better maintainability.

Certainly, let's outline the creation of a subflow:

Step 1: Create a Subflow

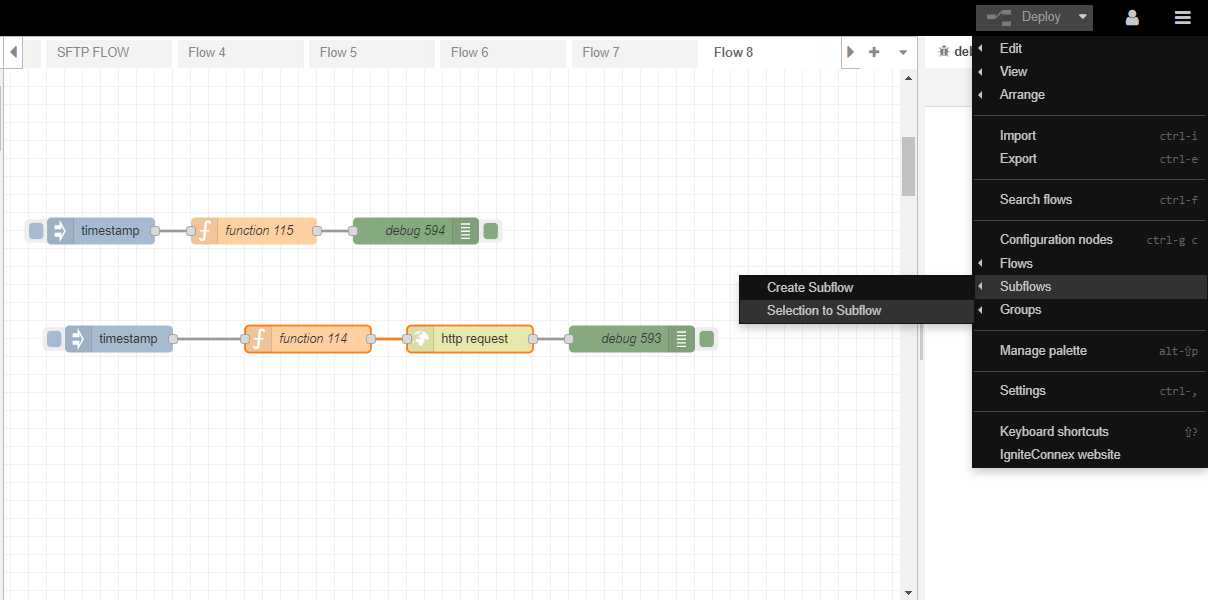
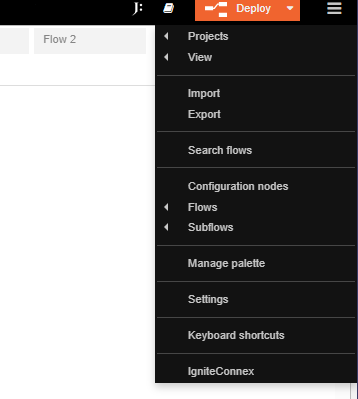
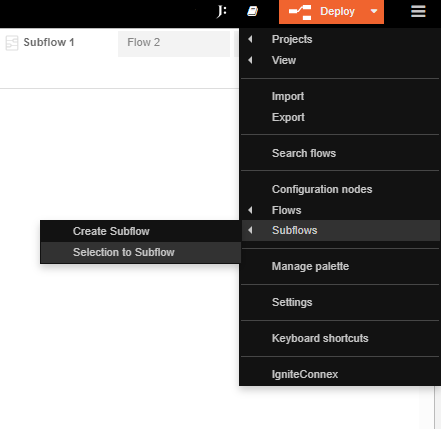
To initiate the subflow creation process, kindly access the Hamburger menu and subsequently select the "Create subflow" option within the Subflow section.

Step 2: Input Node Configuration

Begin by setting up your input node. This involves adding two environment variables and assigning a value to each of them.
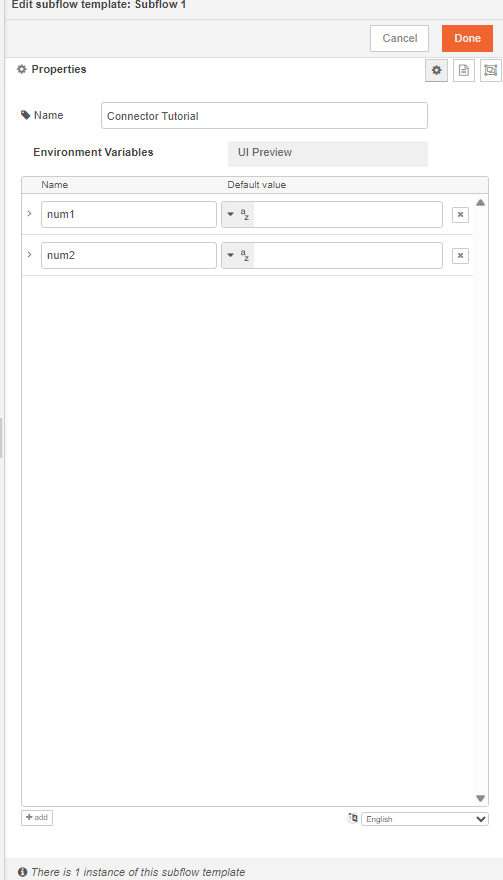

we should not hard-code any of these values inside the subflow. We will now pick these values from the user inputs. These can be picked using env of the subflow.

Note: The parameters of the env.get function are case-sensitive.

Let's also add override properties to this connector. Override properties are useful when the user wants to supply inputs to connector through msg object and not input fields.

msg.event={

"num1": env.get('num1') || msg.config.num1;

"num2": env.get('num2') || msg.config.num2;

}

Step 3: Product of the Variables

Next, implement the logic for the product of the variables within a Function Node.
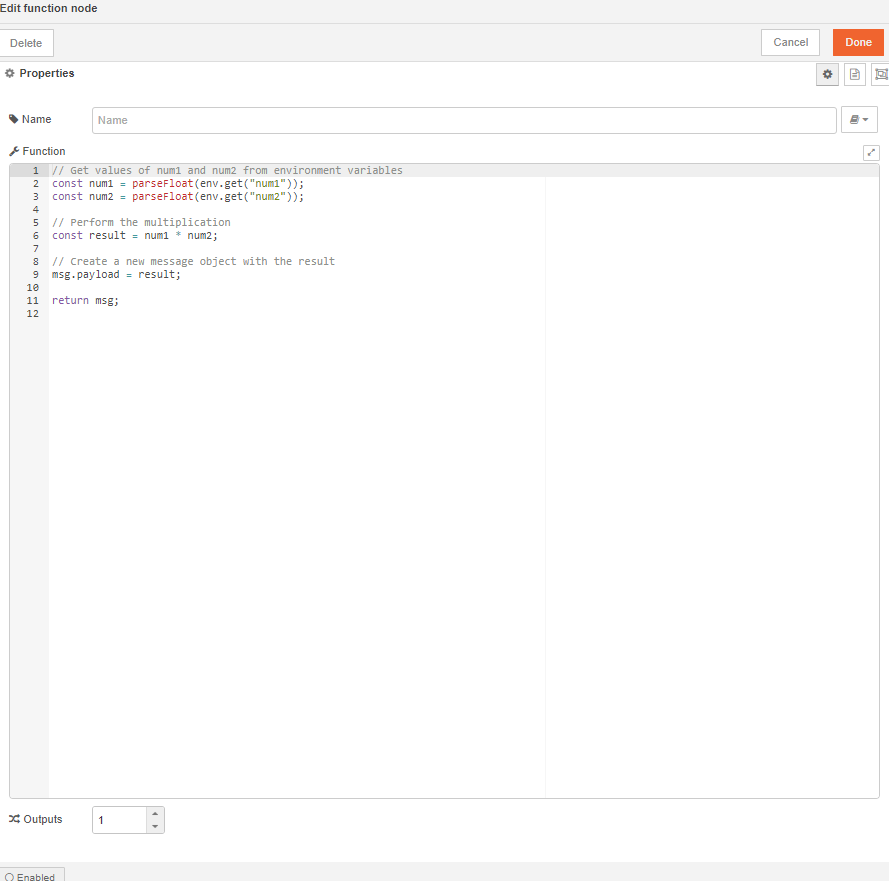

Step 4: Node Integration

Connect the input node to the function node. Additionally, establish a connection to a debugger node to capture any results or errors.


Step 5: Create a Connector

To organize the workflow, select all nodes and utilize the 'Selection to Subflow' option. This action will create a connector containing the selected nodes.

Adding Documentation to Connector

Certainly! Here are the steps to enhance your connector with documentation, broken down step by step:

Step 1: Access Connector Properties

Click on "Edit Properties" for the connector you want to document.

Step 2: Navigate to Description Tab

In the connector properties window, navigate to the "Description" tab. This is where you can add documentation to your connector.

Step 3: Use Markdown Editor

Within the "Description" tab, you'll find a provided markdown editor. This editor allows you to input documentation using markdown text formatting. Markdown is a lightweight markup language for text that is easy to read and write while providing formatting options.

Step 4: Write Documentation

Utilize the markdown editor to write detailed documentation for your connector. You can include information such as the connector's purpose, usage instructions, parameters, examples, and any other relevant information to assist users in understanding and using the connector effectively.

Step 5: Save Changes

After you've written and formatted your documentation using markdown, make sure to save your changes within the editor.

Step 6: Deploy Changes

Click on the "Done" button to save your connector's properties and documentation.

Step 7: Access Documentation

Now, when you go to the subflow that uses this connector, you should be able to access your newly added documentation in the "Doc" section. Users will be able to refer to this documentation to understand how to use the connector and its functionality.

By following these steps, you'll enhance your connector with clear and informative documentation, making it easier for users to utilize your connector effectively.

Branding the Connector action

Let's change the look of this connector now. Double click on the subflow and click edit properties >> Appearance
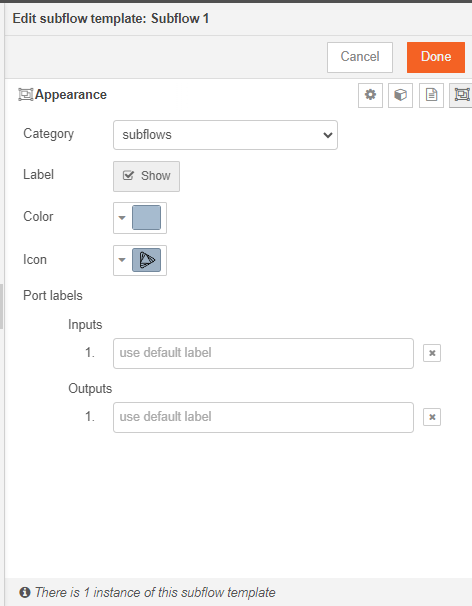

Make any required changes and deploy.

Conclusion

Congratulations. You have successfully created a connector.

Similarly you can create more connectors.

Stay tuned for more Igniteconnex Tutorials.
· 4 min read
Sparsh Mishra

Introduction

In this blog post, we'll delve into the world of data integration using the powerful Snowflake connectors on the IgniteConnex platform. We'll guide you through setting up three essential Snowflake connectors: Snowflake Client Config Connector, Snowflake: Execute Query Connector, and Snowflake: Bulk Insert Connector. By the end of this guide, you'll have the expertise to seamlessly connect, query, and insert data into Snowflake using IgniteConnex.

Prerequisites

Before we start, ensure you have the following prerequisites:

  • Access to the IgniteConnex platform.
  • A Snowflake account with necessary credentials (account URL, username, password).
  • Basic familiarity with SQL and data warehousing concepts.

Section 1: Setting Up Snowflake Client Config Connector

Step 1: Access the IgniteConnex Platform

  1. Log in to your IgniteConnex account.
  2. Navigate to the Connectors section and locate the Snowflake Client Config Connector and import the connector.

Step 2: Configuration

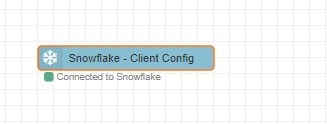
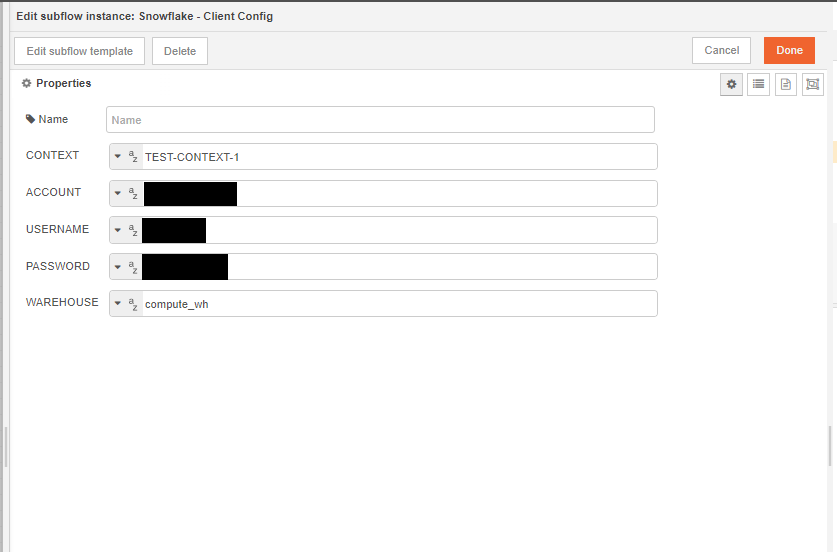
  1. Fill in the required configuration parameters.

    Make sure to fill in the details correctly; these details of your Snowflake account are used to configure the connection. You can find the account name on the bottom left corner of your Snowflake Portal.

Note: Context is the unique identifier for the Snowflake connection. Multiple Connections are uniquely identified through their context.

Note : Account config is in the format of "Org-Account", and can be easily fetched from the snowflake portal.

Step 3: Establish Connection

  1. Save the configuration and establish the connection by hitting that deploy button.
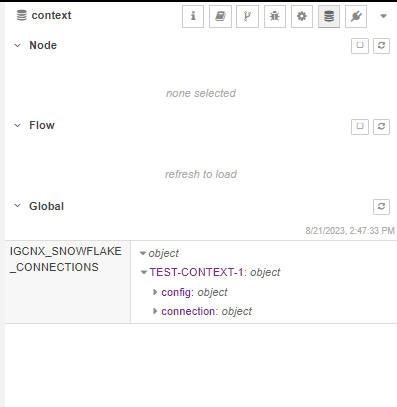
  2. Your Connection details are cached in the global storage; you can view and verify the connection details of your Snowflake Account there.

Section 2: Utilizing Snowflake: Execute Query Connector

Phew!! We have successfully configured the snowflake connection; next, we will be using the Execute Query Connector to execute queries in Snowflake through the IgniteConnex Editor.

Step 1: Locate the Connector

  1. Import the Snowflake - Execute Query Connector.

Step 2: Configuration

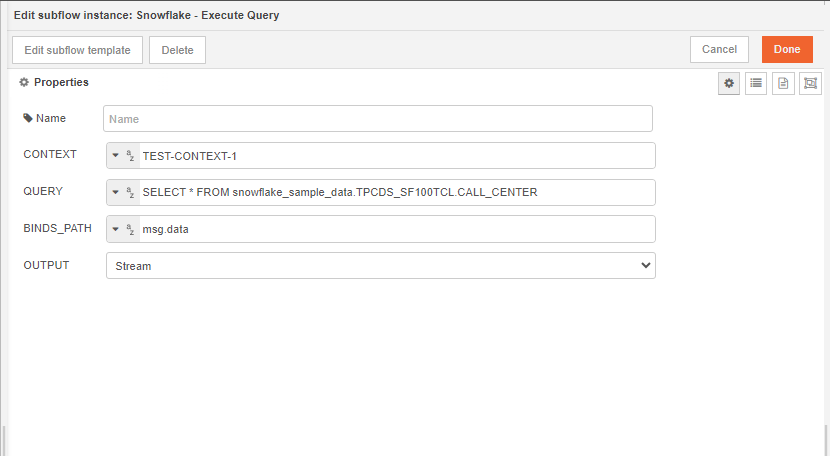
  1. Provide the necessary details:

    • Context: The connection context created earlier.

    • Query: Enter the SQL query you want to execute.

    • Binds_Path: Specify the path to your binds (e.g., msg.data).

    • Output: Choose 'bulk' or 'stream' for the output mode.

Bulk: If the queried data output should be in one single object

Stream: If the queried data output should be in a stream of events (w.r.t rows)

Step 3: Executing Queries

  1. Configure the connector to execute queries using the provided settings.
  2. Utilize msg.config to pass parameters and override properties.
  3. Binds can be passed in msg.data to utilize the feature of binds.
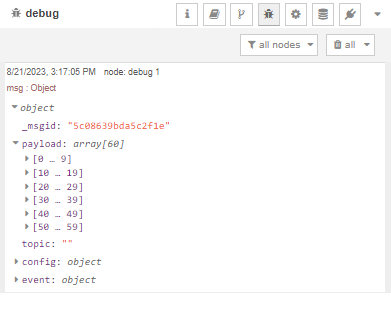
  4. After executing the query, you can see the fetched results in the debug panel.

Section 3: Performing Bulk Inserts with Snowflake: Bulk Insert Connector

Since we have now learned about establishing connection to Snowflake and executing queries on Snowflake through our IgniteConnex, we will now utilize the functionalities of the Snowflake - Bulk Insert Connector.

Step 1: Locate the Connector

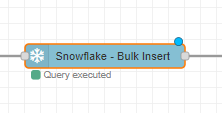
  1. In IgniteConnex, locate the Snowflake: Bulk Insert Connector and import it to your IgniteConnex Editor.

Step 2: Configuration

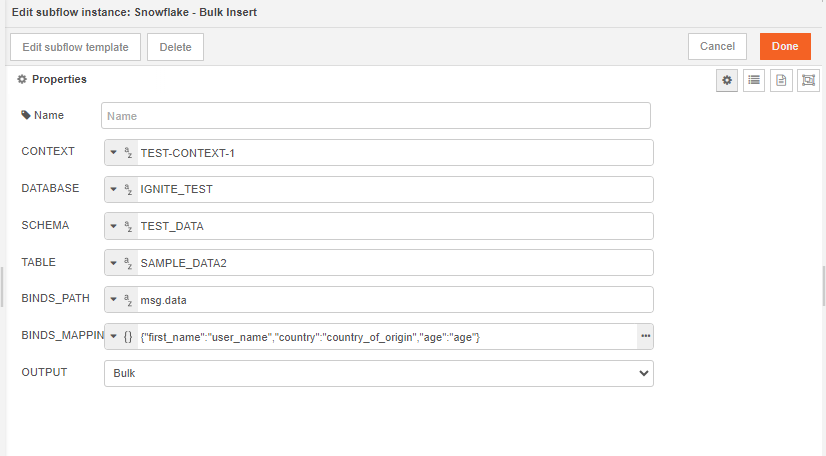
  1. Enter the configuration details:
    • Context: The connection context created earlier.
    • Database: Specify the target database.
    • Schema: Define the target schema.
    • Table: Choose the target table.
    • Binds_Path: Provide the path to your binds (e.g., msg.data).
    • Binds_Mapping: Map placeholders to data properties.
    • Output: Choose 'bulk' or 'stream' for the output mode.

Step 3: Bulk Insertions

  1. Configure the connector for bulk insertions based on your requirements.
  2. Use msg.config to customize your insertion process.
  3. Binds should be defined in msg.data, which should be an array of objects.
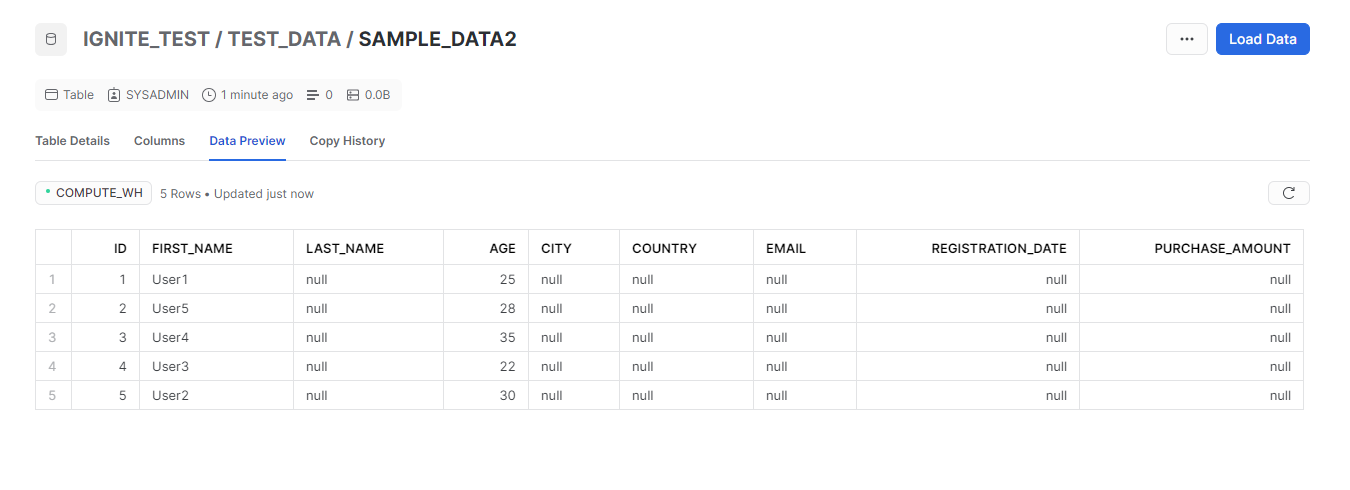
  4. Cross check with your Snowflake database that the data is successfully inserted and is being reflected there.

Advanced Use Cases and Insights

You can try these connectors build flows for some real time

  1. Real-time Analytics: Leverage Execute Query Connector with 'stream' output for real-time data analysis.
  2. Data Migration: Utilize Bulk Insert Connector for large-scale data migrations.
  3. Data Enrichment: Combine Execute Query and Bulk Insert Connectors for enriching data with external sources.

Conclusion

By following this comprehensive guide, you've successfully harnessed the power of Snowflake connectors on IgniteConnex. From setting up connections to executing queries and bulk insertions, you've gained the expertise to seamlessly integrate Snowflake into your data workflows. The connectors' flexibility allows you to explore a wide range of use cases, from real-time analytics to data migrations. With IgniteConnex and Snow

· 4 min read
Ahana Drall

Introduction

Hello World! Have you also been captivated by the remarkable seamlessness that connectors bring to the table? Well, let's delve into the realm of crafting connectors within the Ignite environment.

We will be integrating with Alloy today.

Alloy API Reference

Alloy stands as a pioneering platform that redefines identity verification and risk management. With an unwavering focus on security and innovation, Alloy empowers businesses to seamlessly verify identities, detect fraud, and make informed decisions. Leveraging cutting-edge technology, Alloy offers a comprehensive suite of tools that enable enterprises to streamline onboarding processes, enhance customer experiences, and mitigate potential risks. By amalgamating sophisticated data analytics, intuitive workflows, robust evaluations, and intricate entity recognition, Alloy transforms the landscape of identity verification, safeguarding businesses and customers alike in an interconnected digital world.

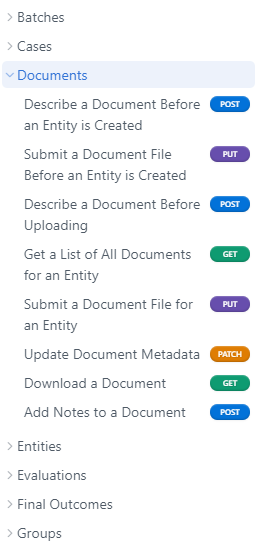
Let's look at the API reference provided by Alloy.

In the image below, we can see all the api definitions provided by Alloy. To access any of these APIs, we will need an authentication method. For the same, lets look at the authentication guide for Alloy.


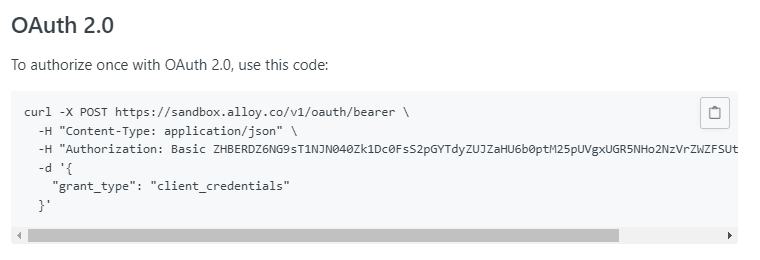
The authentication guide mentions various authentication methods.


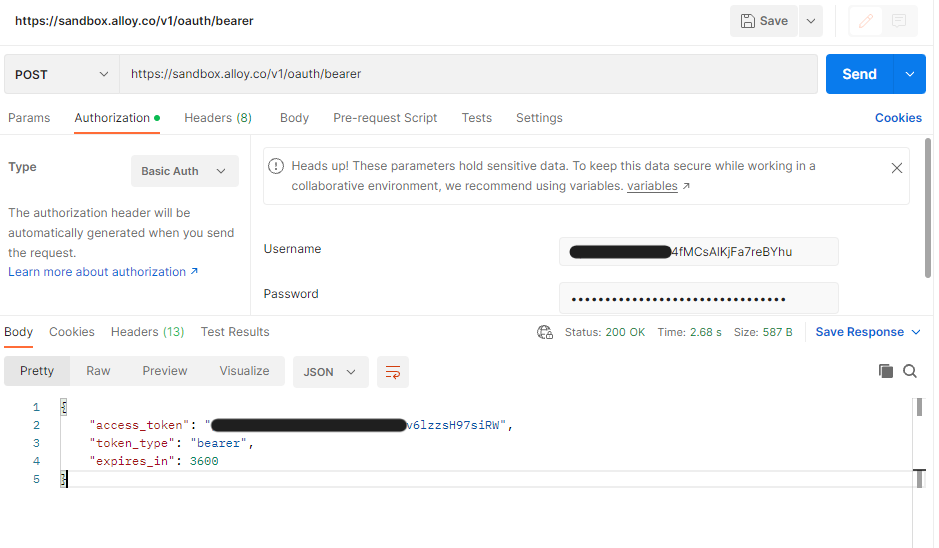
For clarity and ease of use, let's first try to access the auth token using postman.


We need to provide our username and password in auth headers and the success response of api will return an access token.

Let's Start

It's time to dive into the editor and start to create a connector.

We will be using a function node and an http request node for this case. The first step is to create this http request in the editor.


Now, you need to select the function node and the http request node, click on 'selection to subflow'. The subflow will be created.


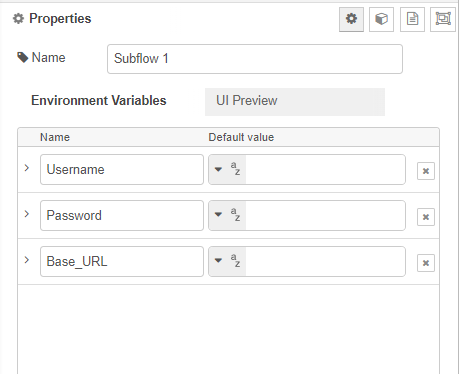
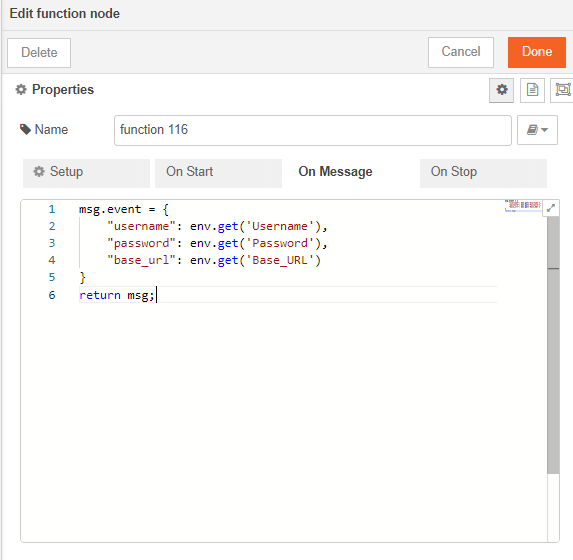
It's time to add properties to this connector and make it generic. Let's figure out all the properties we need to get from the user.

  • Username
  • Password
  • Base URL

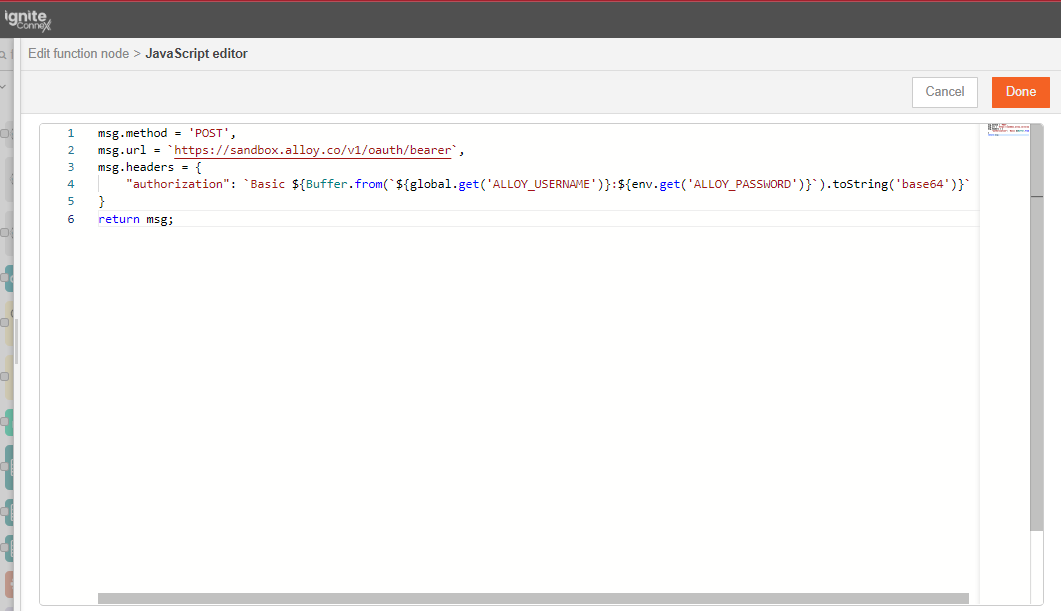
Since all the above can be different based on different businesses, we cannot hard-code any of these values inside the subflow. We will now pick these values from the user inputs. These can be picked using env of the subflow.


Note: The parameters of the env.get function are case-sensitive.

Let's also add override properties to this connector. Override properties are useful when the user wants to supply inputs to connector through msg object and not input fields.


Now we will modify our api call to use these values,


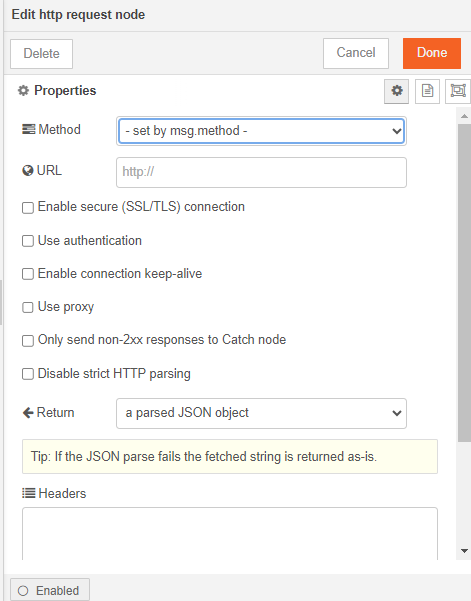
Make sure to configure the http request node to pick method and url from the msg object.


Adding Documentation to Connector Action

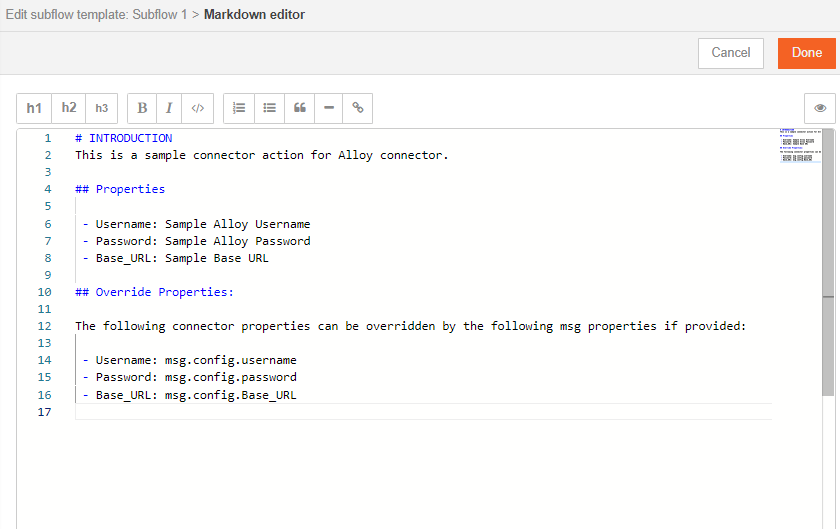
Now let's add documentation to our connector action.

Click on edit properties, and navigate to description tab.

This is a markdown editor which accepts markdown text.


Click done and deploy.

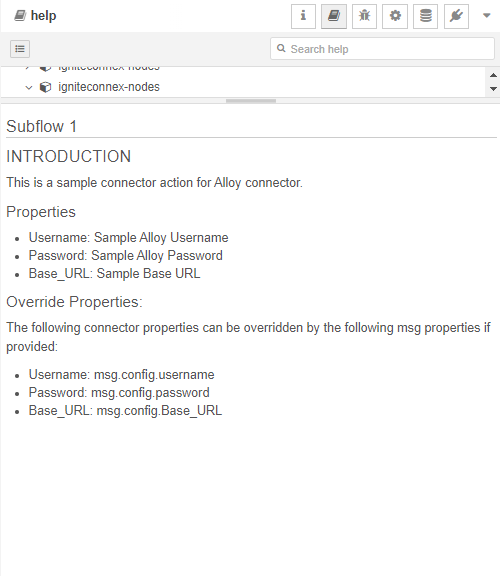
Click on the subflow and in the doc section, you will be able to see your brand new doc.


Branding the Connector Action

Let's change the look of this connector now. Double click on the subflow and click edit properties >> Appearance


Make any required changes and deploy.

Conclusion

Congratulations. You have successfully created a connector action for alloy.

Similarly you can create more connector actions.

Stay tuned for more Igniteconnex Tutorials.
· 5 min read
Sparsh Mishra

Introduction to the Spec API Router

If you've ever struggled with integrating APIs into your projects or wished for a more streamlined process, the IgniteConnex Spec API Router is here to make your dreams come true. This innovative feature seamlessly integrates OpenAPI specifications, dynamically generating HTTP endpoints, and making API integration a breeze. In this blog, we'll take you through every step of the process, from adding the router to routing requests. Let's dive in and harness the power of the Spec API Router!

Step 1: Adding the Spec API Router

To get started with the Spec API Router, follow these simple steps:

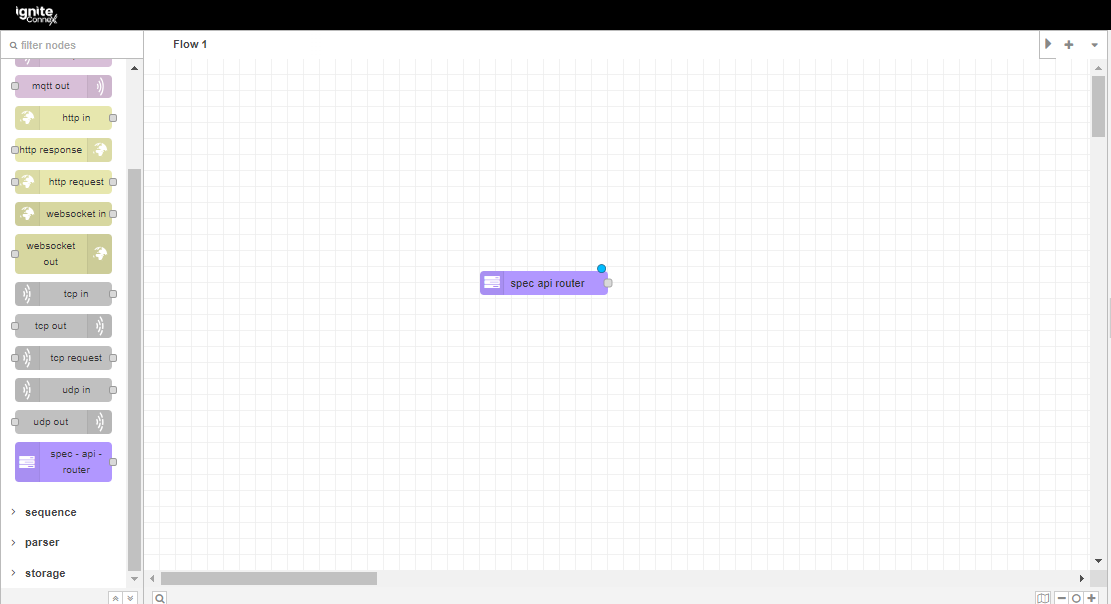
  1. Access the Router: Launch your Ignite Editor and locate the Spec API Router in the node palette. It's usually under the "Integration" or "API" section.

  2. Drag and Drop: Drag the Spec API Router onto your workspace. It's that simple!

Step 2: Configuration and Loading

Now that you have the Spec API Router on your workspace, let's configure and load the specifications:

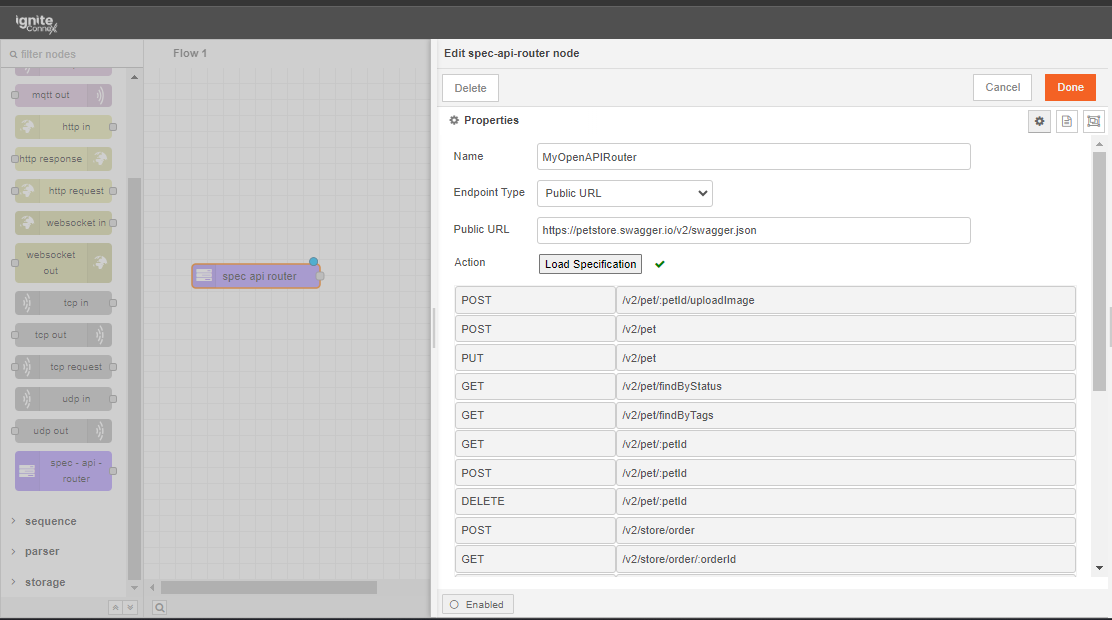
Scenario 1 - Loading API Spec with Public URL

  1. Router Configuration:

    • Name Your Router: Give your router a descriptive name, such as "MyOpenAPIRouter."
    • Choose Endpoint Type: Select the "Public URL" option. This indicates you'll be loading specifications from a URL.
    • Enter URL: Input the complete URL of your OpenAPI document.
  2. Fetching Specifications:

    • Load Specification: Click the "Load Specification" button. The router will fetch the OpenAPI document from the provided URL.
    • Dynamic Endpoints: Witness the magic as the router generates HTTP endpoints corresponding to API operations defined in the document.

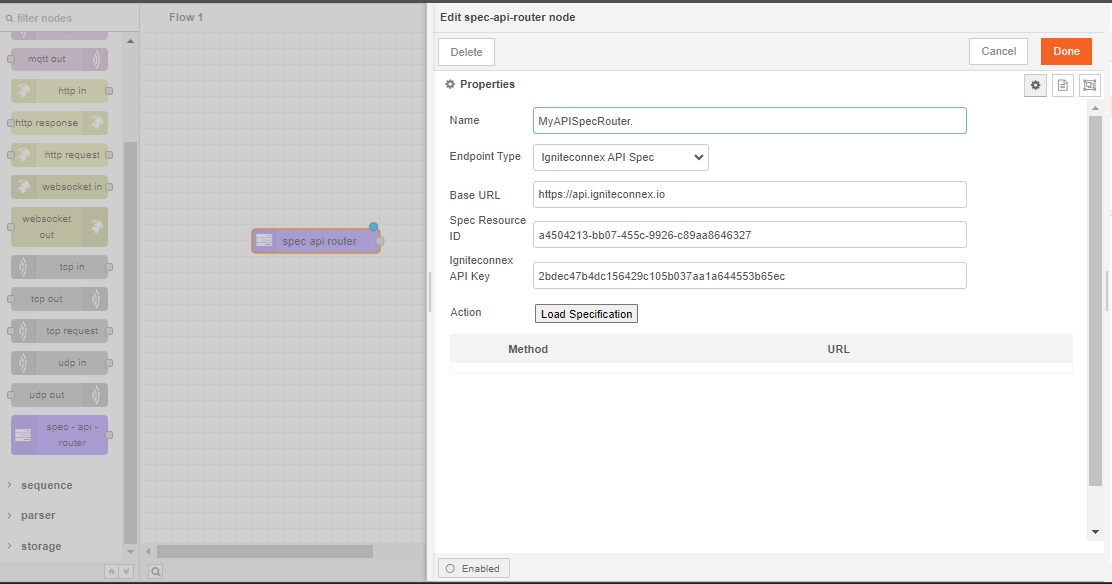
Scenario 2 - Loading API Spec with Credentials

Let's now look at loading an API Spec that requires credentials:

  1. Router Configuration:

    • Name Your Router: Assign a name like "MyAPISpecRouter."
    • Choose Endpoint Type: Opt for "IgniteConnex API Spec" to indicate loading with credentials.
    • API Key & Spec ID: Enter your API Key and Spec Resource ID from your OpenAPI Spec on the IgniteConnex Dashboard.
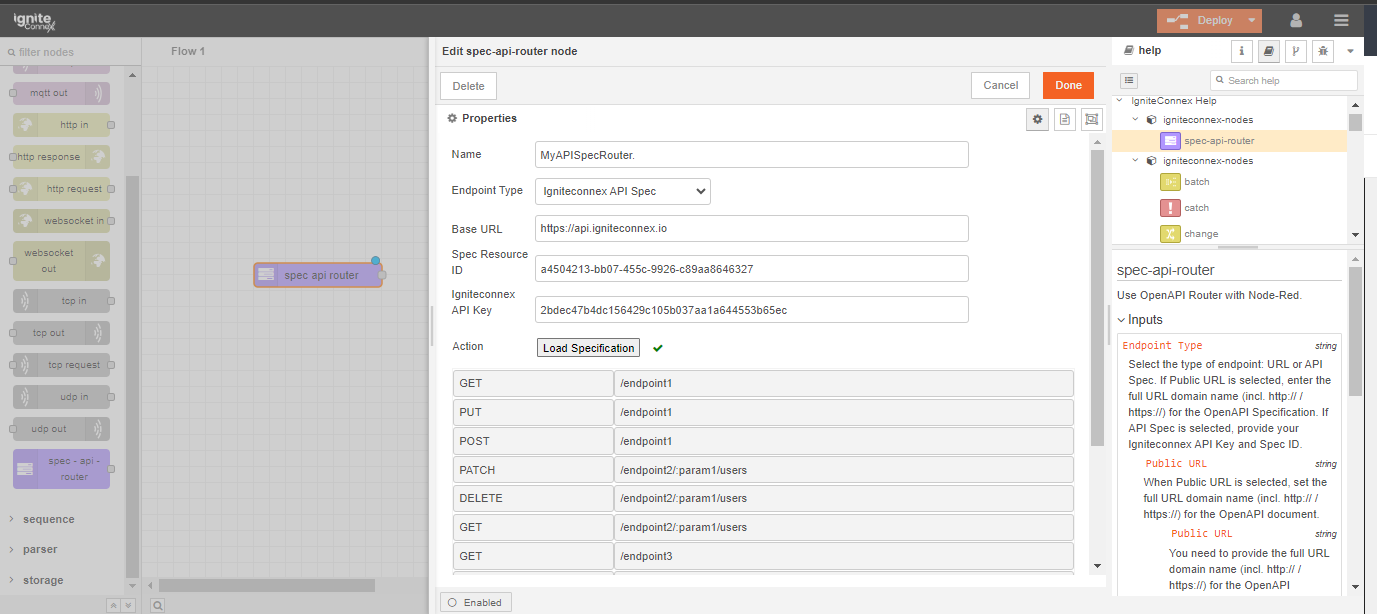
  2. Fetching and Endpoint Generation:

    • Load Specification: Click the "Load Specification" button to fetch the API Spec using your provided credentials.
    • Endpoint Generation: Watch the router create HTTP endpoints dynamically based on the fetched specifications.

Demo Credentials : The provided credentials are for demonstration purposes and can be utilized within the Spec API Router node. This enables the creation of dynamic endpoints through the OpenAPI Spec defined on the IgniteConnex Dashboard.

   - IgniteConnex API Key: 2bdec47b4dc156429c105b037aa1a644553b65ec
- Spec Resource ID : a4504213-bb07-455c-9926-c89aa8646327
## Step 3: Harnessing the Power of `x-entry-node-id`

The Spec API Router introduces an advanced feature for routing requests using x-entry-node-id:

  1. Identify Path: In your OpenAPI specs, pinpoint the path where you want to route requests.

  2. Integrate x-entry-node-id: Insert the x-entry-node-id field into the path, specifying the target node's ID.

  3. Deploy and Enjoy: Deploy the updated specs. Incoming requests to the path will now be directed to your designated node.

Where to Find the Node ID?

The x-entry-node-id serves as the unique identifier for the node you wish to route your request to. You can locate this identifier by following these steps:

  1. Click on the node of interest within your Ignite Editor workspace.
  2. Proceed to the node's information section, which can usually be accessed through an "Info" or "Details" button.
  3. In this section, the specific node ID will be prominently displayed.

This identified node ID functions as your x-entry-node-id, guiding your request to the designated node for routing.

Step 4: Validations for Smoother Integrations

The Spec API Router doesn't just stop at integration. It empowers you with advanced validation capabilities, making sure your API calls are smooth and error-free.

The validations include:

  • x-entry-node-id Validation: Ensure incoming requests are routed to specific nodes based on x-entry-node-id defined in your OpenAPI specs.

    paths:
    /route-to-node:
    post:
    x-entry-node-id: target-node-id
    summary: Route request to a specific node
    ...
  • Payload Validation: Ensure that the data you send to your API matches the expected format. For instance, validate JSON payloads against your API's request schema.

    paths:
    /create:
    post:
    requestBody:
    required: true
    content:
    application/json:
    schema:
    $ref: "#/components/schemas/User"
  • Parameter Checks: Validate query parameters, path parameters, and headers against expected types and values.

    paths:
    /user/{userId}:
    parameters:
    - name: userId
    in: path
    required: true
    schema:
    type: integer
  • Response Validation: Verify that the API responses conform to the defined schema, ensuring consistency in data format.

    paths:
    /user/{userId}:
    get:
    responses:
    "200":
    description: Successful response
    content:
    application/json:
    schema:
    $ref: "#/components/schemas/User"
  • Security Key Validation: Implement security key validation to ensure only authorized requests are processed.

        security:
    - apiKey: []

Conclusion

Congratulations! You've successfully learned how to leverage the IgniteConnex Spec API Router to simplify API integration. From loading OpenAPI specs to generating endpoints, routing requests, and conducting validations, this tool is your key to building efficient and powerful workflows. Say goodbye to integration challenges and embrace the future of API integration with IgniteConnex!

· 4 min read
Ahana Drall

Introduction

Hello World! Have you too been struggling to monitor your system performance or managing your business insights? Well, we got you covered.

IgniteConnex Observability provisions the capability of monitoring the system continuously. While the standard dashboard gives insights about the system metrices, CPU performance etc, you can create custom dashboards and visualise your business data in a number of possible ways.

In this blog I will take you through the process of creating and sharing custom dashboards.

Let's dive in and create a Dashboard from scratch inside of your org.

Adding a Datasource

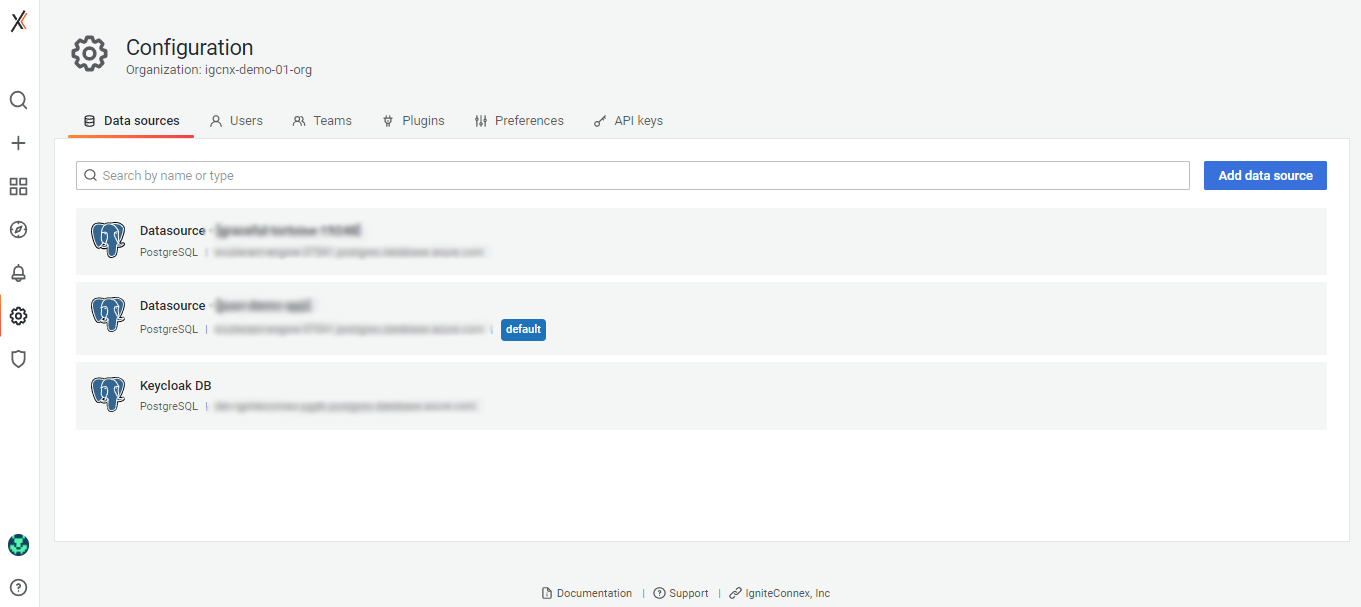
To create a dashboard inside of your observability org, you will first need to add a datasource for the custom dashboard. For doing so, click on the gear icon from the sidebar and select the datasource tab.

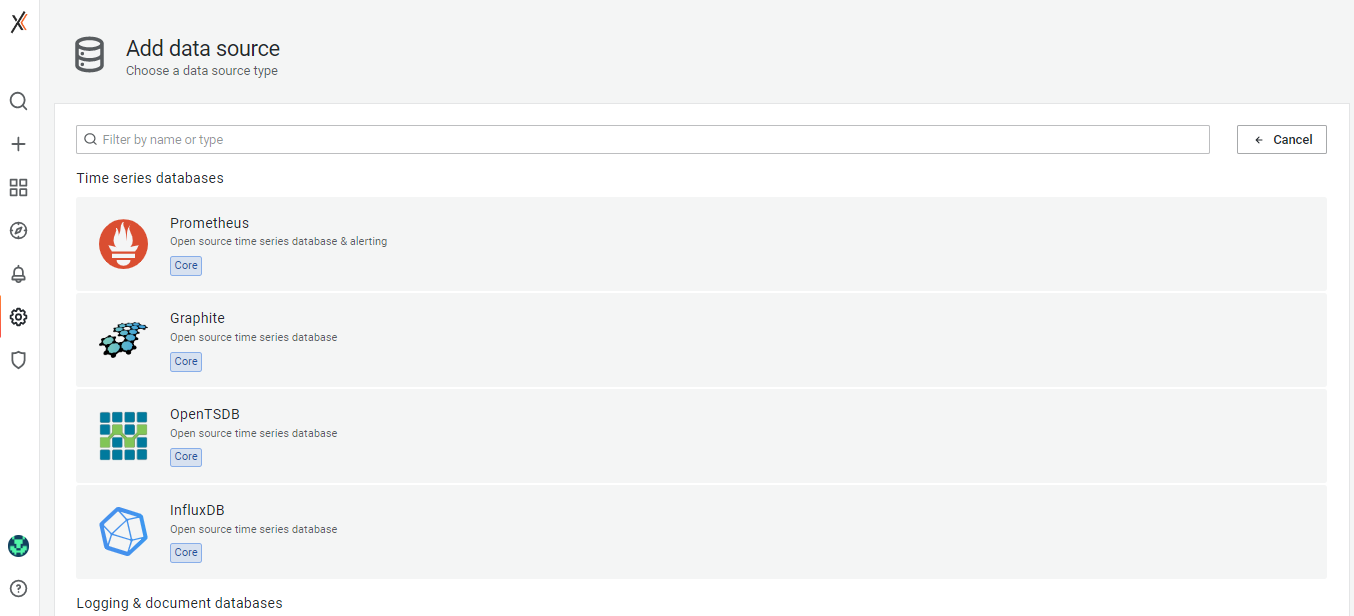
Click on Add data source.

You will be prompted to choose a data source type. There are a number of types that you can choose from.

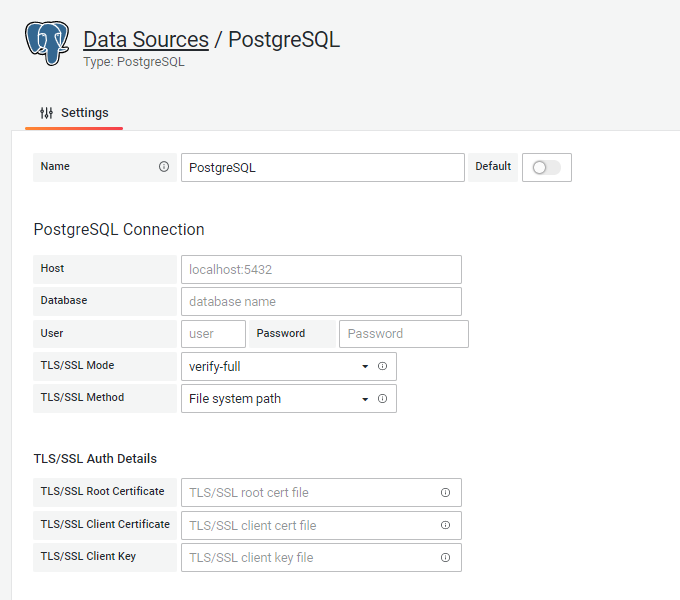
Choose a datasource type and continue. (I selected postgreSQL). The next screen lets you add your database details.
Once done, click on Save & test

Your datasource should get validated. The newly added datasource should be visible in the datasource tab.

note

Make sure to give appropriate database credentials while adding the datasource. This data will be used for creating the dashboard panels.
Creating Dashboards

Going forward you will need to click on the dashboard icon from the sidebar and select browse.
You will be redirected to the dashboard screen. Here you find a list of all your dashboards. Click on New dashboard.

A new dashboard gets created. You can save the dashboard from the save option. A dashboard is a collection of different panels and hence, now we will move on and create some panels.

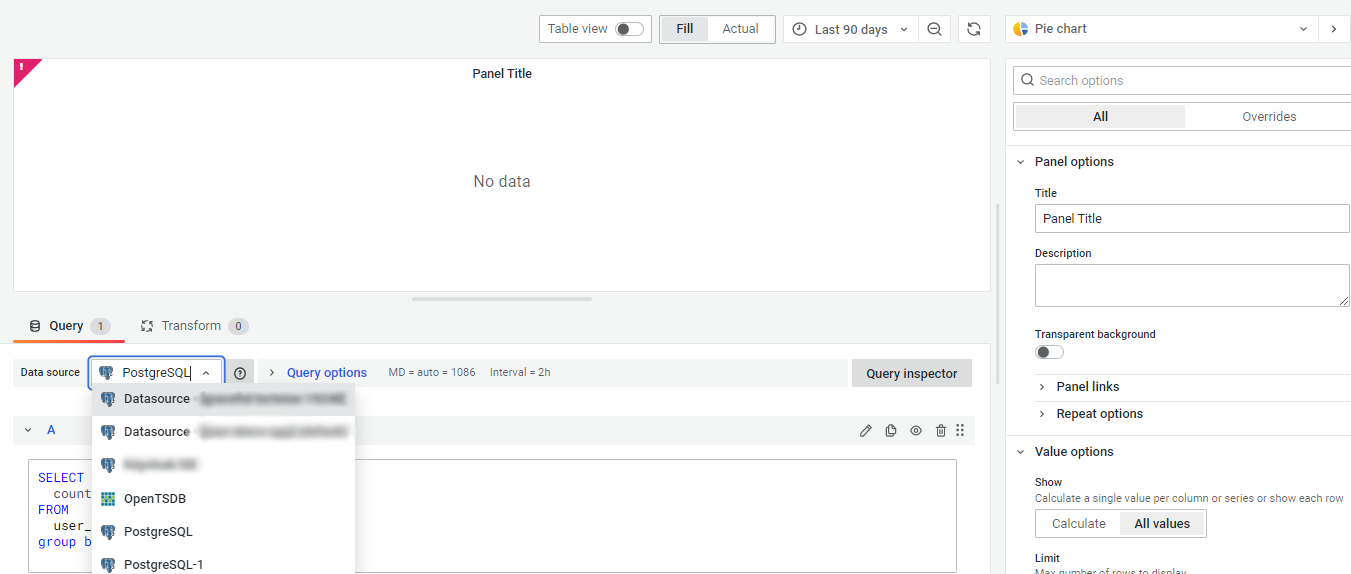
Next we will need to attach a datasource to the panel. Click on the datasource dropdown and select the datasource we just configured. The datasource is now successfully added.

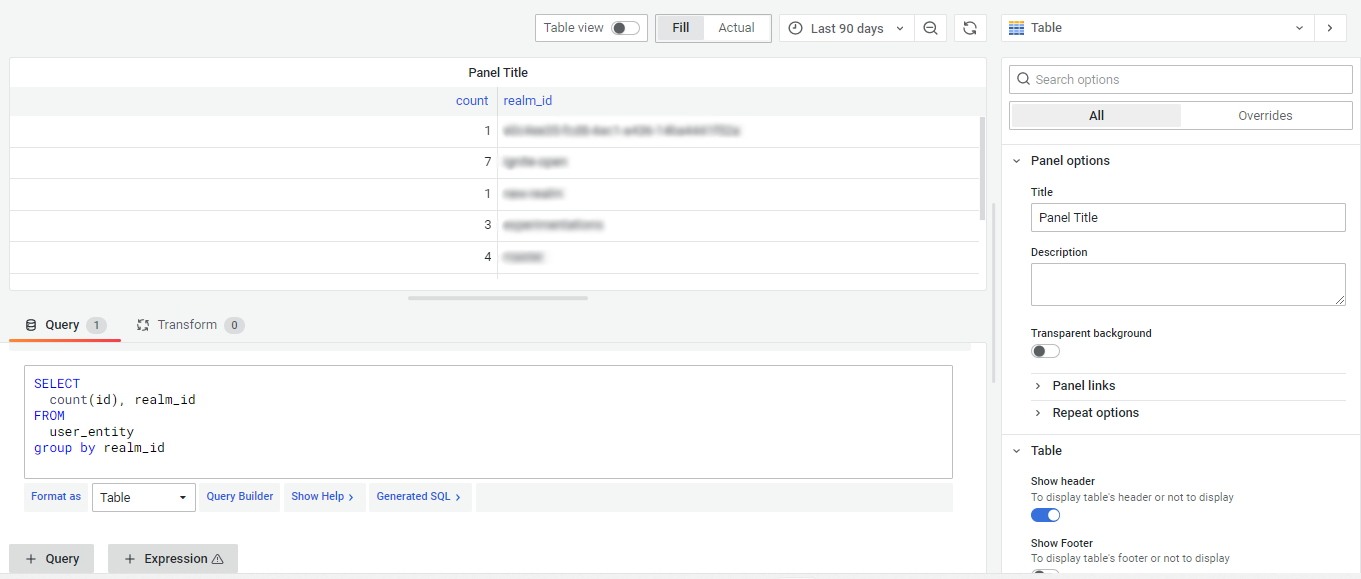
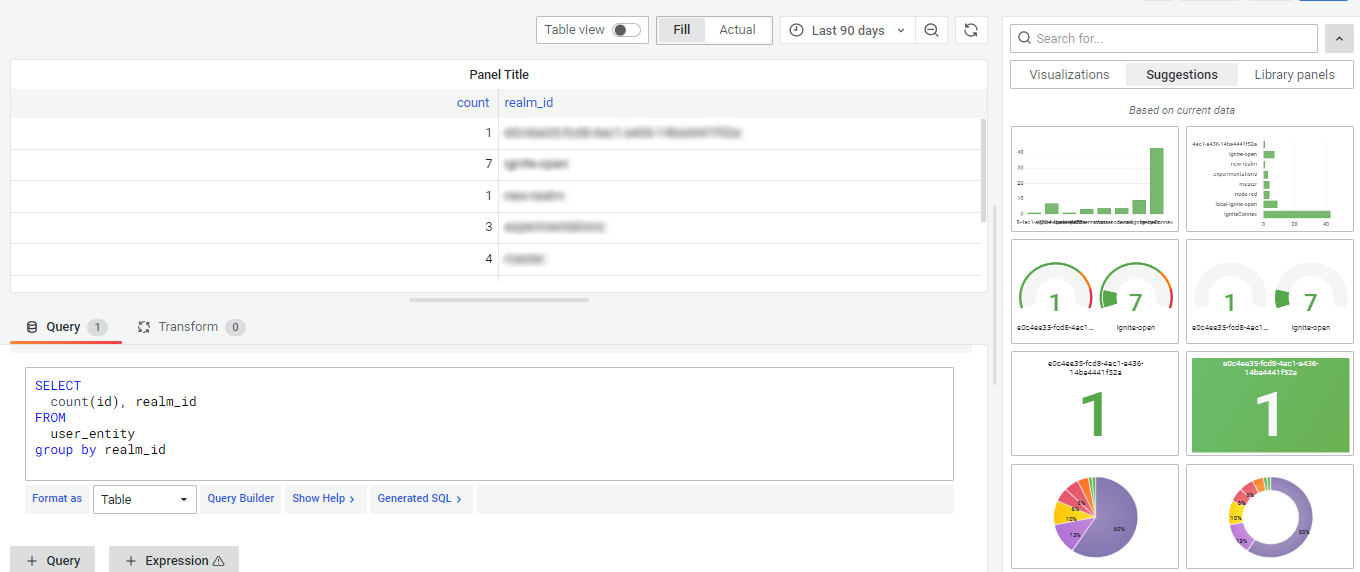
Now you can go ahead and write any query to fetch data from the datasource. You can either use the query builder to fetch the data or can write your custom query by clicking on the Edit SQL option below the query builder.

You can either format the output as a timeseries or as a table.

Since the data is now visible on the panel as a table, we can choose any of the visualisation options from the side panel.

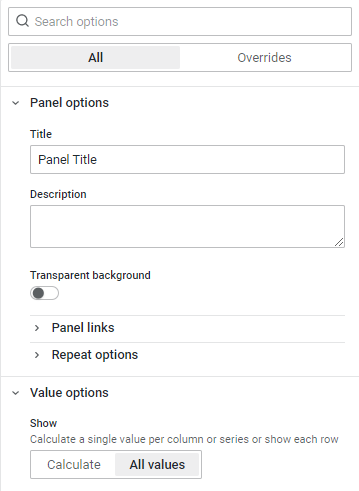
Furthermore you can change the look of the visualisation using the options available in the side panel.

Apply the changes and the new panel will be visible on the dashboard. Don't forget to save the dashboard.

Congratulations! You have created your first dashboard!

Sharing the Dashboard

Next, if you want to share your amazing dashboard, you can do so in different ways.

Adding a New User to the Org

Any new user added to the org has access to the dashboard created inside the orgs. You can add users in your org and this will give them the capability to make contributions to the dashboard.

To add a new user,

Click on the gear icon on the side bar and navigate to the users tab. Click on Invite. This screen lets you invite new users to your org. While adding the users, you can also select the role you want to give to the new user.

Sharing the Dashboard externally.

To share the dashboard with the users of other orgs, click on the share icon against the dashboard name.

Navigate to the Export tab and click on View Json.

This Json can be shared with other users, which can then be imported using the import option on the dashboard screen.

Now that you have successfully created and shared a dashboard, you are ready to roll. Stay tuned!

· 3 min read
Nitish Sharma

Introduction

In this module of IgniteConnex Identity, we will be configuring an identity for a specific app. After configuring, we will create a custom endpoint in IgniteConnex flows and will secure the endpoint using IgniteConnex Identity.

The end goal is to add authentication and secure the API created in flows using IgniteConnex Identity.

Let's configure IgniteConnex Identity

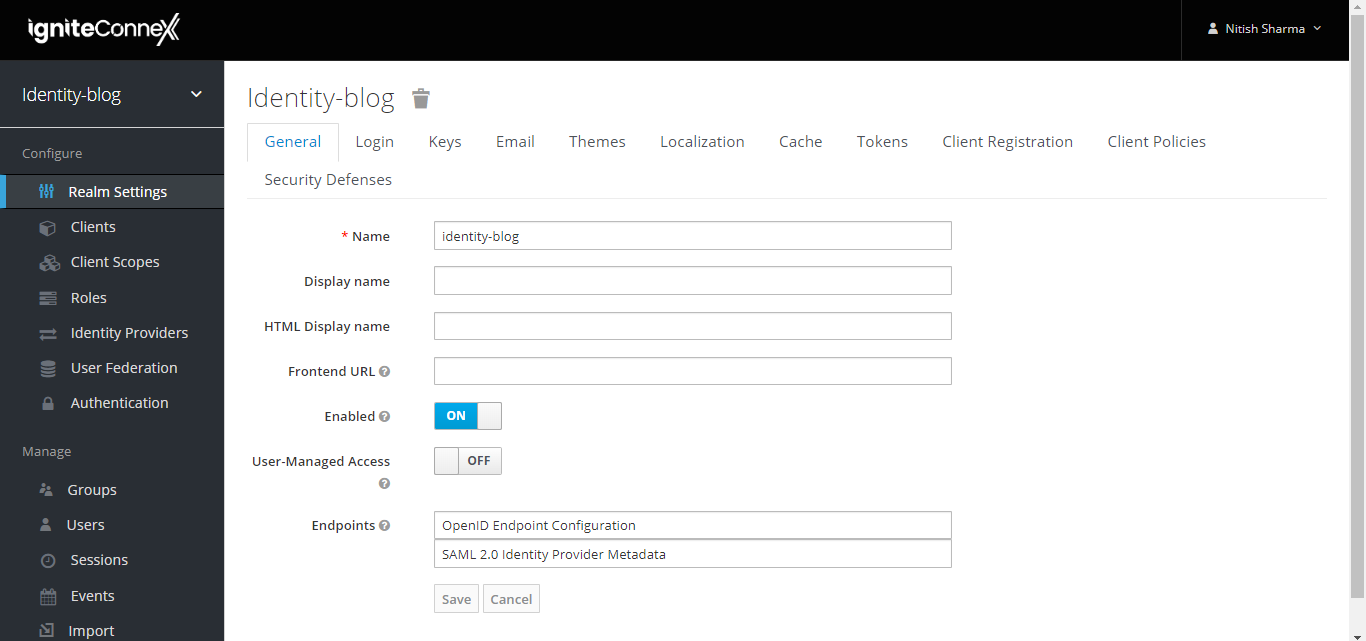
You will be given access to the IgniteConnex Identity platform with login credentials. Login to your portal with credentials. You will land on a page which looks like this:


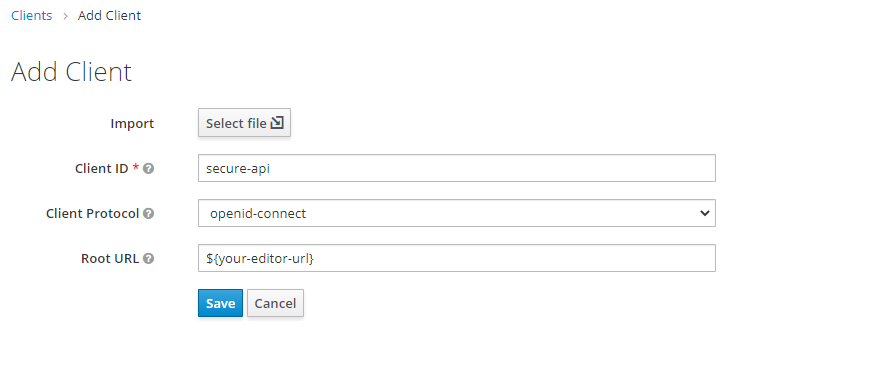
  1. Let's create a new client

Client in identity is just the web-app.


Click on create and enter name of client and root-url for the client.


note

Copy this client name somewhere, you will need it later.

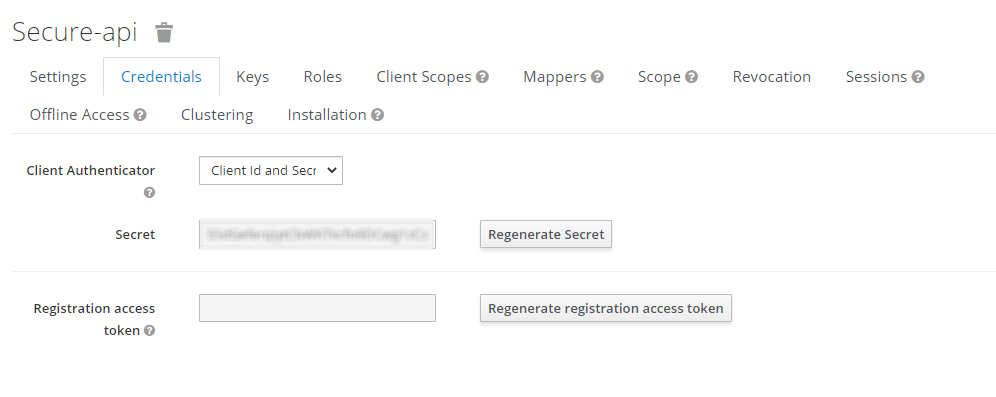
  1. Enable access-type to confidential We are enabling it to confidential to generate its client secret.

  • Generate Client secret

note

Copy this secret somewhere, you will need it later.

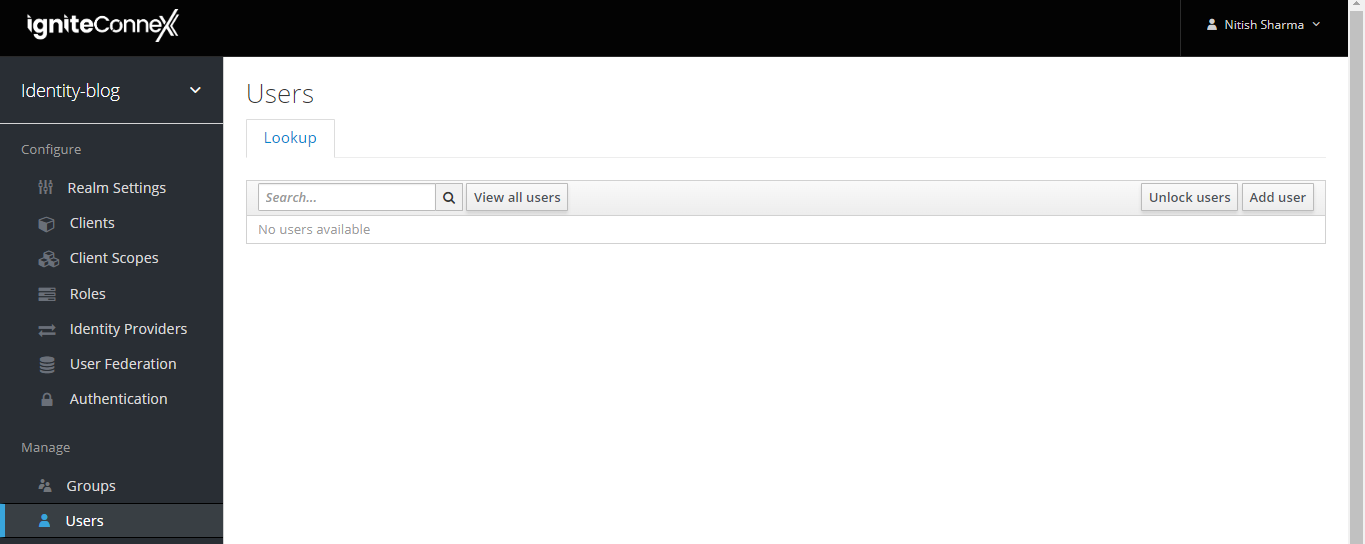
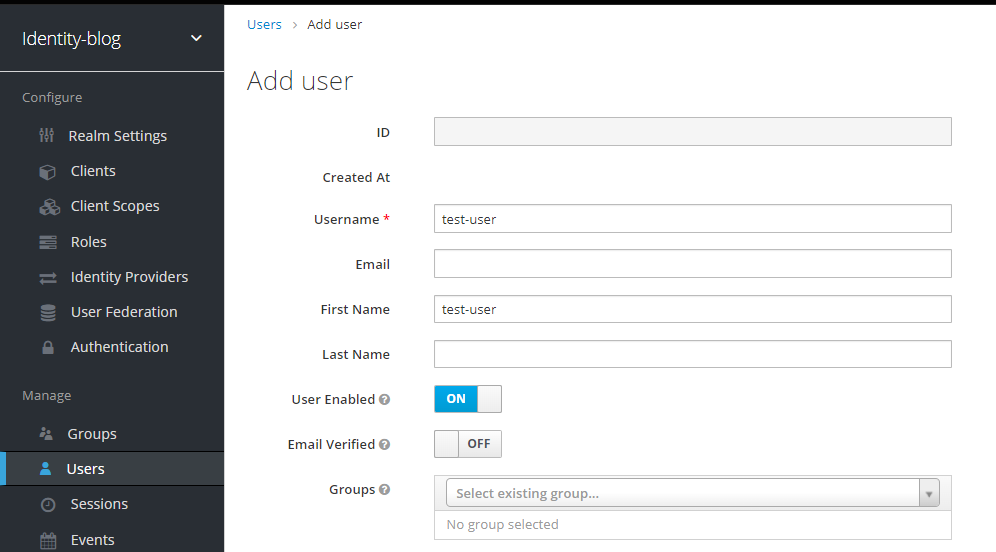
  • Create a user Enter the username, email, firstname and lastname to continue.


note

Copy this username somewhere, you will need it later.

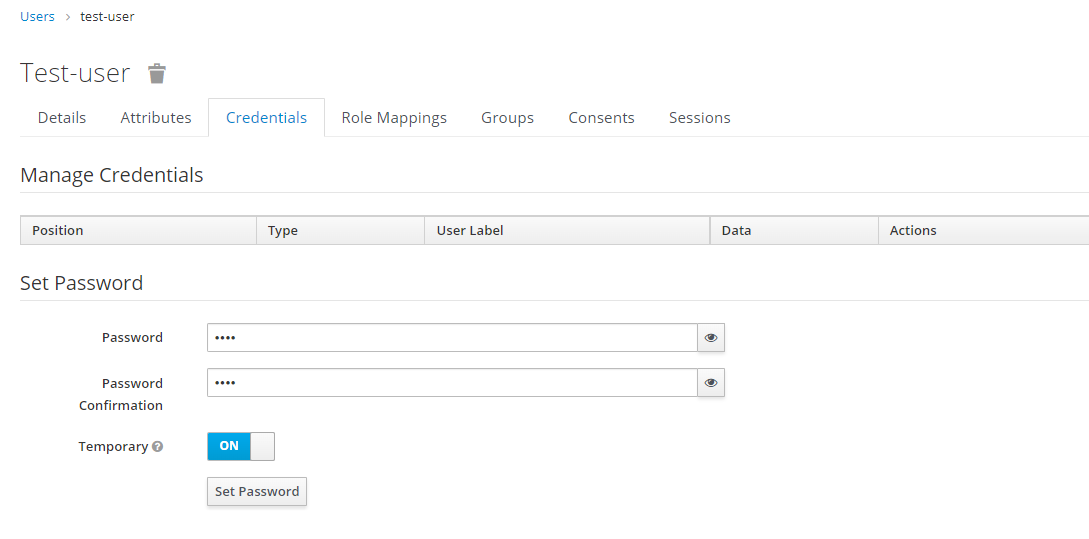
  • Set a password for this user

note

Copy this password somewhere, you will need it later.

To protect an API:

We will be creating an endpoint that:

  1. Gives us the access token for the user.
  2. A Protected API, which can give data only with a valid access token.

Let's create a basic endpoint to fetch user access token

  1. Open IgniteConnex Editor
  2. Create a new flow same as given below. Fill in the right details (all details are already copied to a safe place as mentioned above)

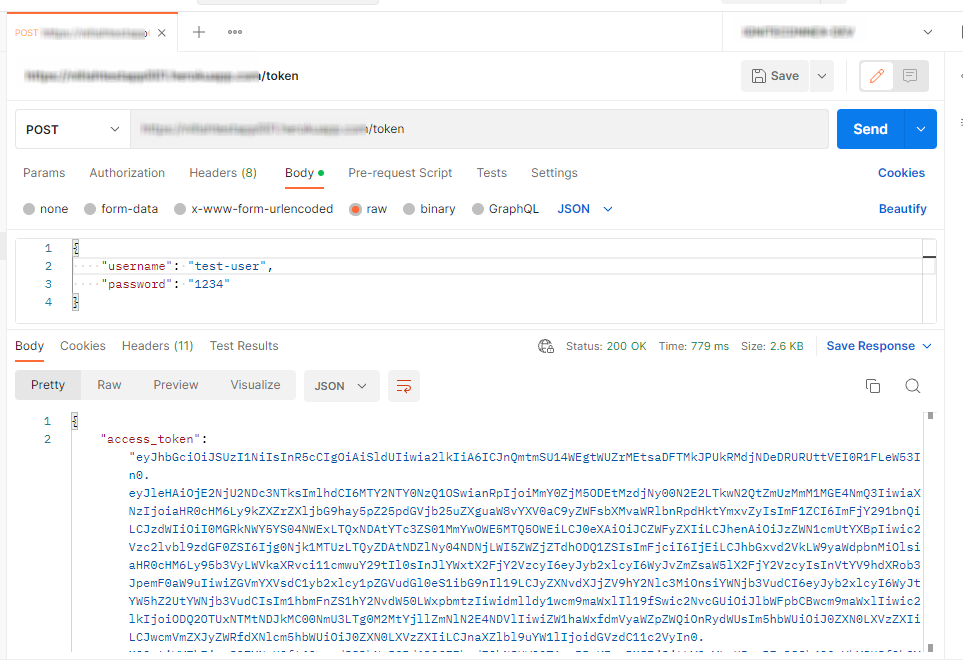
We have created a post method for getting a token. We will be sending user credentials in JSON as below using postman.


Here Get token is used to retrieve the user's token by which authentication can be performed.

Let's secure an API

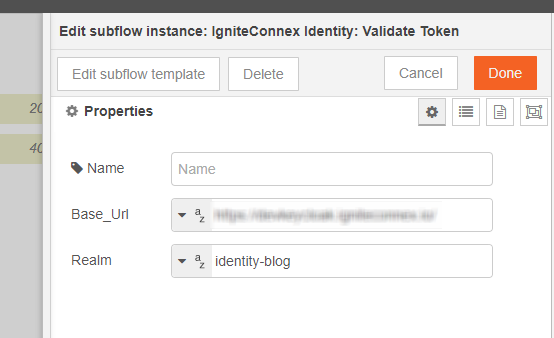
  • Use validate token connector to secure a API at the starting of the endpoint

  • This connector will verify the user identity, and if the user has access to the resource. He will get the result else the output will be unauthorized.

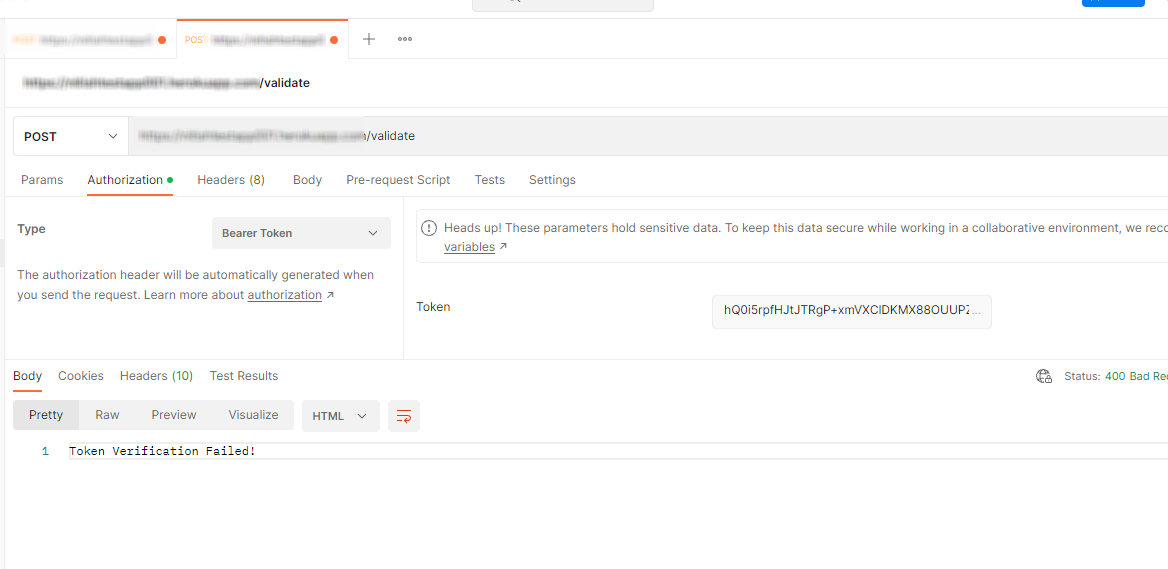
Create a Request with the postman on the validate endpoint and pass the token as request headers as "Bearer (token)" This validate API is secured.


Conclusion

We have finally created an API which is secured and backed with IgniteConnex Identity.

· 3 min read
Ravi Kant Sharma

Browse OData 4.0 Service Using OData Client Node or Postman Client.

Hey there folks!
You must be here for a reason, We know you have created an OData Service with IgniteConnex and now you can't wait to see it in action. well, if you haven't created one yet, learn how to create an OData Service here.

Well, fasten you seat-belts because now we are going to get a live tour of our service. You can either use OData Client node or Postman Client to access your APIs as per your convenience. There will be no changes in the requests no matter which client you use. We will be Postman Client for this tutorial. Open Postman on your system and lets get started.

For this example we will take a table (entity) Users with columns (properties) (ID, FullName, Username) and perform CRUD operations on that table using our OData service. To perform CRUD operations, let's start with a GET call.

note

Replace ServiceRoot with your Service URL in the below example URLs.

Requesting Data

Entity Collections

The call below will fetch us data from Users table.

GET serviceRoot/Users

Individual Entity

The call below call will fetch us data from Users table with specified key(primary key).

GET serviceRoot/Users(1)

Specific Fields

The call below will fetch FullName property from Users table with specified key(primary key).

GET serviceRoot/Users(1)/FullName

Querying Data

$top

The call below will fetch top 5 records.

GET serviceRoot/Users?$top=5

$skip

The call below will skip top 5 records.

GET serviceRoot/Users?$skip=5

$select

The call below will get us FullName and Username for all records.

GET serviceRoot/Users?$select=FullName, Username

$count

The call below will get us all the matching records with @Odata.count property with record count.

GET serviceRoot/Users?$count=true

$orderby

The call below will fetch us all records in ascending order

GET serviceRoot/Users?$orderby= Id

  • $orderby= Id asc (default)
  • $orderby= Id desc

$filter

The call below will fetch records where the filter matches the specified criteria.

GET serviceRoot/Users?$filter=FullName eq 'Ravi'

you can add multiple filters by separating them with 'AND' & 'OR' keywords.

  • Fullname eq 'Ravi' AND Username eq 'Ravi-Kaushish'
  • Fullname eq 'Ravi' OR Username eq 'Ravi-Kaushish'
note

New version of OData Nodes support filter function, will be added here soon

Data Modification

Create a Record

The request below will create a new resource in Users table.

POST serviceRoot/Users

{
"Id": 8,
"FullName": "Ravi Sharma",
"Username": "Ravi-Kaushish"
}
info

Request body must contain the data to POST.

Delete a Record

The call below will delete the record with Id 6 from Users table.

DELETE serviceRoot/Users(6)

danger

The primary key for the matching record must be provided.

Update a Record

PATCH serviceRoot/Users(8)

{
"FullName": "Bijay",
"Username": "Bijay-Shah"
}
caution

The request body must only contain the data that you want to UPDATE.

These are the features our OData Nodes supports in its early version.

While you keep doing magic with our tools, we are here working hard to make things even better for you. Fist Bump

· 3 min read
Ravi Kant Sharma

Introduction

Great news! You can now create an OData 4.0 Service inside Ignite using our Ignite-odata nodes and exchange data with your Salesforce Organization.

To create an OData workflow compatible with Salesforce Connect (External Object Connection), you will need our Ignite-OData and Ignite-sequelize nodes.

In this blog I will walk you on "How to create an OData 4.0 Service in Ignite from scratch" step by step.

Let's dive in and create an OData service from scratch inside of our Ignite platform.

Intercepting Requests

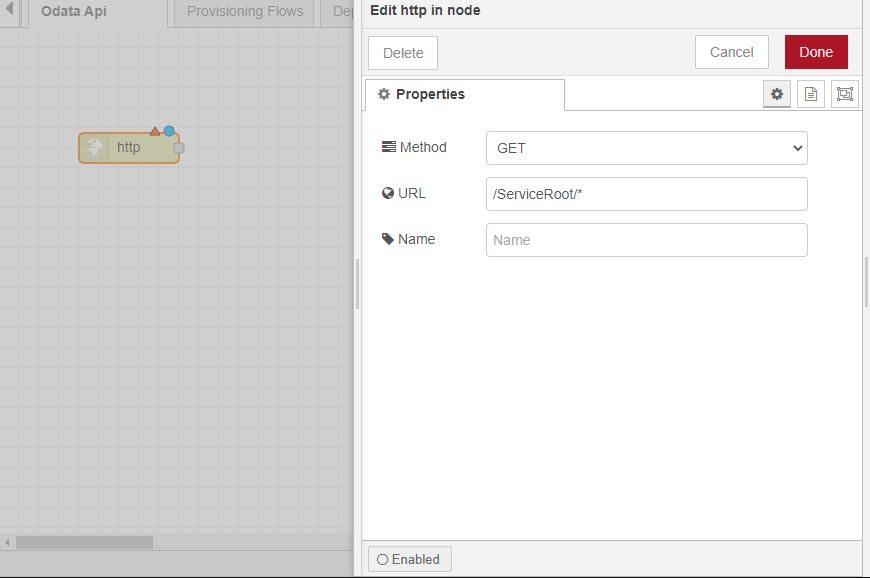
To create an OData service we will need an API endpoint to serve the incoming requests, which we can create using the http-in node.

Go ahead, drag and drop a http-in node and configure it. To make it compatible with incoming OData requests which comprises of dynamic URLs, you need to append a /Root/* or /Serviceroot/* variable to the endpoint. This endpoint will now serve all the incoming get requests matching in Serviceroot/ or Root/.

note

To enable your service to perform upsert operations, you will need to add a few other http-in nodes to support requests with other http verbs (Post, Put, Patch, Delete).

Metadata Model

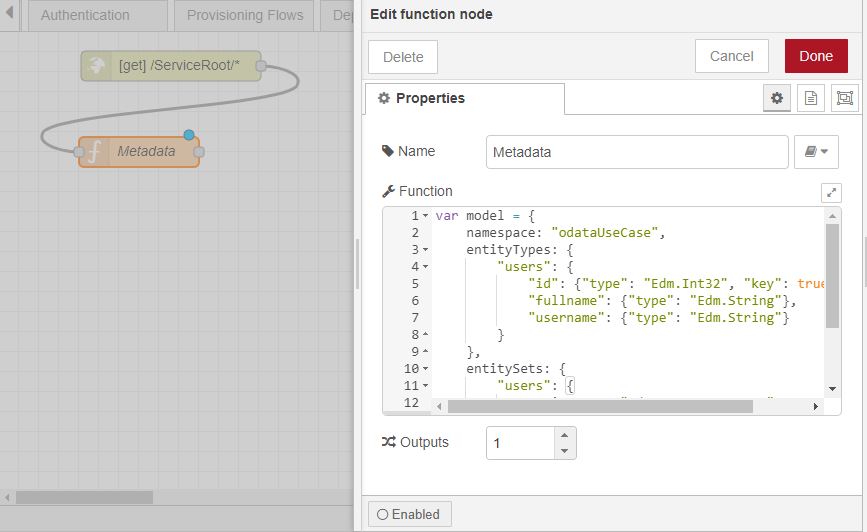
Going forward you will need to provide a database model for your service to serve incoming metadata requests. This can be achieved by using a function node and setting the msg.model property to a valid model and then adding a wire from http-in node to the function node. See the example below.

var model = {
namespace: "odata",
entityTypes: {
users: {
id: { type: "Edm.Int32", key: true },
fullname: { type: "Edm.String" },
username: { type: "Edm.String" },
},
},
entitySets: {
users: {
entityType: "odata.users",
},
},
};
msg.model = model;
return msg;

OData Magic

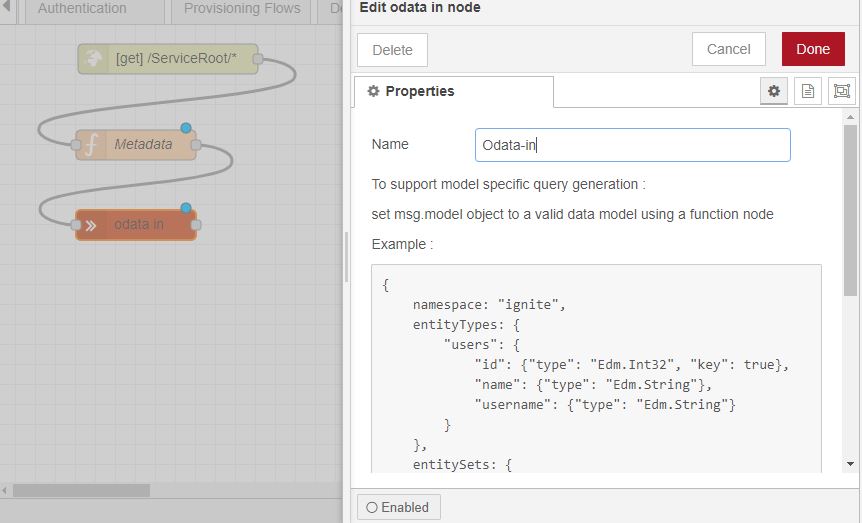
Next, drag and drop an OData-in node and connect a wire from the function node to the OData-in node. Great job, we are halfway through now!

Database Operation

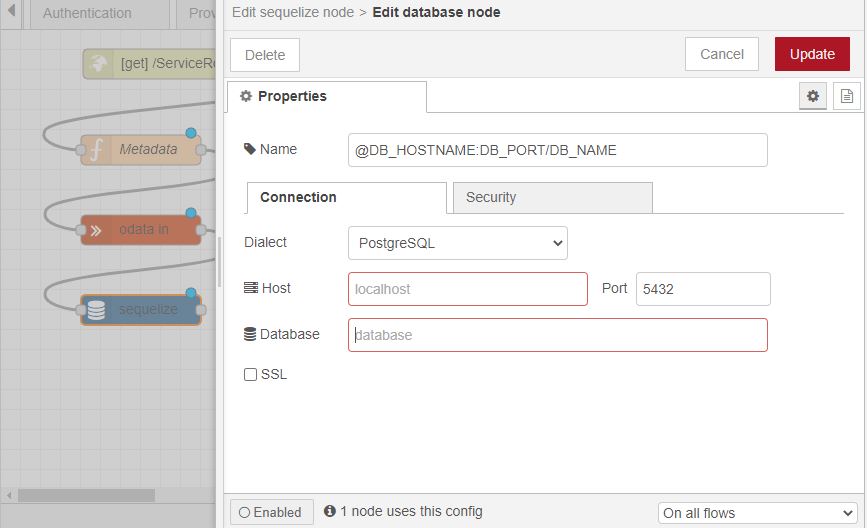
Drag and drop an Ignite-Sequelize node and connect a wire from the OData-in node to the Sequelize node. Configure your Sequelize node and provide your database connection variables.

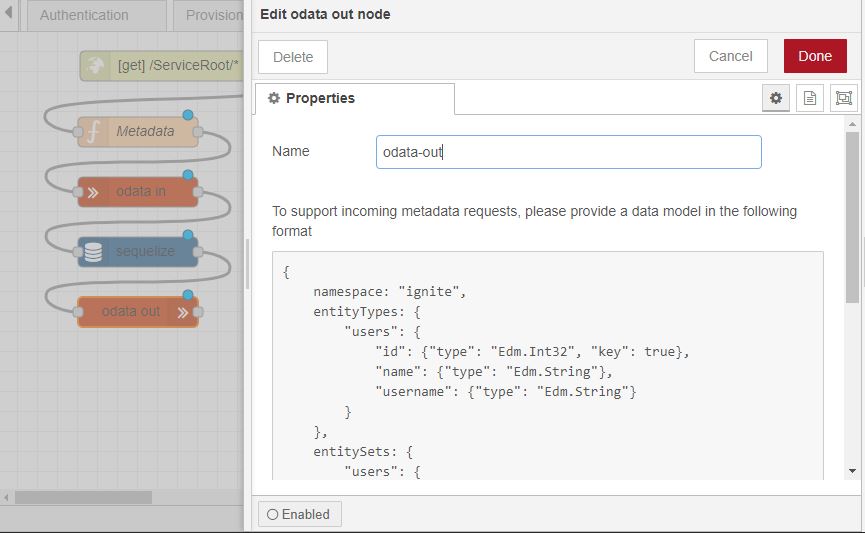
OData Out

Now that we have data, we need to enable our workflow to give us an OData compatible response. In order to do this add an OData-out node to your flow and draw a wire from the Sequelize node to the OData-out node.

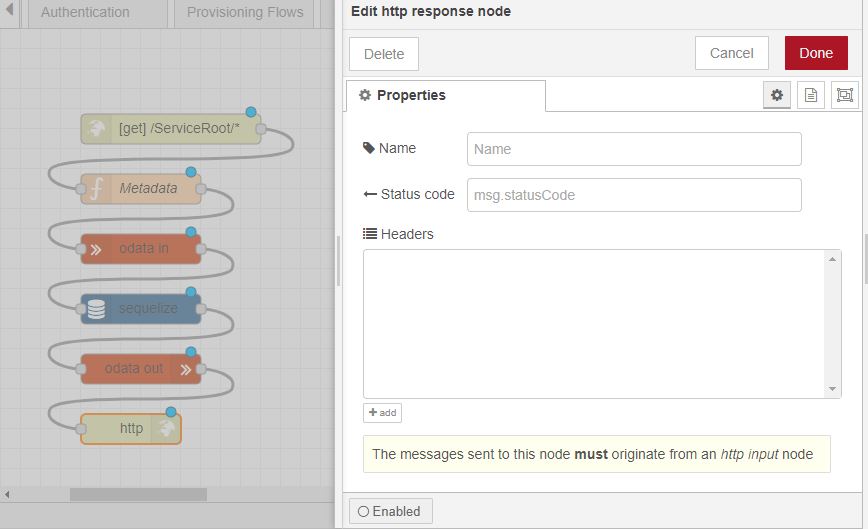
Http Response

Once you reach this step, give yourself a pat on the back. Now all you need to do is add an http-response node to send that response back to the client.

Click the "Deploy" button and your shining new OData service workflow is ready. You can use Postman client or OData Client node to test your service.

Now that your service is ready for integration, connect to your salesforce organization to exchange data.