
Introduction to the Spec API Router
If you've ever struggled with integrating APIs into your projects or wished for a more streamlined process, the IgniteConnex Spec API Router is here to make your dreams come true. This innovative feature seamlessly integrates OpenAPI specifications, dynamically generating HTTP endpoints, and making API integration a breeze. In this blog, we'll take you through every step of the process, from adding the router to routing requests. Let's dive in and harness the power of the Spec API Router!
Step 1: Adding the Spec API Router
To get started with the Spec API Router, follow these simple steps:
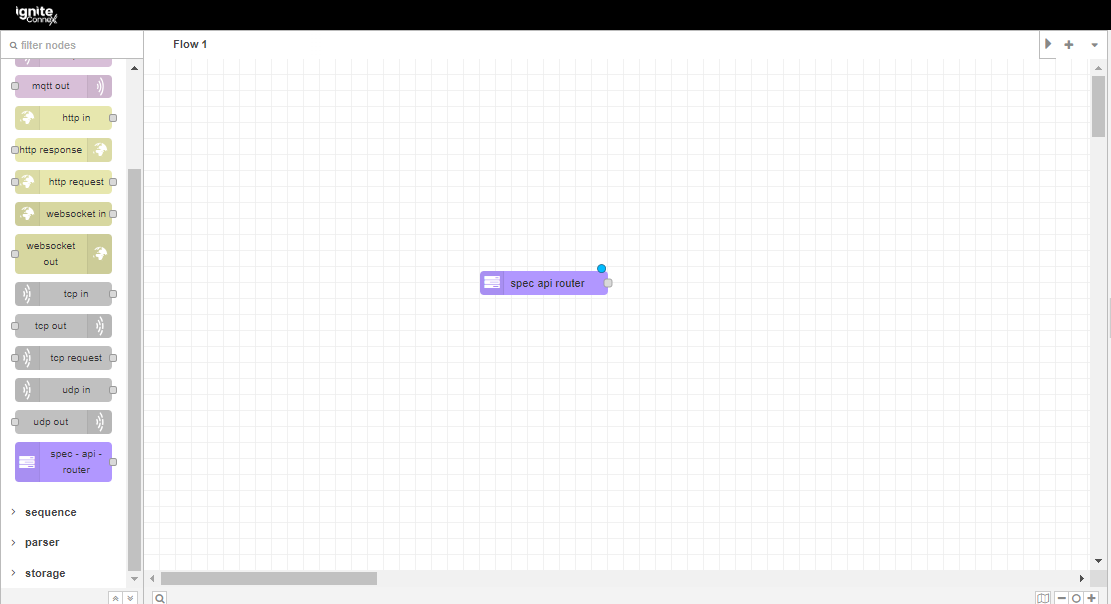
Access the Router: Launch your Ignite Editor and locate the Spec API Router in the node palette. It's usually under the "Integration" or "API" section.
Drag and Drop: Drag the Spec API Router onto your workspace. It's that simple!
Step 2: Configuration and Loading
Now that you have the Spec API Router on your workspace, let's configure and load the specifications:
Scenario 1 - Loading API Spec with Public URL
Router Configuration:
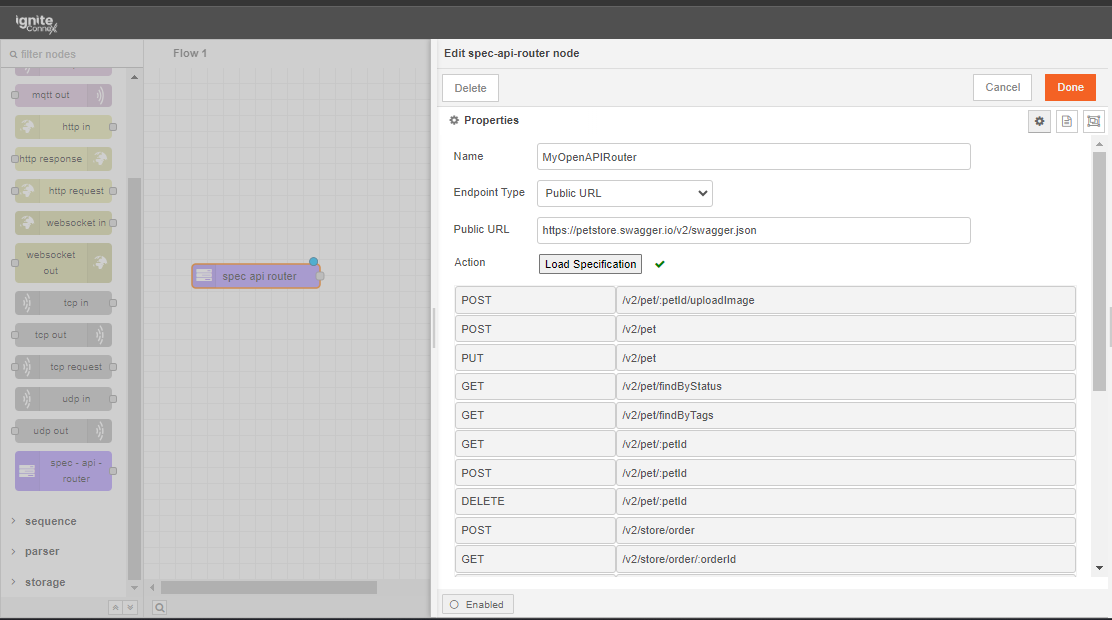
- Name Your Router: Give your router a descriptive name, such as "MyOpenAPIRouter."
- Choose Endpoint Type: Select the "Public URL" option. This indicates you'll be loading specifications from a URL.
- Enter URL: Input the complete URL of your OpenAPI document.
Fetching Specifications:
- Load Specification: Click the "Load Specification" button. The router will fetch the OpenAPI document from the provided URL.
- Dynamic Endpoints: Witness the magic as the router generates HTTP endpoints corresponding to API operations defined in the document.
Scenario 2 - Loading API Spec with Credentials
Let's now look at loading an API Spec that requires credentials:
Router Configuration:
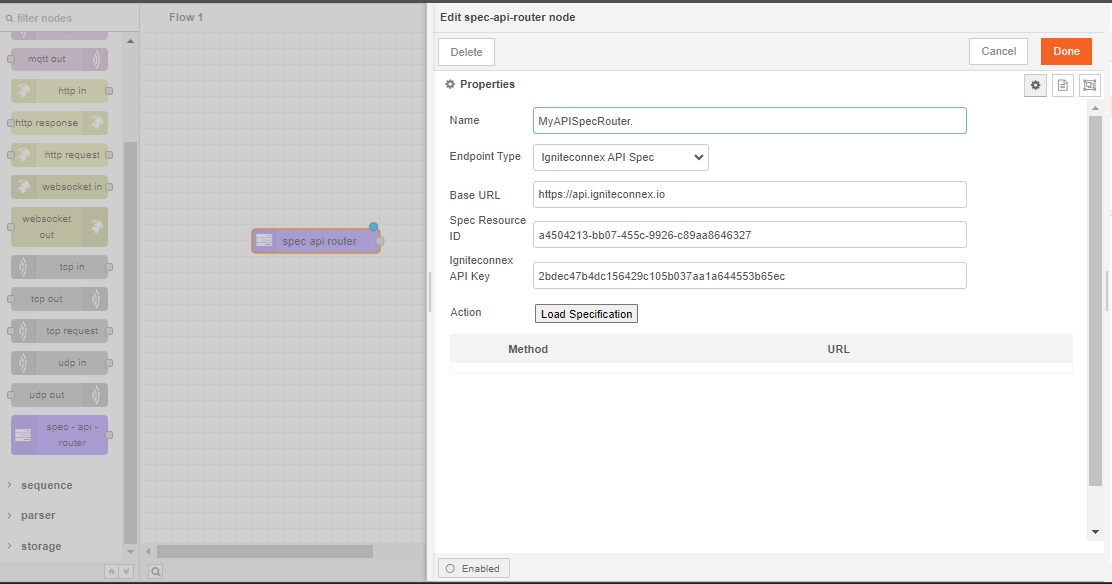
- Name Your Router: Assign a name like "MyAPISpecRouter."
- Choose Endpoint Type: Opt for "IgniteConnex API Spec" to indicate loading with credentials.
- API Key & Spec ID: Enter your API Key and Spec Resource ID from your OpenAPI Spec on the IgniteConnex Dashboard.
Fetching and Endpoint Generation:
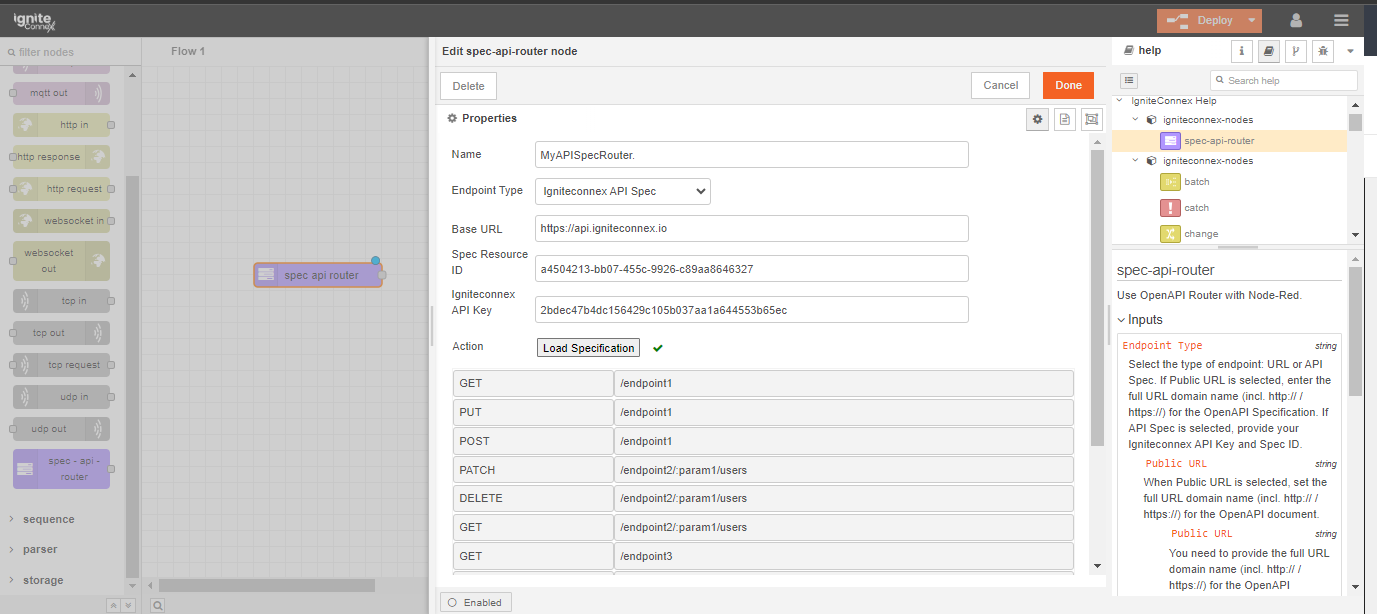
- Load Specification: Click the "Load Specification" button to fetch the API Spec using your provided credentials.
- Endpoint Generation: Watch the router create HTTP endpoints dynamically based on the fetched specifications.
Demo Credentials : The provided credentials are for demonstration purposes and can be utilized within the Spec API Router node. This enables the creation of dynamic endpoints through the OpenAPI Spec defined on the IgniteConnex Dashboard.
   - IgniteConnex API Key: 2bdec47b4dc156429c105b037aa1a644553b65ec
   - Spec Resource ID : a4504213-bb07-455c-9926-c89aa8646327
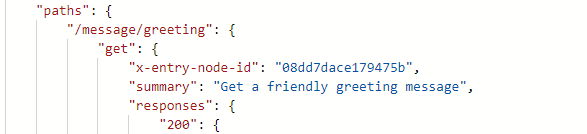
The Spec API Router introduces an advanced feature for routing requests using x-entry-node-id:
Identify Path: In your OpenAPI specs, pinpoint the path where you want to route requests.
Integrate
x-entry-node-id: Insert thex-entry-node-idfield into the path, specifying the target node's ID.Deploy and Enjoy: Deploy the updated specs. Incoming requests to the path will now be directed to your designated node.
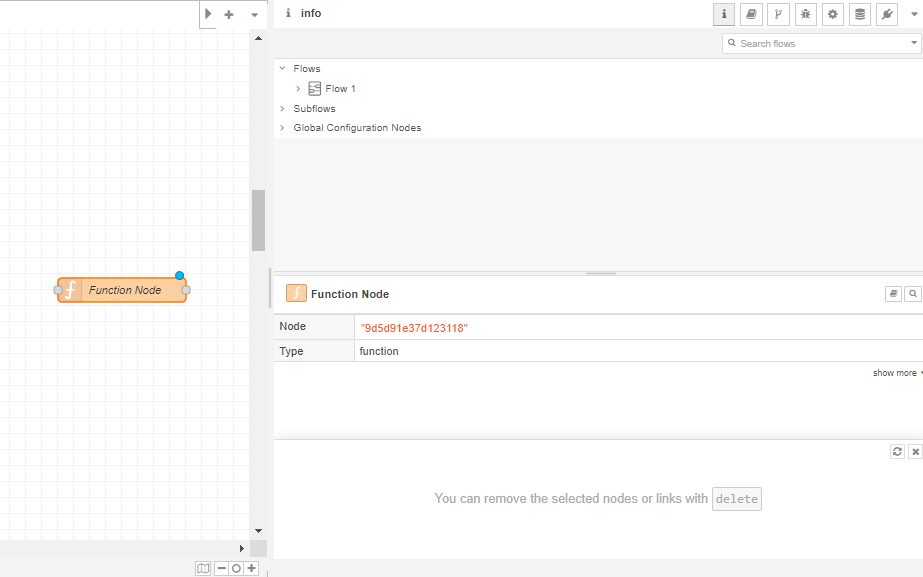
Where to Find the Node ID?
The x-entry-node-id serves as the unique identifier for the node you wish to route your request to. You can locate this identifier by following these steps:
- Click on the node of interest within your Ignite Editor workspace.
- Proceed to the node's information section, which can usually be accessed through an "Info" or "Details" button.
- In this section, the specific node ID will be prominently displayed.
This identified node ID functions as your x-entry-node-id, guiding your request to the designated node for routing.
Step 4: Validations for Smoother Integrations
The Spec API Router doesn't just stop at integration. It empowers you with advanced validation capabilities, making sure your API calls are smooth and error-free.
The validations include:
x-entry-node-id Validation: Ensure incoming requests are routed to specific nodes based on x-entry-node-id defined in your OpenAPI specs.
paths:
  /route-to-node:
    post:
      x-entry-node-id: target-node-id
      summary: Route request to a specific node
      ...
Payload Validation: Ensure that the data you send to your API matches the expected format. For instance, validate JSON payloads against your API's request schema.
paths:
  /create:
    post:
      requestBody:
        required: true
        content:
          application/json:
            schema:
              $ref: "#/components/schemas/User"
Parameter Checks: Validate query parameters, path parameters, and headers against expected types and values.
paths:
  /user/{userId}:
    parameters:
      - name: userId
        in: path
        required: true
        schema:
          type: integer
Response Validation: Verify that the API responses conform to the defined schema, ensuring consistency in data format.
paths:
  /user/{userId}:
    get:
      responses:
        "200":
          description: Successful response
          content:
            application/json:
              schema:
                $ref: "#/components/schemas/User"
Security Key Validation: Implement security key validation to ensure only authorized requests are processed.
    security:
     - apiKey: []
Conclusion
Congratulations! You've successfully learned how to leverage the IgniteConnex Spec API Router to simplify API integration. From loading OpenAPI specs to generating endpoints, routing requests, and conducting validations, this tool is your key to building efficient and powerful workflows. Say goodbye to integration challenges and embrace the future of API integration with IgniteConnex!