5 posts tagged with "Integration"

View All Tags

· 4 min read
Sparsh Mishra

Introduction

In this blog post, we'll delve into the world of data integration using the powerful Snowflake connectors on the IgniteConnex platform. We'll guide you through setting up three essential Snowflake connectors: Snowflake Client Config Connector, Snowflake: Execute Query Connector, and Snowflake: Bulk Insert Connector. By the end of this guide, you'll have the expertise to seamlessly connect, query, and insert data into Snowflake using IgniteConnex.

Prerequisites

Before we start, ensure you have the following prerequisites:

  • Access to the IgniteConnex platform.
  • A Snowflake account with necessary credentials (account URL, username, password).
  • Basic familiarity with SQL and data warehousing concepts.

Section 1: Setting Up Snowflake Client Config Connector

Step 1: Access the IgniteConnex Platform

  1. Log in to your IgniteConnex account.
  2. Navigate to the Connectors section and locate the Snowflake Client Config Connector and import the connector.
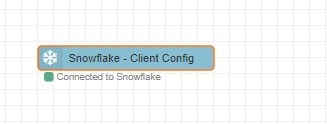
Step 2: Configuration

  1. Fill in the required configuration parameters.
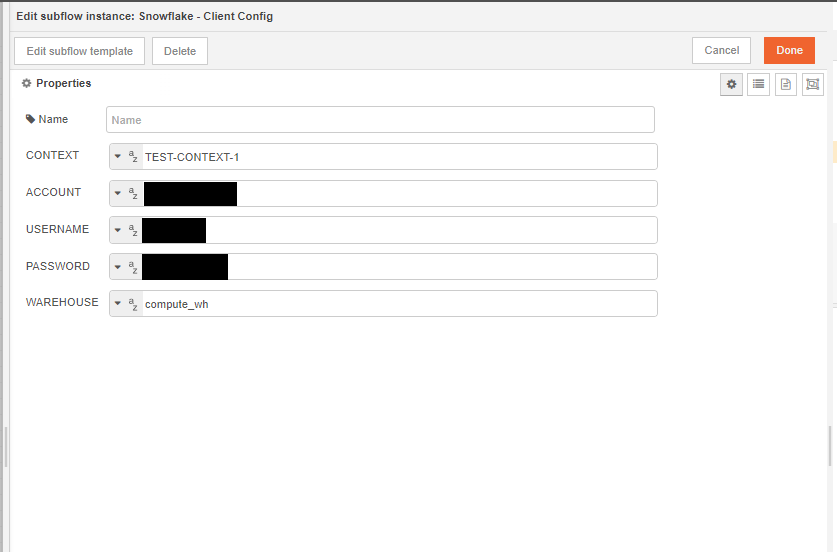
    Make sure to fill in the details correctly; these details of your Snowflake account are used to configure the connection. You can find the account name on the bottom left corner of your Snowflake Portal.

Note: Context is the unique identifier for the Snowflake connection. Multiple Connections are uniquely identified through their context.

Note : Account config is in the format of "Org-Account", and can be easily fetched from the snowflake portal.

Step 3: Establish Connection

  1. Save the configuration and establish the connection by hitting that deploy button.
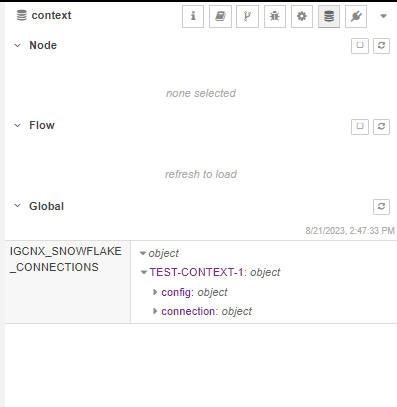
  2. Your Connection details are cached in the global storage; you can view and verify the connection details of your Snowflake Account there.
Section 2: Utilizing Snowflake: Execute Query Connector

Phew!! We have successfully configured the snowflake connection; next, we will be using the Execute Query Connector to execute queries in Snowflake through the IgniteConnex Editor.

Step 1: Locate the Connector

  1. Import the Snowflake - Execute Query Connector.

Step 2: Configuration

  1. Provide the necessary details:

    • Context: The connection context created earlier.

    • Query: Enter the SQL query you want to execute.

    • Binds_Path: Specify the path to your binds (e.g., msg.data).

    • Output: Choose 'bulk' or 'stream' for the output mode.
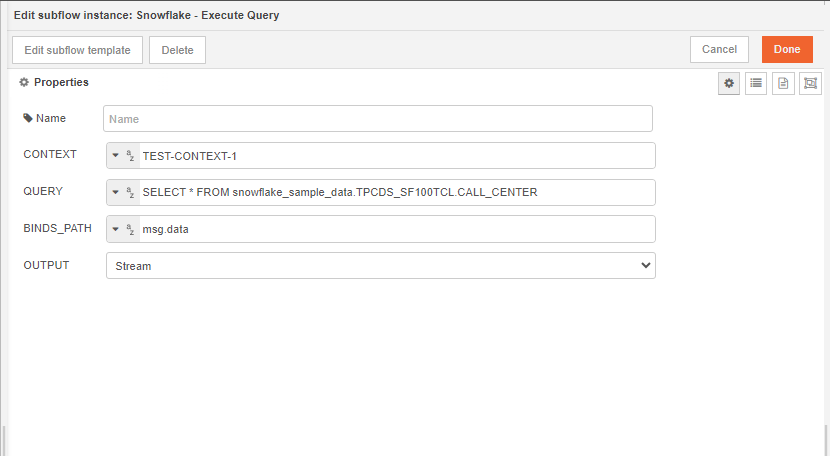
Bulk: If the queried data output should be in one single object

Stream: If the queried data output should be in a stream of events (w.r.t rows)

Step 3: Executing Queries

  1. Configure the connector to execute queries using the provided settings.
  2. Utilize msg.config to pass parameters and override properties.
  3. Binds can be passed in msg.data to utilize the feature of binds.
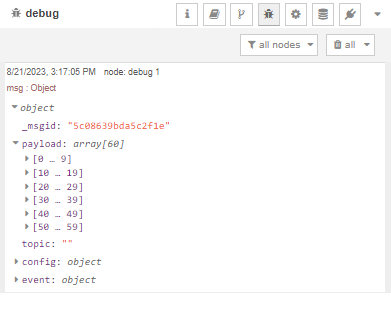
  4. After executing the query, you can see the fetched results in the debug panel.
Section 3: Performing Bulk Inserts with Snowflake: Bulk Insert Connector

Since we have now learned about establishing connection to Snowflake and executing queries on Snowflake through our IgniteConnex, we will now utilize the functionalities of the Snowflake - Bulk Insert Connector.

Step 1: Locate the Connector
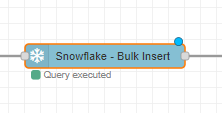
  1. In IgniteConnex, locate the Snowflake: Bulk Insert Connector and import it to your IgniteConnex Editor.

Step 2: Configuration

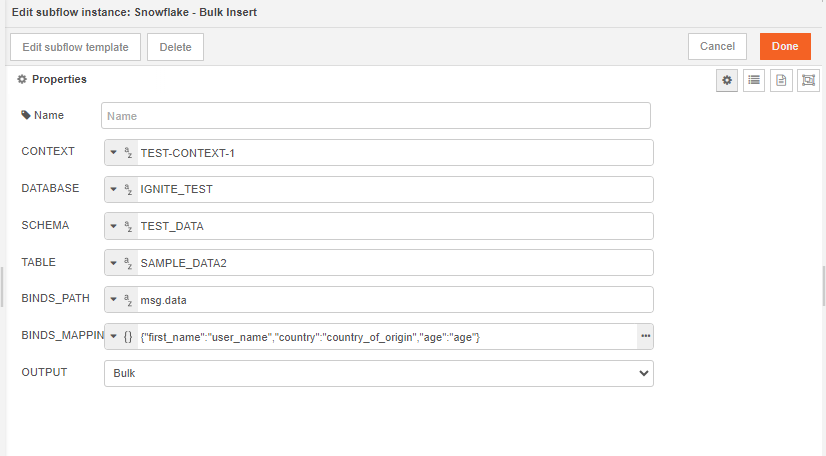
  1. Enter the configuration details:
    • Context: The connection context created earlier.
    • Database: Specify the target database.
    • Schema: Define the target schema.
    • Table: Choose the target table.
    • Binds_Path: Provide the path to your binds (e.g., msg.data).
    • Binds_Mapping: Map placeholders to data properties.
    • Output: Choose 'bulk' or 'stream' for the output mode.
Step 3: Bulk Insertions

  1. Configure the connector for bulk insertions based on your requirements.
  2. Use msg.config to customize your insertion process.
  3. Binds should be defined in msg.data, which should be an array of objects.
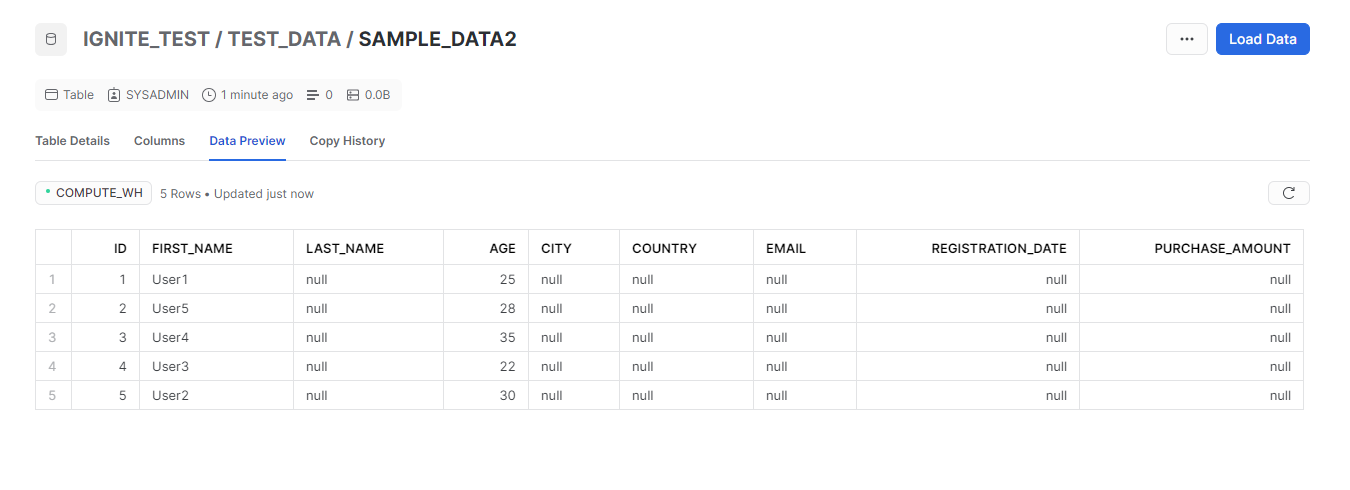
  4. Cross check with your Snowflake database that the data is successfully inserted and is being reflected there.
Advanced Use Cases and Insights

You can try these connectors build flows for some real time

  1. Real-time Analytics: Leverage Execute Query Connector with 'stream' output for real-time data analysis.
  2. Data Migration: Utilize Bulk Insert Connector for large-scale data migrations.
  3. Data Enrichment: Combine Execute Query and Bulk Insert Connectors for enriching data with external sources.

Conclusion

By following this comprehensive guide, you've successfully harnessed the power of Snowflake connectors on IgniteConnex. From setting up connections to executing queries and bulk insertions, you've gained the expertise to seamlessly integrate Snowflake into your data workflows. The connectors' flexibility allows you to explore a wide range of use cases, from real-time analytics to data migrations. With IgniteConnex and Snow

· 4 min read
Debashish Das

Set up Google Service

Set up Google Service Account

Go to Google Console and sign in to your Google account. Once signed in, you'll see a list of existing projects (if there are any) or you can click Create Project to create a new one.

On the New Project page, enter a name for your project, select an organization and then click Create.

Enable the Sheet's API

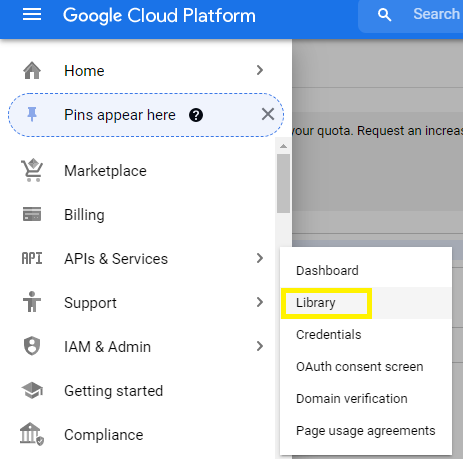
Make sure your project is still selected as the current project. From the navigation menu, select Library under APIs & Services option.

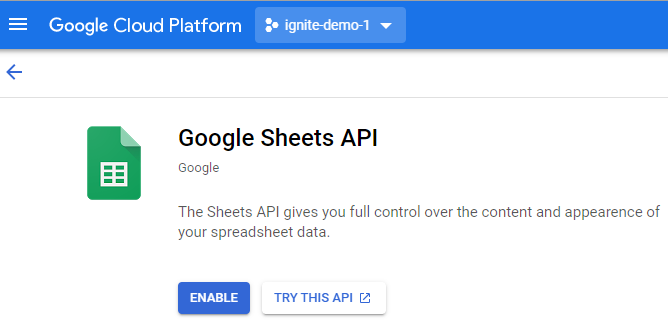
Search for Google Sheets and click the API tile.

Click Enable.

Enable the Drive's API

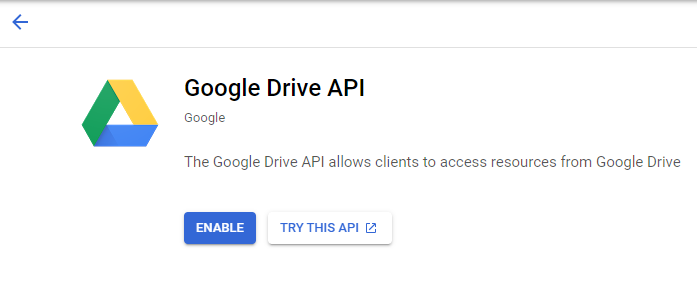
Do the same thing to enable the Google Drive API. Search for Google Drive and click the API tile.

Click Enable.

Download Service Account Credentials

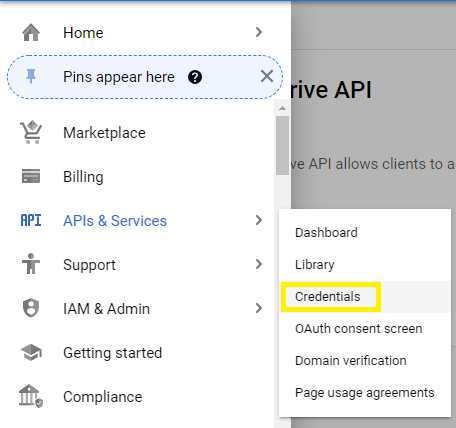
Now we will create credentials that we will download as a JSON file and later add to the Google sheets node to configure it. To create credentials, from the navigation menu, select Credentials under APIs and Services.

On the Credentials page, click Create Credentials and select the Service Account option.

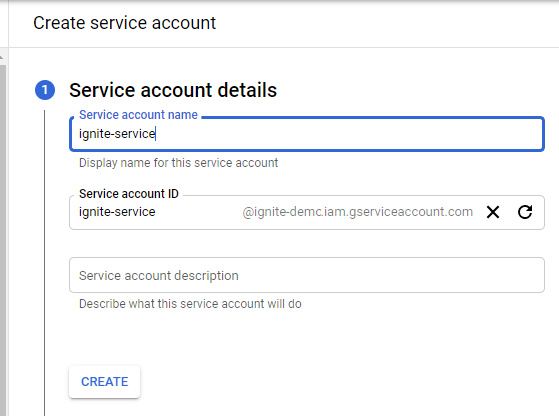
Set the Service account dropdown to New Service Account and click Create.

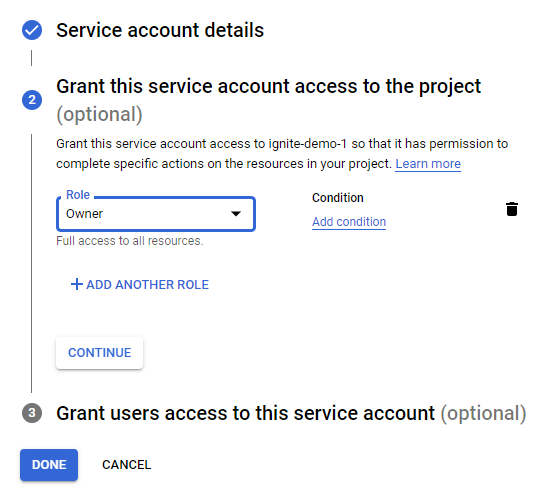
Select the Role for your Service Account.

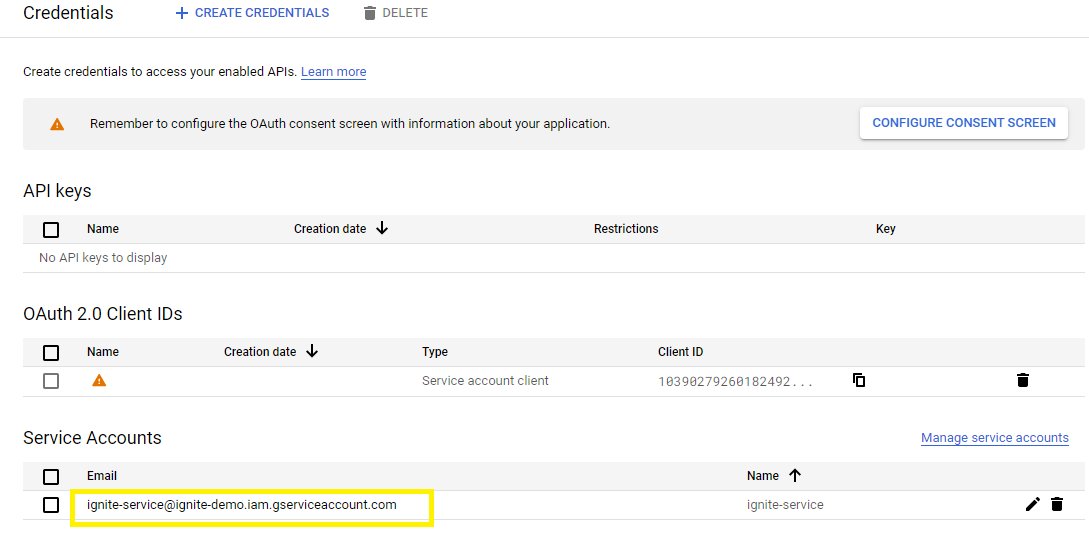
Click Done to create credentials. Select Service Account from the list.

Save Service Account Email

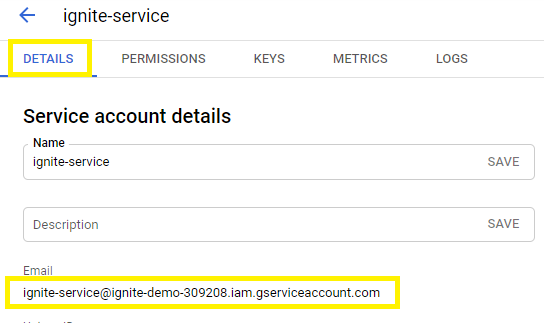
Select Details tab and copy the email address.

This information will be used to Share Sheet With Email.

Save Credential File

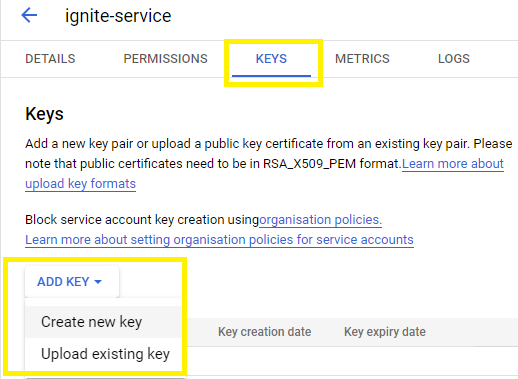
Select Keys tab and click on Add Key

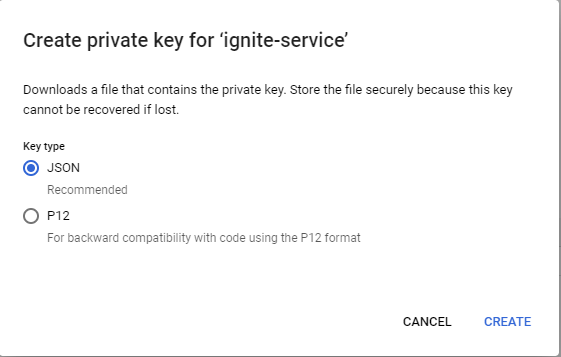
Select JSON key type and click on Create

A key file of josn type will be download to your system.

Now open the downloaded JSON file and copy all information from the file. This information will be used to Set up Google Sheet Connector.

Set up Google Sheet

Open Google Sheet

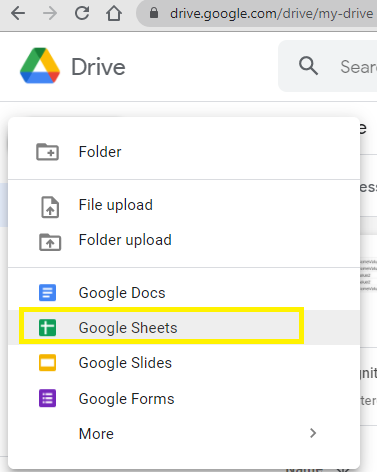
Open Google Drive and create a new Google Sheets from Google Drive.

You can also open existing Google Sheet.

Share Sheet With Email

Click on the Share button in the upper right corner. In the people field put in the email address that you copied from Save Service Account Email and click on Done.

Copy ID Part From Sheet

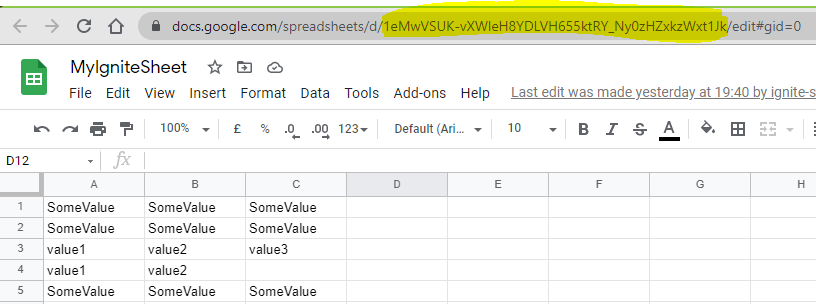
Take the ID part from the https link of the spreadsheet. The sheet ID can be found in the URL of your google sheet, for example in https://docs.google.com/spreadsheets/d/1eMwVSUK-vXWleH8YDLVH655ktRY_Ny0zHZxkzWxt1Jk/edit#gid=0. The ID would be 1eMwVSUK-vXWleH8YDLVH655ktRY_Ny0zHZxkzWxt1Jk.

This information will be used to Set up Google Sheet Connector.

Using the Google Sheet Connector

Prerequisite

Usage

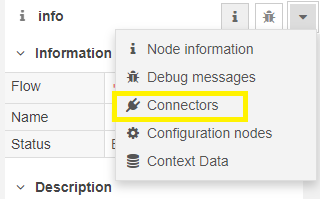
Open Connectors library from right menu.

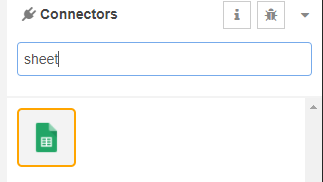
Filter Google Sheet from search menu

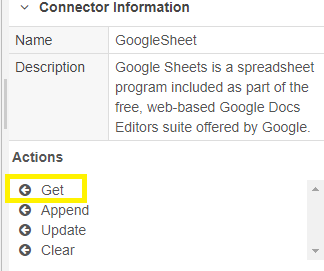
Import the Get Action

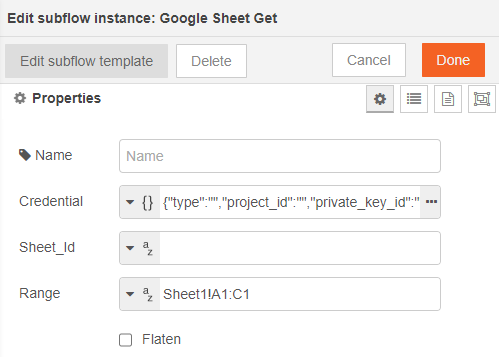
Double click on Google Sheet Connector to open the properties menu.

Set-up Google Sheet Connector Properties

  • Provide the credential from Save Credential File

  • Provide Sheet_Id from Copy ID Part from Sheet

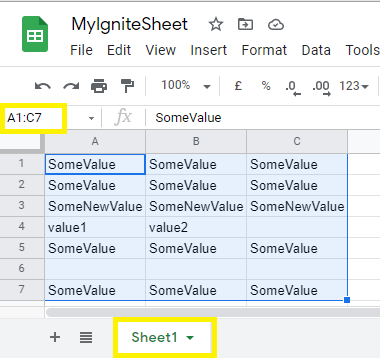
  • Provide the Range that you want to cover from the sheet in the format “Sheet1!A1:C1”, where Sheet1 is the name of sheet within your Google Sheet.

In our example sheet “Sheet1” is the name of sheet and you can select the cells to get the range details.

After fill the properties, associate the Google Sheet Get sub-flow with inject and debug node.

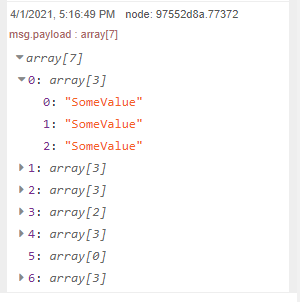
Deploy the changes and then inject message from “Inject” node. You will get result.

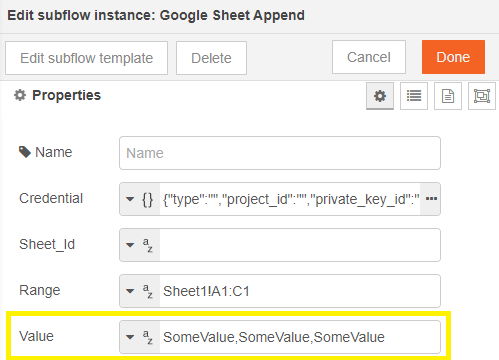
Similarly, you can setup the other actions like “Append”, ”Update” and “Clear”. For Update and Append you have to pass the comma separated values in the “Value” property.

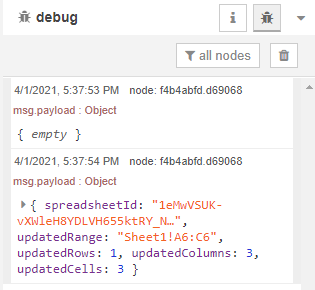
Deploy the changes and then inject message from “Inject” node. You will get result.

· 3 min read
Ravi Kant Sharma

Introduction

In this blog I will walk you through the process of connecting to your salesforce organization with your odata service.

Connect and configure your service in Salesforce External Data Source.

To be able to create and configure an external data source, you must Set up Salesforce Connect. This trail on Salesforce will walk you through the necessary steps.

Once you have installed the necessary packages into your Salesforce Organization, follow the steps below to configure your OData service inside Salesforce CRM.

Connect

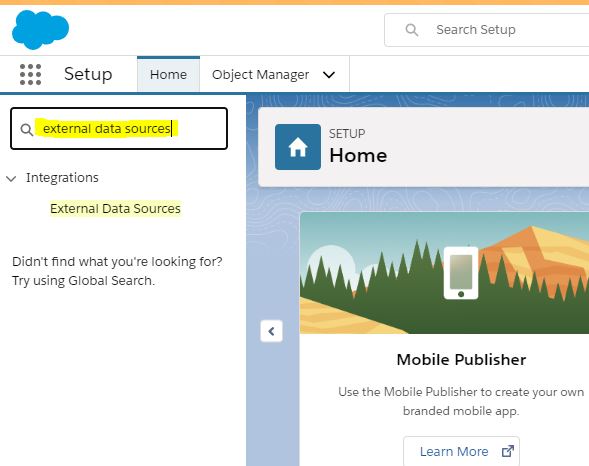
From Setup, type External Data Sources into the Quick Find box, then select External Data Sources.

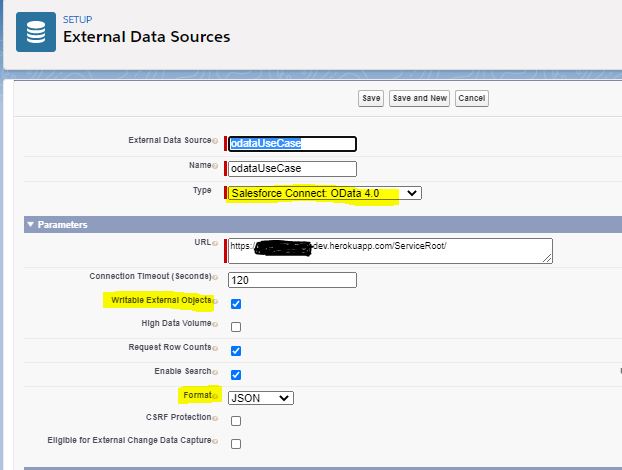
Click New External Data Source.

Enter a valid label for your external data source and then select Salesforce Connect: OData 4.0 as the type.

Now, provide your service URL with the endpoint in the URL field and click Save when you're done.

note

You should check the Writable External Object only when you have added http-in nodes with POST, PUT, PATCH, DELETE methods which enables Salesforce to write records to the database.

Phew! That was tricky, but stick to the steps because we're almost there.

Sync

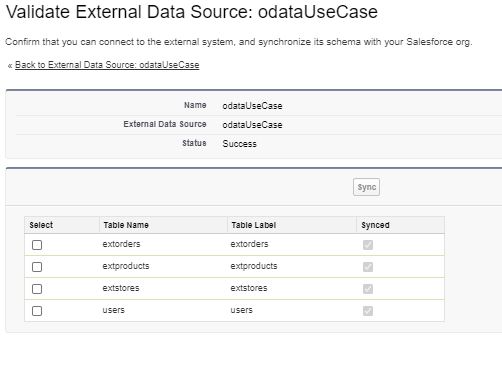
Now that we have an external data source, we need to sync the tables/metadata to create objects inside of our Salesforce Organization. which can be easily done by clicking the "Validate and Sync button."

Remember the model we provided in step 1?

Here, you'll see a list of all the tables that you provided metadata for inside of the function node.

Check all the tables you want to sync with Salesforce and click the Sync button.

Have you done that? Well then congratulations! You've successfully added your OData service as an external data source inside your Organization.

Verify

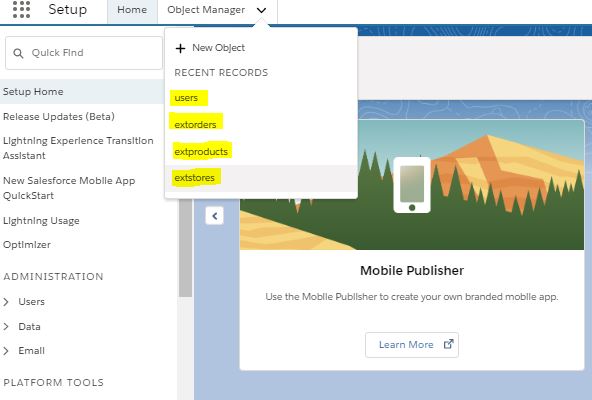
To confirm if the objects have been created inside Salesforce, click the drop-down arrow next to the Object Manager, Here you'll see the tables that you just synced.

Hooray! We're done and the end result is even sweeter than you expected.

  • Play around with these objects and configure them according to your needs.

  • Create custom tabs to view external data.

  • Use your tabs to read, write, update and delete data directly from Salesforce Organization to your database.

  • Perform full CRUD operations from Salesforce to your external database.

  • Use these objects to feed data to your reports and decorate your dashboards to give useful business insights.

  • Data from your database will directly populate your dashboards in real-time.

To perform CRUD operations on your database, try creating a custom tab. Follow this trail's View External Data section to create custom tabs.

You can also find a trail on how to prepare reports and dashboards with your data here.

· 3 min read
Ravi Kant Sharma

Browse OData 4.0 Service Using OData Client Node or Postman Client.

Hey there folks!
You must be here for a reason, We know you have created an OData Service with IgniteConnex and now you can't wait to see it in action. well, if you haven't created one yet, learn how to create an OData Service here.
Well, fasten you seat-belts because now we are going to get a live tour of our service. You can either use OData Client node or Postman Client to access your APIs as per your convenience. There will be no changes in the requests no matter which client you use. We will be Postman Client for this tutorial. Open Postman on your system and lets get started.

For this example we will take a table (entity) Users with columns (properties) (ID, FullName, Username) and perform CRUD operations on that table using our OData service. To perform CRUD operations, let's start with a GET call.

note

Replace ServiceRoot with your Service URL in the below example URLs.

Requesting Data

Entity Collections

The call below will fetch us data from Users table.

GET serviceRoot/Users

Individual Entity

The call below call will fetch us data from Users table with specified key(primary key).

GET serviceRoot/Users(1)

Specific Fields

The call below will fetch FullName property from Users table with specified key(primary key).

GET serviceRoot/Users(1)/FullName

Querying Data

$top

The call below will fetch top 5 records.

GET serviceRoot/Users?$top=5

$skip

The call below will skip top 5 records.

GET serviceRoot/Users?$skip=5

$select

The call below will get us FullName and Username for all records.

GET serviceRoot/Users?$select=FullName, Username

$count

The call below will get us all the matching records with @Odata.count property with record count.

GET serviceRoot/Users?$count=true

$orderby

The call below will fetch us all records in ascending order

GET serviceRoot/Users?$orderby= Id

  • $orderby= Id asc (default)
  • $orderby= Id desc

$filter

The call below will fetch records where the filter matches the specified criteria.

GET serviceRoot/Users?$filter=FullName eq 'Ravi'

you can add multiple filters by separating them with 'AND' & 'OR' keywords.

  • Fullname eq 'Ravi' AND Username eq 'Ravi-Kaushish'
  • Fullname eq 'Ravi' OR Username eq 'Ravi-Kaushish'
note

New version of OData Nodes support filter function, will be added here soon

Data Modification

Create a Record

The request below will create a new resource in Users table.

POST serviceRoot/Users

{
"Id": 8,
"FullName": "Ravi Sharma",
"Username": "Ravi-Kaushish"
}
info

Request body must contain the data to POST.

Delete a Record

The call below will delete the record with Id 6 from Users table.

DELETE serviceRoot/Users(6)

danger

The primary key for the matching record must be provided.

Update a Record

PATCH serviceRoot/Users(8)

{
"FullName": "Bijay",
"Username": "Bijay-Shah"
}
caution

The request body must only contain the data that you want to UPDATE.

These are the features our OData Nodes supports in its early version.

While you keep doing magic with our tools, we are here working hard to make things even better for you. Fist Bump

· 3 min read
Ravi Kant Sharma

Introduction

Great news! You can now create an OData 4.0 Service inside Ignite using our Ignite-odata nodes and exchange data with your Salesforce Organization.

To create an OData workflow compatible with Salesforce Connect (External Object Connection), you will need our Ignite-OData and Ignite-sequelize nodes.

In this blog I will walk you on "How to create an OData 4.0 Service in Ignite from scratch" step by step.

Let's dive in and create an OData service from scratch inside of our Ignite platform.

Intercepting Requests

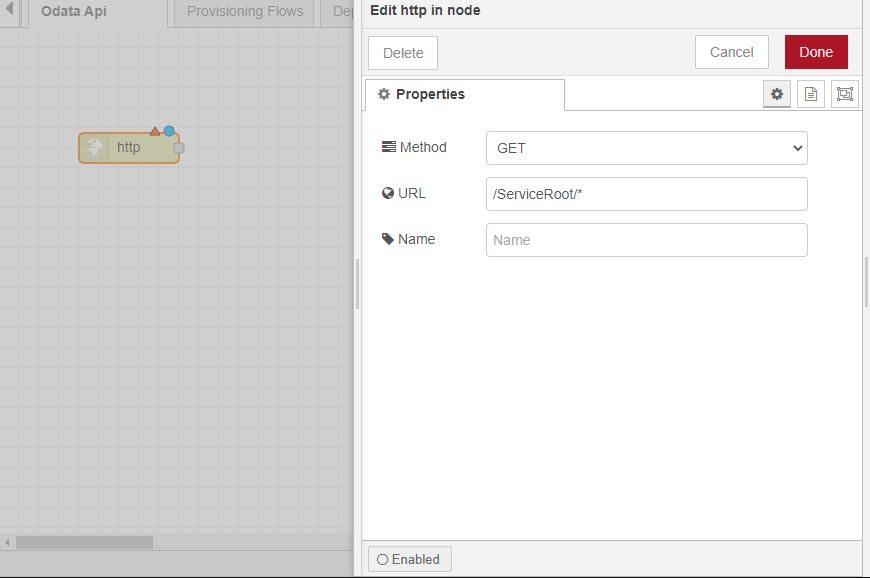
To create an OData service we will need an API endpoint to serve the incoming requests, which we can create using the http-in node.

Go ahead, drag and drop a http-in node and configure it. To make it compatible with incoming OData requests which comprises of dynamic URLs, you need to append a /Root/* or /Serviceroot/* variable to the endpoint. This endpoint will now serve all the incoming get requests matching in Serviceroot/ or Root/.

note

To enable your service to perform upsert operations, you will need to add a few other http-in nodes to support requests with other http verbs (Post, Put, Patch, Delete).

Metadata Model

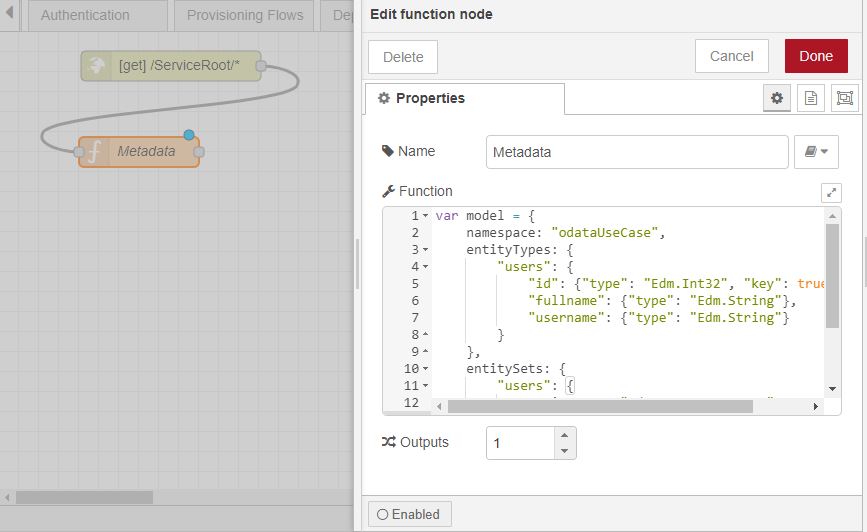
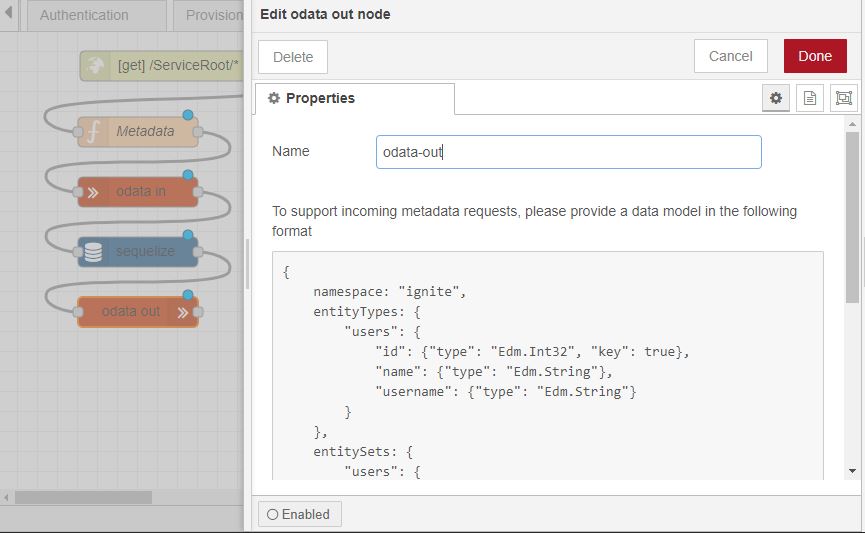
Going forward you will need to provide a database model for your service to serve incoming metadata requests. This can be achieved by using a function node and setting the msg.model property to a valid model and then adding a wire from http-in node to the function node. See the example below.

var model = {
namespace: "odata",
entityTypes: {
users: {
id: { type: "Edm.Int32", key: true },
fullname: { type: "Edm.String" },
username: { type: "Edm.String" },
},
},
entitySets: {
users: {
entityType: "odata.users",
},
},
};
msg.model = model;
return msg;

OData Magic

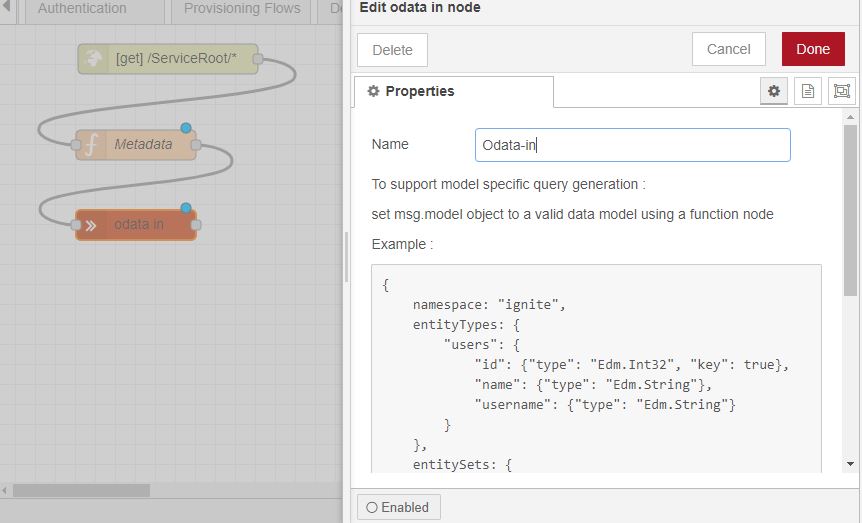
Next, drag and drop an OData-in node and connect a wire from the function node to the OData-in node. Great job, we are halfway through now!

Database Operation

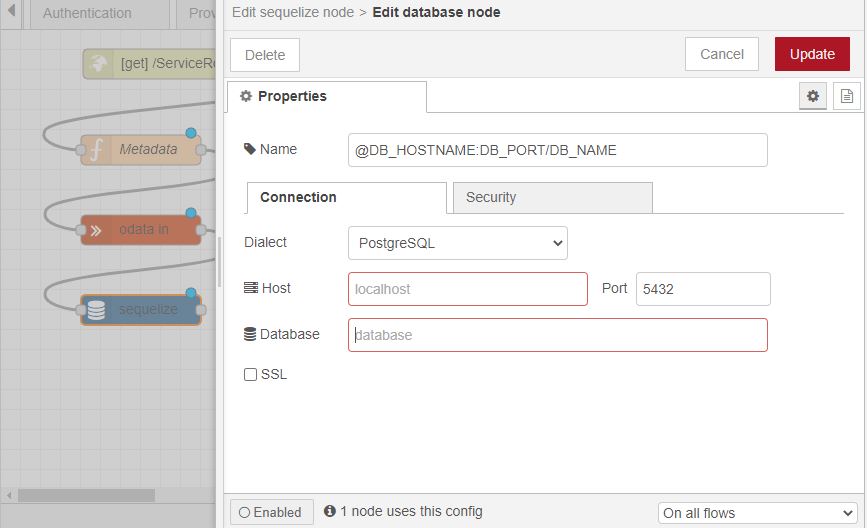
Drag and drop an Ignite-Sequelize node and connect a wire from the OData-in node to the Sequelize node. Configure your Sequelize node and provide your database connection variables.

OData Out

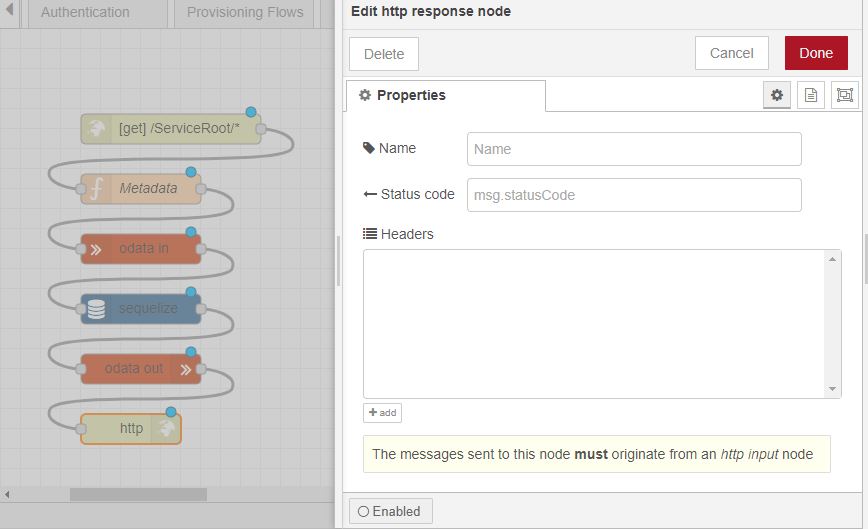
Now that we have data, we need to enable our workflow to give us an OData compatible response. In order to do this add an OData-out node to your flow and draw a wire from the Sequelize node to the OData-out node.

Http Response

Once you reach this step, give yourself a pat on the back. Now all you need to do is add an http-response node to send that response back to the client.

Click the "Deploy" button and your shining new OData service workflow is ready. You can use Postman client or OData Client node to test your service.

Now that your service is ready for integration, connect to your salesforce organization to exchange data.