
Introduction
Great news! You can now create an OData 4.0 Service inside Ignite using our Ignite-odata nodes and exchange data with your Salesforce Organization seamlessly.
To create an OData workflow compatible with Salesforce Connect (External Object Connection), you will need our Ignite-OData and Ignite-sequelize nodes.
In this blog I will walk you on "How to create an OData 4.0 Service in Ignite from scratch" step by step.
Let's dive in and create an OData service from scratch inside of our Ignite platform.
Intercepting Requests
To create an OData service we will need an API endpoint to serve the incoming requests, which we can create using the http-in node.
Go ahead, drag and drop a http-in node and configure it. To make it compatible with incoming OData requests which comprises of dynamic URLs, you need to append a /Root/* or /Serviceroot/* variable to the endpoint. This endpoint will now serve all the incoming get requests matching in Serviceroot/ or Root/.
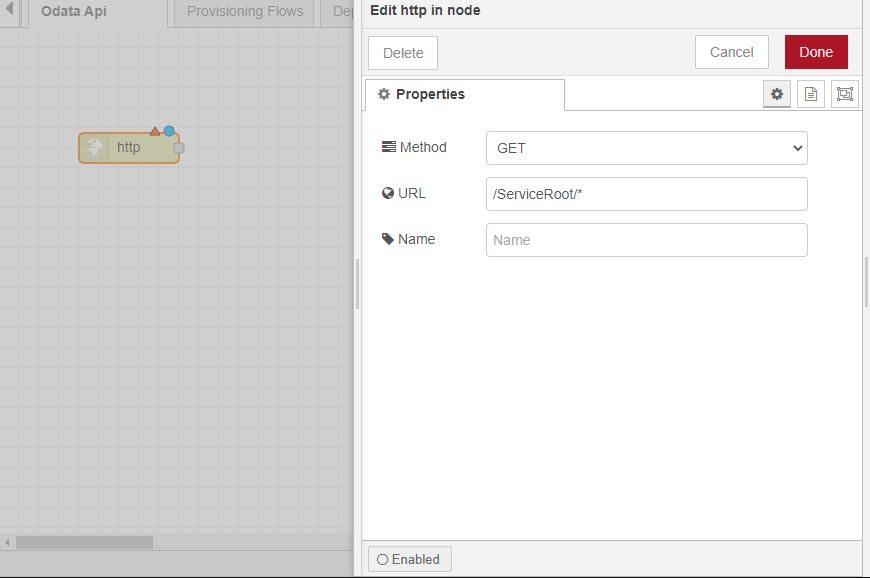
To enable your service to perform upsert operations, you will need to add a few other http-in nodes to support requests with other http verbs (Post, Put, Patch, Delete).
Metadata Model
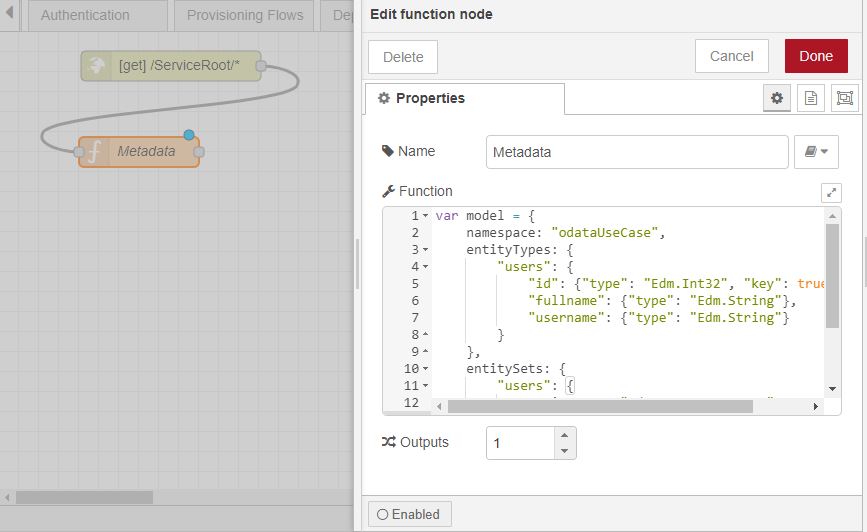
Going forward you will need to provide a database model for your service to serve incoming metadata requests. This can be achieved by using a function node and setting the msg.model property to a valid model and then adding a wire from http-in node to the function node. See the example below.
var model = {
  namespace: "odata",
  entityTypes: {
    users: {
      id: { type: "Edm.Int32", key: true },
      fullname: { type: "Edm.String" },
      username: { type: "Edm.String" },
    },
  },
  entitySets: {
    users: {
      entityType: "odata.users",
    },
  },
};
msg.model = model;
return msg;
OData Magic
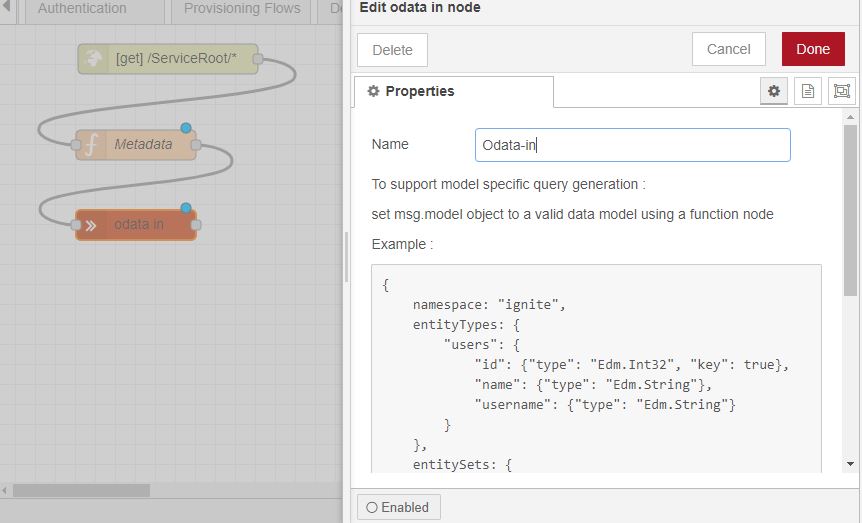
Next, drag and drop an OData-in node and connect a wire from the function node to the OData-in node. Great job, we are halfway through now!
Database Operation
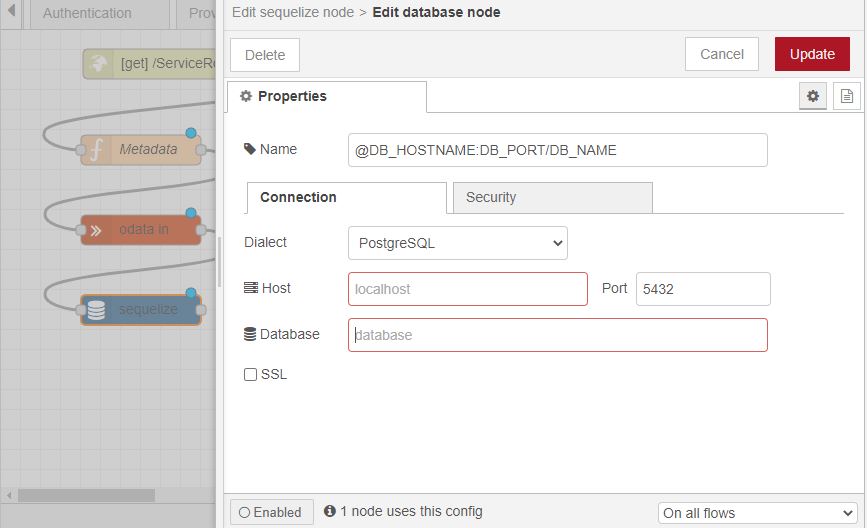
Drag and drop an Ignite-Sequelize node and connect a wire from the OData-in node to the Sequelize node. Configure your Sequelize node and provide your database connection variables.
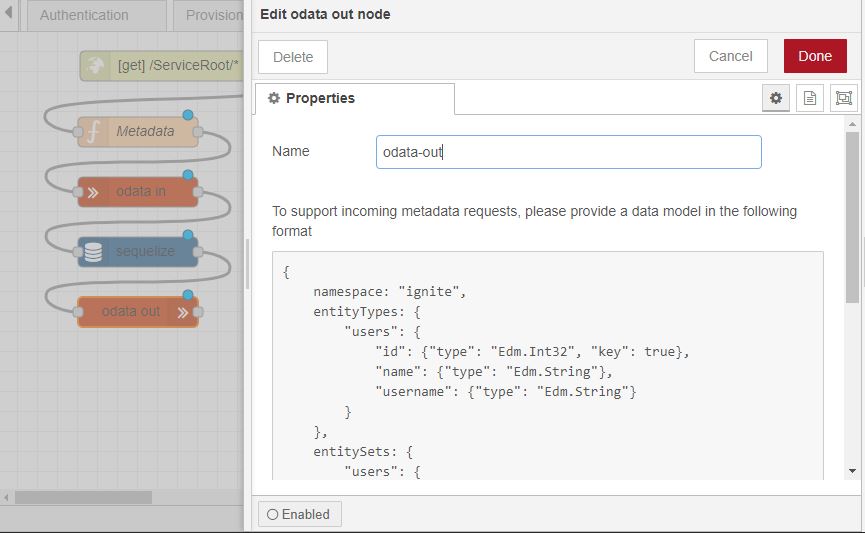
OData Out
Now that we have data, we need to enable our workflow to give us an OData compatible response. In order to do this add an OData-out node to your flow and draw a wire from the Sequelize node to the OData-out node.
Http Response
Once you reach this step, give yourself a pat on the back. Now all you need to do is add an http-response node to send that response back to the client.
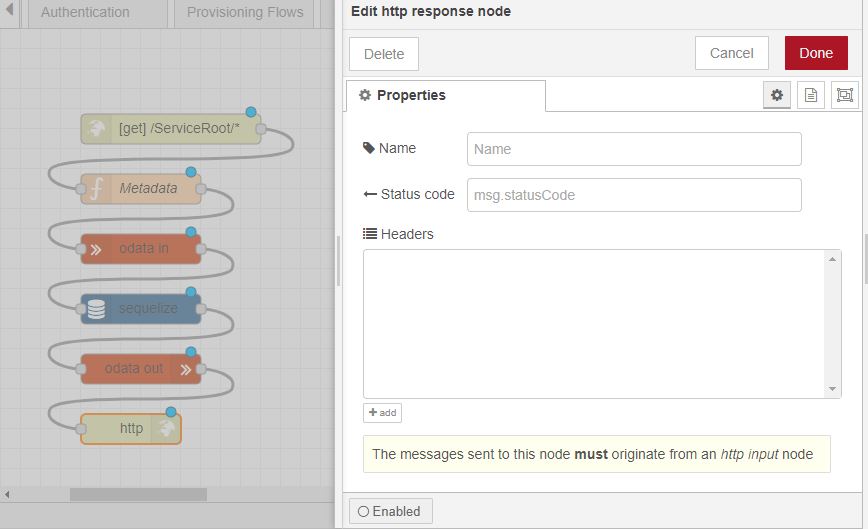
Click the "Deploy" button and your shining new OData service workflow is ready. You can use Postman client or OData Client node to test your service.
Now that your service is ready for integration, connect to your salesforce organization to exchange data.