Introduction
Welcome to the IgniteConnex platform! This guide is here to walk you through the straightforward process of registering your on-premise app with IgniteConnex on a new port. From logging in to tweaking runtime settings using Docker Compose, this step-by-step walkthrough ensures a seamless integration process. Learn how to customize your digital product's identity settings for a tailored user experience. Whether you're a newcomer to IgniteConnex or seeking a hassle-free setup, this guide provides the essential steps to successfully register your app and elevate your on-premise experience.
Below are the steps to follow for registering your on-premise app on a new port:
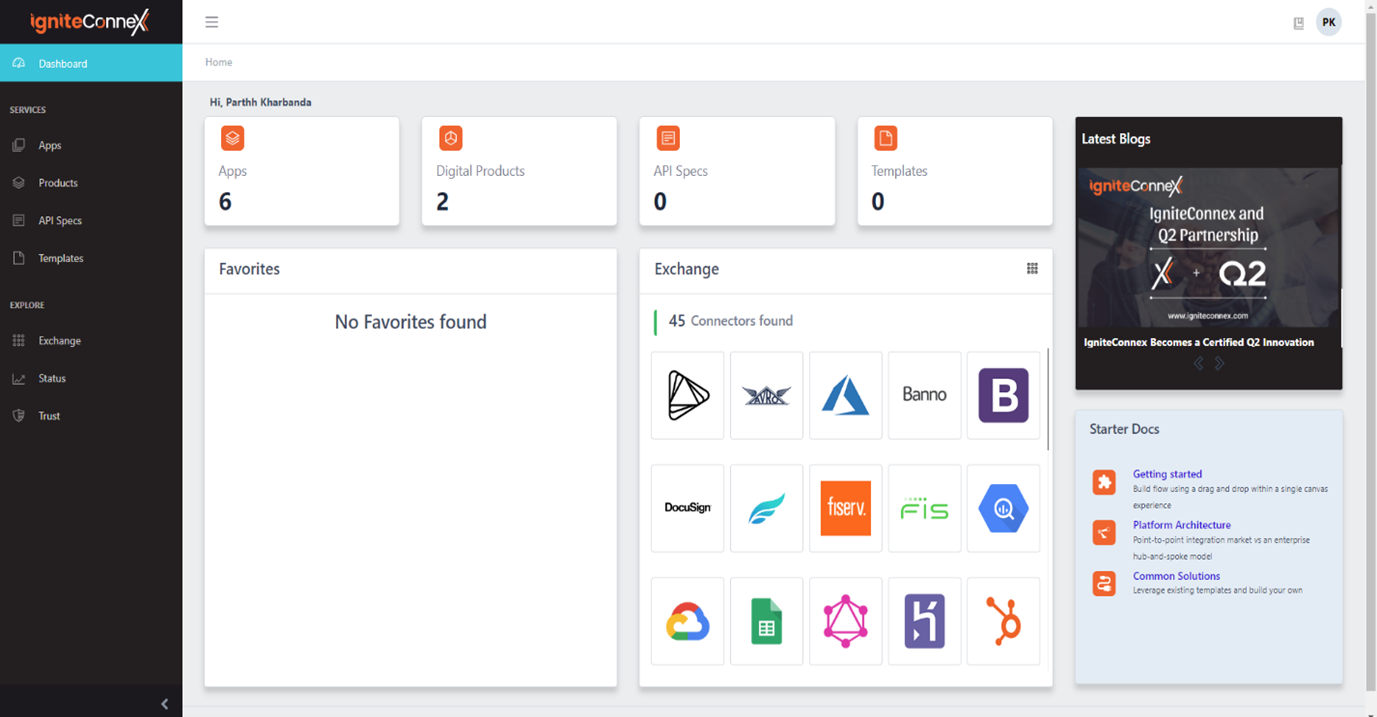
Step 1: Log in to your IgniteConnex dashboard.
Begin the registration process by logging in to your IgniteConnex account, providing the necessary credentials for secure access.
Step 2: Navigate to the Products tab.
Once logged in, locate and click on the Products tab situated in the left-side hamburger menu. This section serves as the central hub for managing digital products.
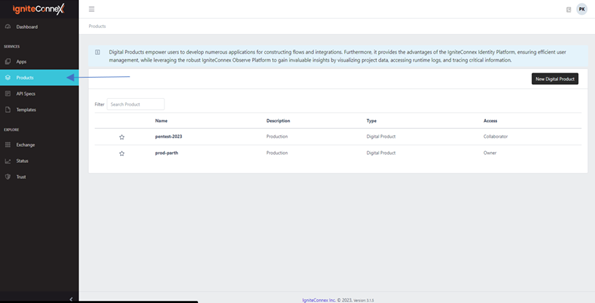
Step 3: Create a new digital product.
Initiate the product creation process by selecting the option to add a new digital product. Provide essential details to establish the foundation for your on-premise app integration.

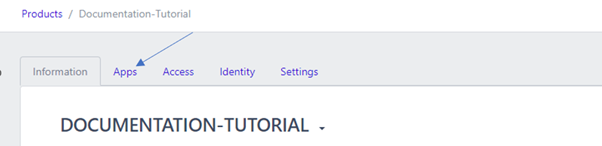
Step 4: Select the Apps tab.
Navigate to the Apps tab within IgniteConnex. This section allows you to manage and configure various applications associated with your digital product.
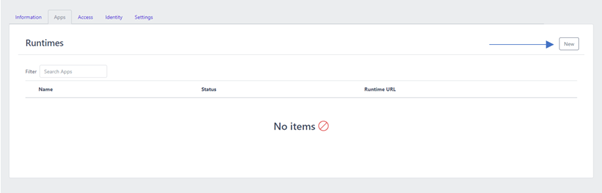
Step 5: Generate a new app.
Click on the "New" button to generate a new application within your chosen digital product. This step is essential for configuring and registering your on-premise app.
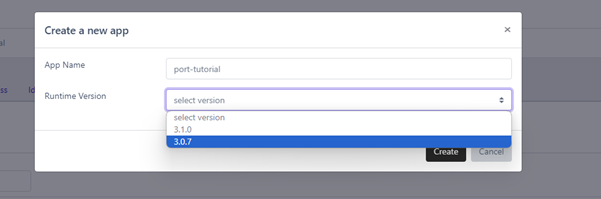
Step 6: Enter app details and choose runtime version.
Provide relevant details, such as the app name, and specify the appropriate runtime version based on your specific requirements. This ensures compatibility and optimal performance.
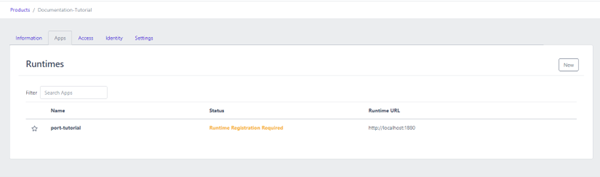
Step 7: Initiate runtime registration.
With your app configured, click on it to commence the runtime registration process. This step establishes a connection between your on-premise app and IgniteConnex.
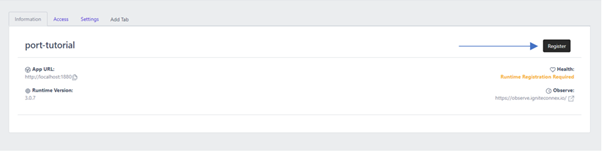
Step 8: Register your app.
Complete the registration process by clicking on the "Register" button. This formalizes the connection, enabling IgniteConnex to recognize and manage your on-premise app seamlessly.
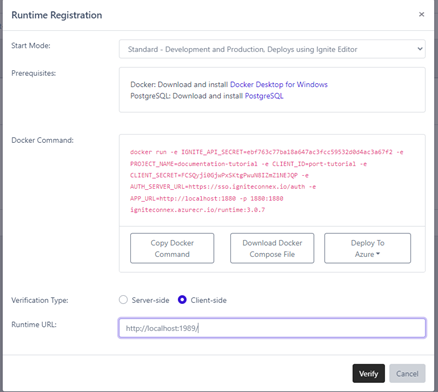
Step 9: Select start mode during runtime registration.
Choose the appropriate start mode—either development or standard—based on your specific needs during the runtime registration process.
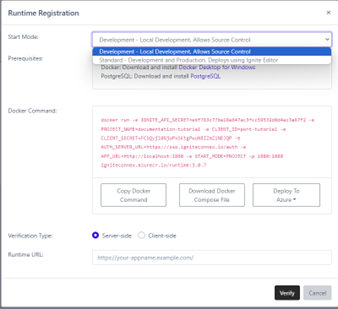
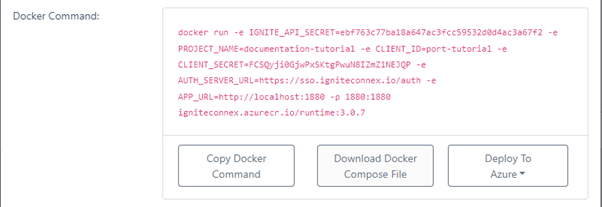
Step 10: Download Docker Compose file.
Download the Docker Compose file, a crucial component for configuring the runtime environment of your on-premise app.
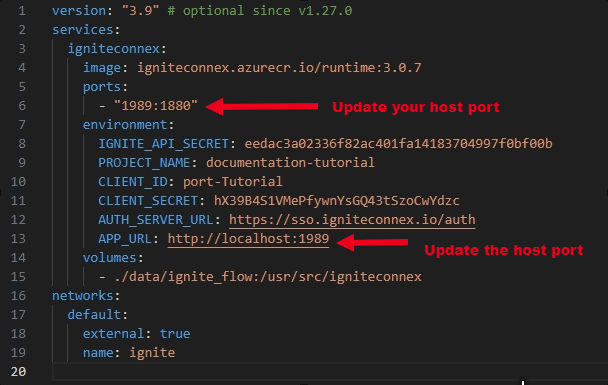
Step 11: Locate and open Docker Compose file.
Find the downloaded file, typically situated in the default Downloads folder. Open the docker-compose.yaml file using your preferred text editor.

Step 12: Adjust port configuration.
Modify the port configuration within the Docker Compose file to align with your desired settings. Save the changes to ensure proper communication between your app and IgniteConnex.
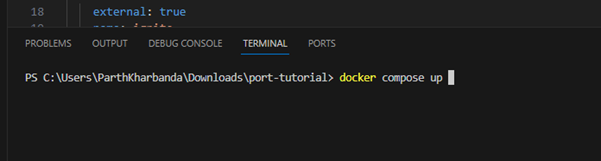
Step 13: Execute the "docker-compose up" command.
Run the "docker-compose up" command in your terminal to deploy the Docker Compose configuration, initiating the necessary flows for your on-premise app.
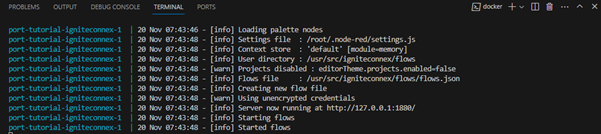
Step 14: Submit runtime registration details.
Once the flows have started, follow the provided instructions to submit your runtime registration details as illustrated in the image.
Finalize the registration process by selecting your verification type, adding your runtime URL (e.g., http://localhost:1989/), and clicking "Verify."
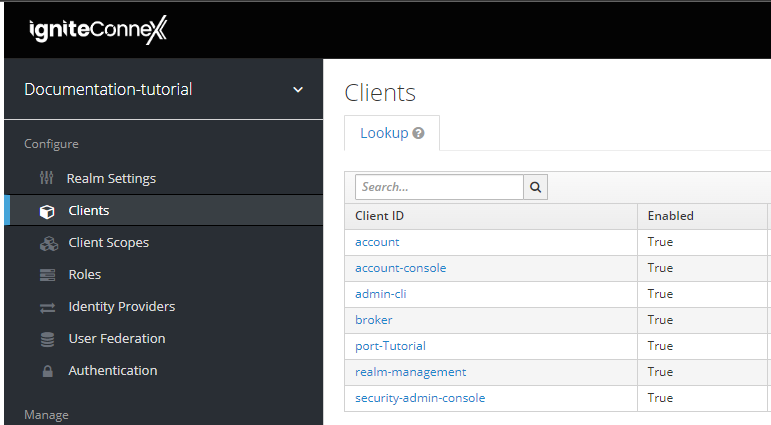
Step 15: Access the identity of your digital product.
Head to the identity settings of your digital product. In the Clients tab, choose your app name or client name.

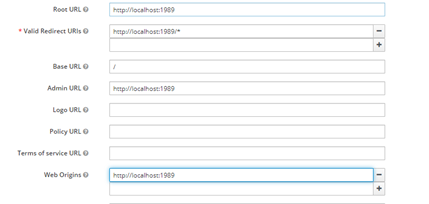
Step 16: Configure identity settings.
In the settings tab, modify the root URL, Valid Redirect URLs, Admin URL, and Web Origins to match the localhost port configured in the Docker file. This step ensures seamless communication between IgniteConnex and your on-premise app.
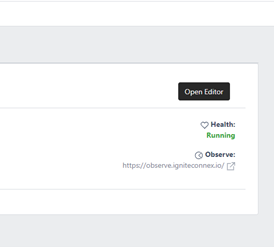
Step 17: Access your editor after successful registration.
Post successful runtime registration, access your app's editor by clicking "Open Editor" or by directly pasting the localhost address into your web browser (e.g., http://localhost:1989/). This marks the successful completion of the on-premise app registration process.

Conclusion
In conclusion, this straightforward guide empowers users to seamlessly register their on-premise app on a new port within IgniteConnex. From initial login to fine-tuning runtime configurations and customizing identity settings, each step has been carefully outlined for a hassle-free integration process. By following these user-friendly instructions, you've successfully navigated the complexities of app registration, ensuring an optimized experience for your on-premise application. Now, armed with a clear understanding of the process, you're well-equipped to leverage the full potential of IgniteConnex for your digital product.