What are Alerts?
Overview
Alerts provide the ability to catch a specific activity from your system, or getting alerted in case of a condition specified by you. User can not only set the time and interval for the alerts but can also manage silencing the alerts for specified time.
Setting up alerts for the system can prevent any errors or unusual system behaviours from getting missed and hence enabling the users to take any necessary actions.
Working with Alerts
The three integral steps for setting up alerts are given below.
Setting up Alert Rules
Alert rules are the conditions which when become true, alerts are sent.
For setting up alert rules:
Navigate to the alert rules tab from the alert item in the sidebar.
Create a New Alert rule.
Give a name to this new rule and choose the type of rule. The classic alert rule is a general type which allows the user to use any added datasource.
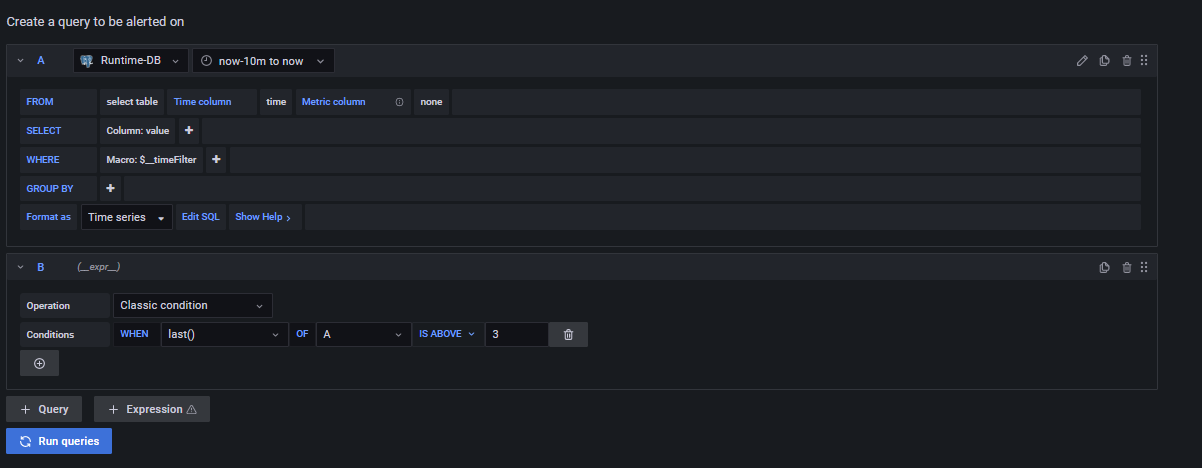
Create a query to be alerted on.
User can also add suitable condition according to the use case. The Run Query button allows user to check what is returned by the query.
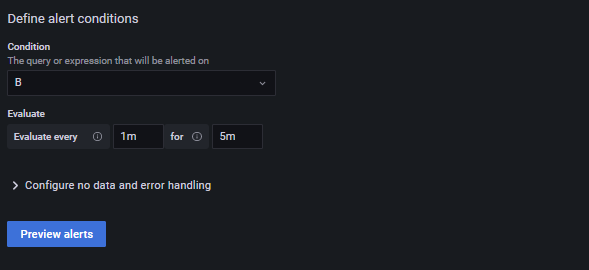
Add alert conditions, and configure the frequency on which the specified condition should be evaluated. Also set the time for which the condition should be evaluated before sending out the alert.
User can add details about their alerts for eg. summary, description etc. Labels need to be added to Alert rules since they will be used for Notification Policies and Silencing.

Setting up Contact Points and Notification Policies
Contact points are addresses where the user wants the alerts to be sent. You can add one or more contact points in the Contact points tab.
Notification Policies manage how the alerts will be sent. Each notification policy has a contact point.
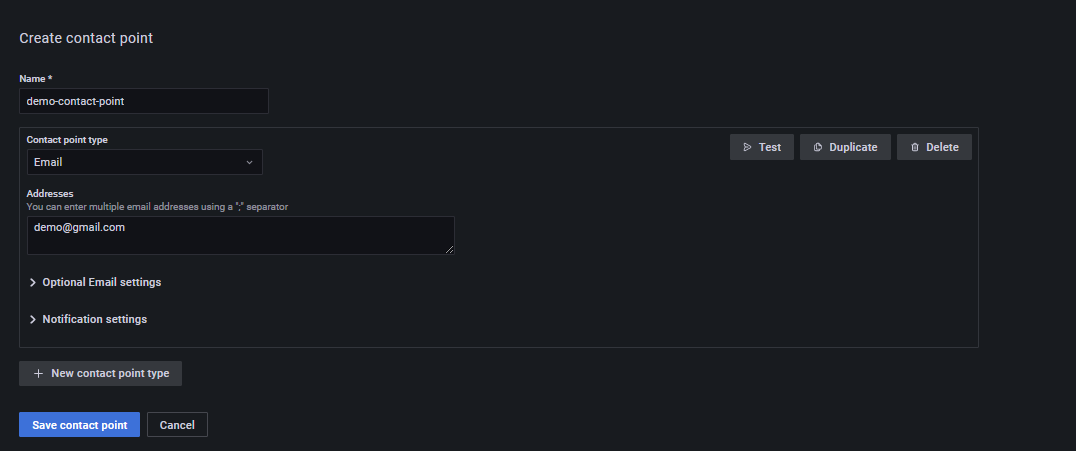
To create a Contact Point:
- Navigate to the contact points tab, and create a new contact point.
- Name the contact point and choose the contact point type. Based on your selection, additional information about the contact point will be needed, for ex. Email address for email, Webhook Url for Microsoft team, Discord etc.
- Save the contact point
To create a Notification Policy:
- Navigate to the Notification Policy tab and create a new policy.
- Add the matching label which we created earlier.
- Choose the contact point which you want to use.
- Save the policy.
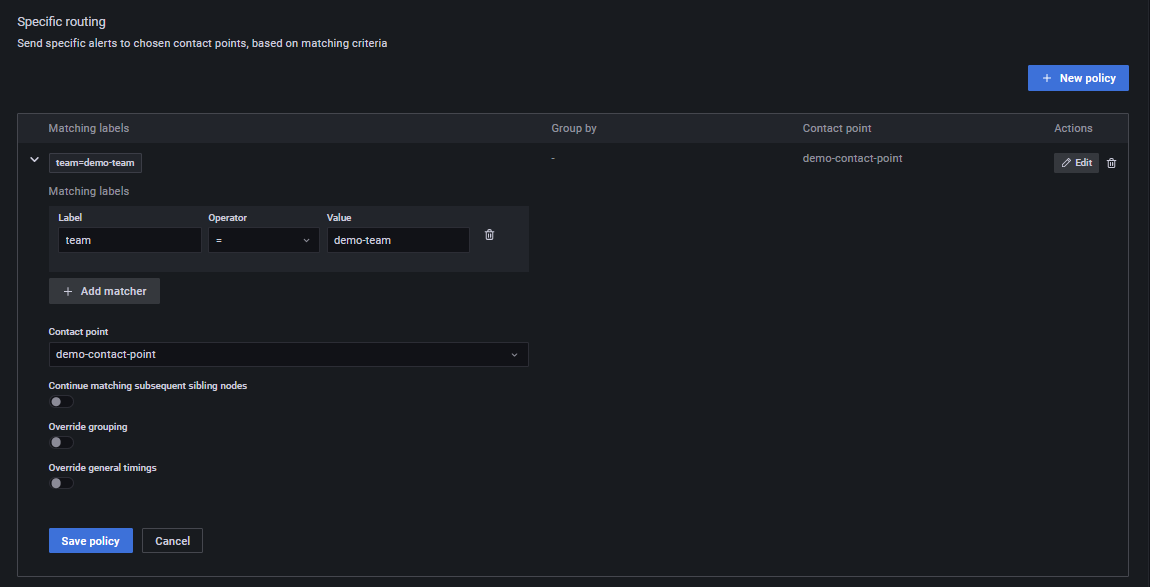
According to the above settings, alerts will be sent to the specified locations.
Silencing Alerts
Silence feature lets the users to stop receiving alert notifications for any specified time interval. like Notification policies, silence feature also works on labels.
To set Silence for a sppecific alert:
- Navigate to the Silences tab.
- Select the start time and he end time for the silence interval.
- Add the label which we created earlier.
- Submit.
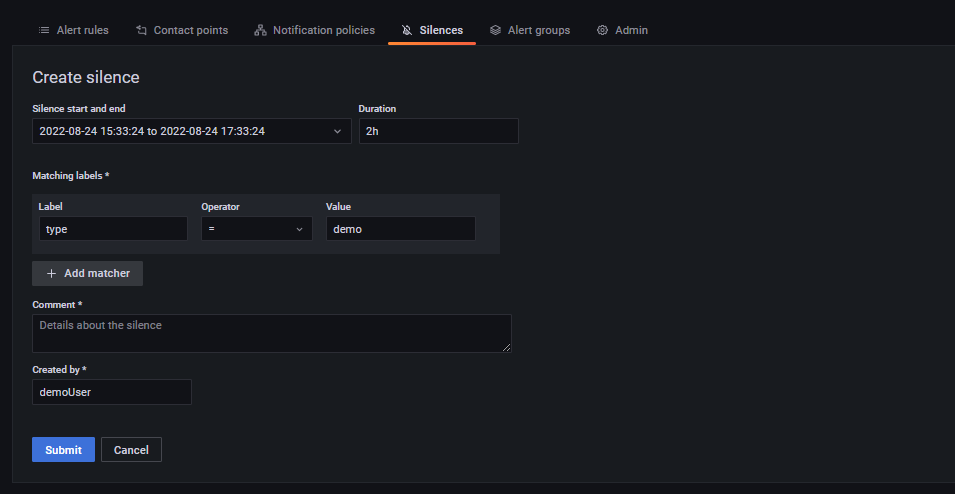
A new silence for the specified time interval will be created.
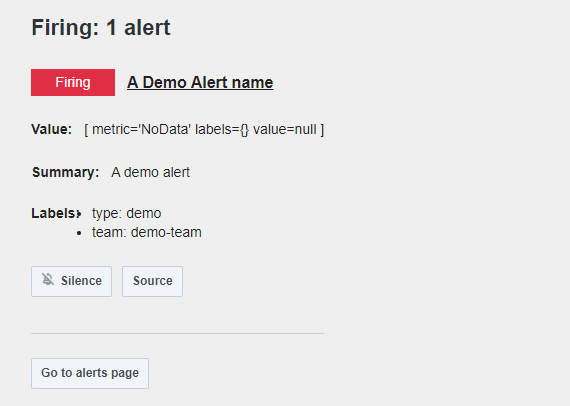
Example Emails
A demo alert email