Identity Brokering and Social Login
Steps for Implementation
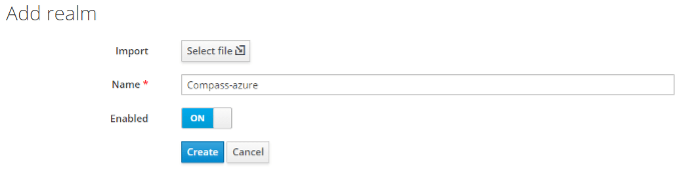
Create realm
Enter Realm Name and keep the realm name handy as it will required later to configure the Realm under the OAuth Client plugin. Click on CREATE to add realm.
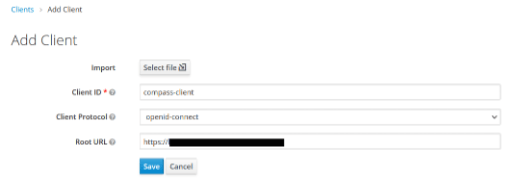
Create OpenID client
Click on the Clients and choose create to create a new client. Enter client id and select client protocol openeid-connect and select Save.
Change Access type
After client is created change its access type to confidential.
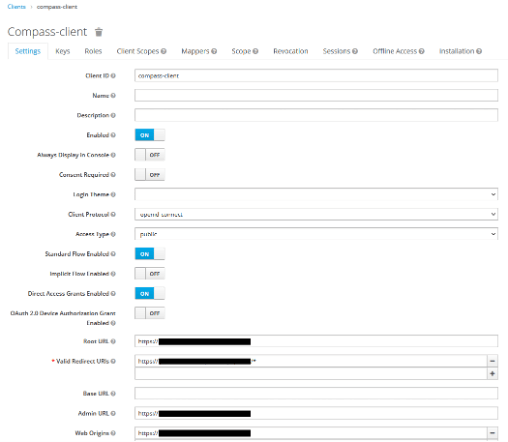
Enter Valid Redirect URIs
Copy callback URL from plugin and then click on SAVE. Ex -- https://{service_base_url}/oauth/callback
Get Client Secret
Now we need to get client secret. So select Clients and select credentials and copy your secret from here.
Plugin Configuration
Enter copied Client Secret under Client secret field in the OAuth Client plugin, and enter the Client Name under the Client ID field.
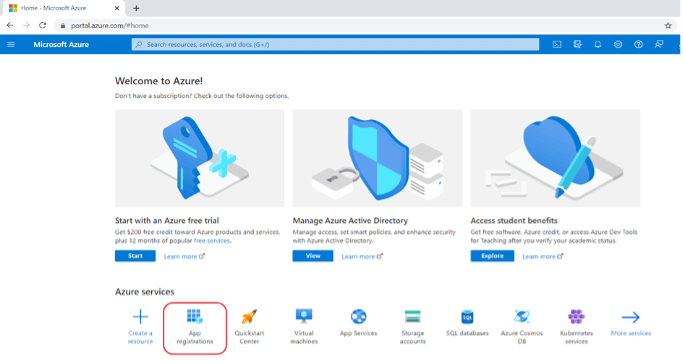
Azure Portal and redirect
Go to Azure Portal and click App Registration.
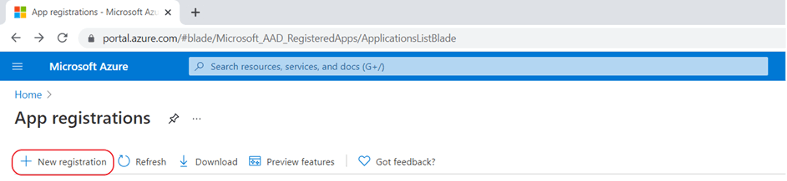
Create an app
Create an New Registration for IgniteConnex Identity provider.
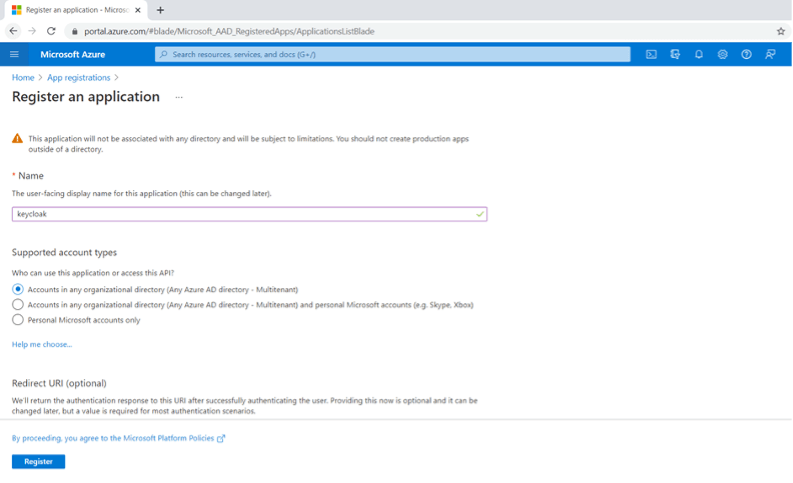
Create new application
Enter the name of New Application and click Register.
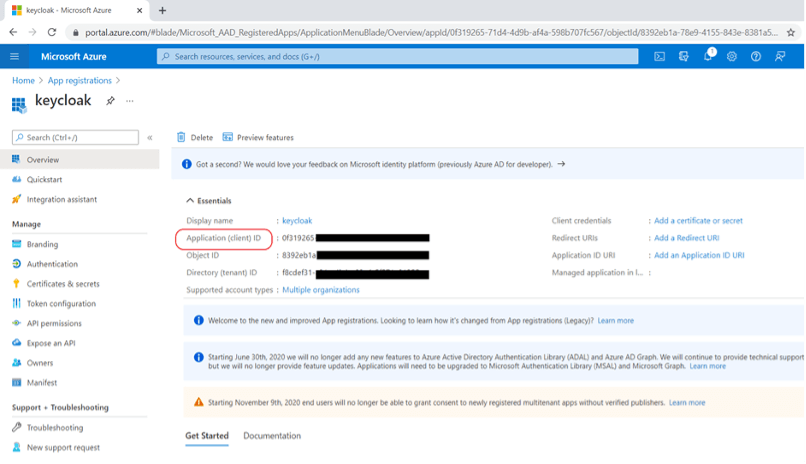
Copy Client ID
You will get a Client ID from azure. Copy and keep it somewhere for future references.
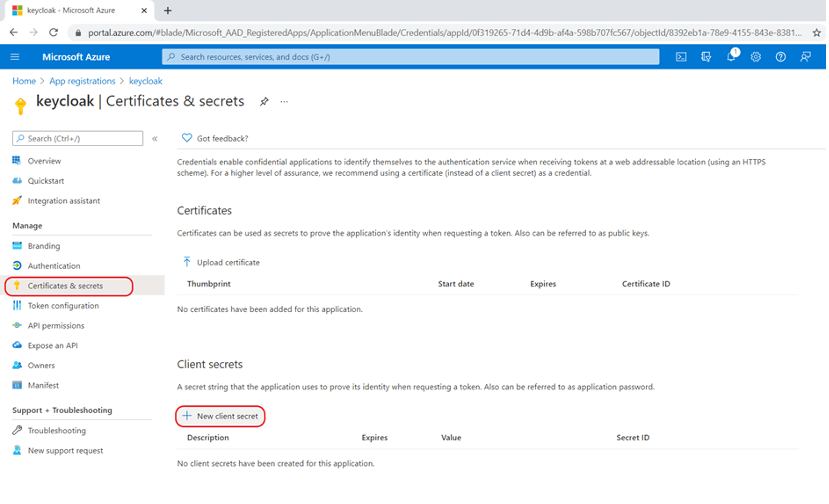
Next Section
Go to "Certificates & Secrets", and click new secret for generating the secret for the app.
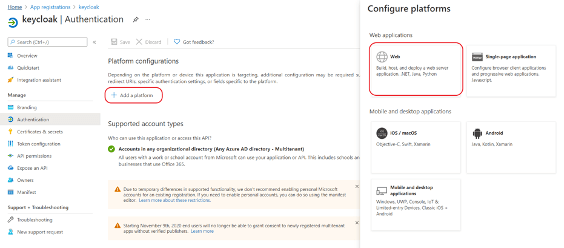
Authentication
Now go to Authentication, and click "Add a Platform", and select "WEB".
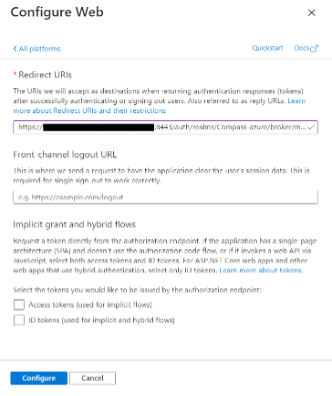
Add URLs
Add Valid redirect URL from IgniteConnex.
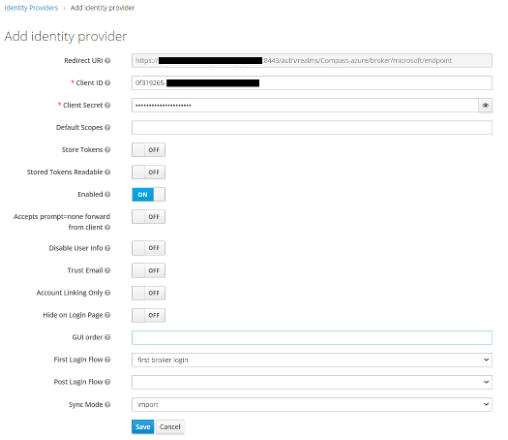
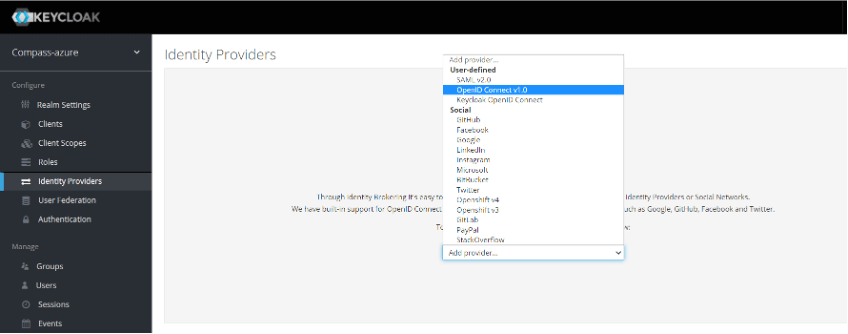
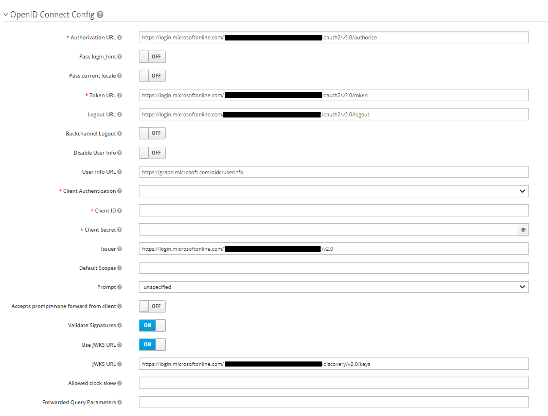
Add Identity Provider
Add an Identity Provider on IgniteConnex and select OpenID Connect v1.0.
Add Authorization URL
Enter the Authorization URL and click next.
Great, You made it.
You are DONE. You can see the Identity Provider button on the login page.