Deploy on Azure
Prerequisite
- You need to sign up on your Microsoft account here
- Login with your Microsoft account here
- Login into your Azure portal here
- For local development you need, Docker Account with Azure container registry. Go to Sign up.
- Finally go to IgniteConnex Dashboard and register your account.
Step1: Configure PostgreSQL
Create and configure PostgreSQL database for storing your app related information. This database will be managed by Ignite App and required for App registration.
Setup PostgreSQL
https://portal.azure.com/#create/Microsoft.PostgreSQLServer
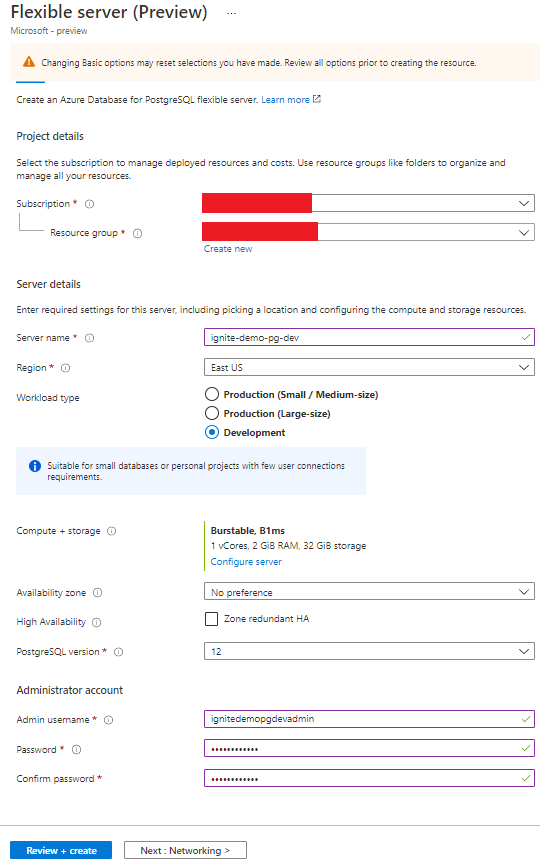
Review & Create
Database Credential
Now create your DATABASE_URL as below format by using above values
postgres://{username}:{password}@{host}:{port}/{database}
Copy or save this DATABASE_URL for Azure App Registration Step
Step2: Create App and Get IgniteConnex Keys in IgniteConnex Dashboard
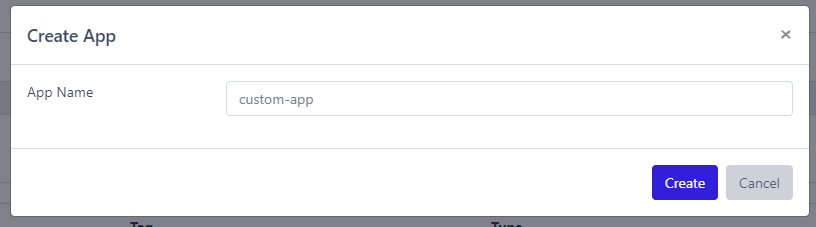
Create App
Visit: https://dashboard.igniteconnex.io/#/apps
Click on button “New App”
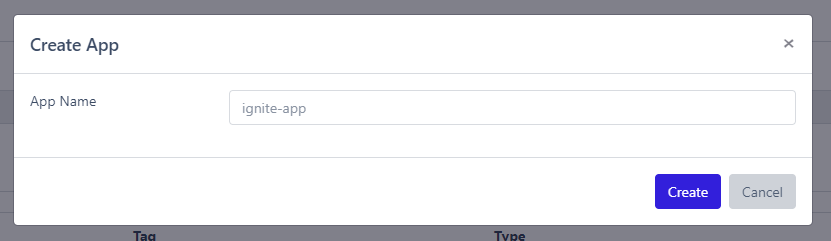
Set App Name
Provide a suitable name for your application and click on button “Create
Get Key for AWS Container Creation
You will get the IGNITE_EDITOR_API_SECRET key, copy or save this key for later use in Azure App Registration Step.
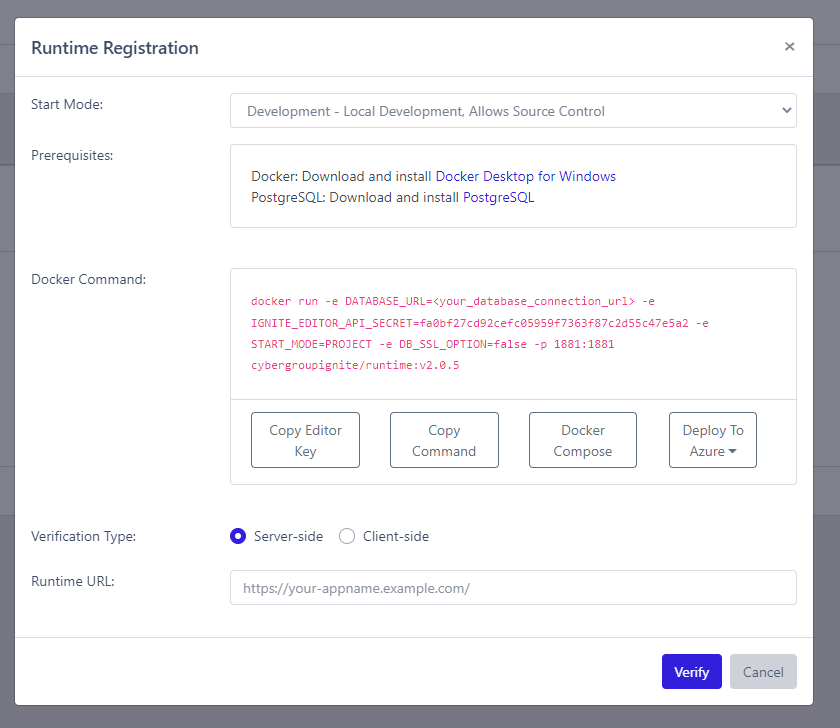
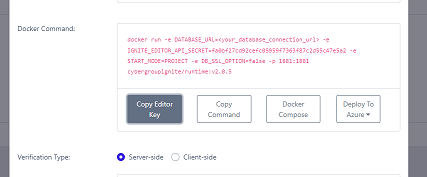
Set IgniteConnex Runtime URL
We will setup this URL once we will finish the "deploy-on-azure".
Step3: Deploy Application Using Docker Hub Public Repository
After the IgniteConnex Platform team provisions your account, you may use the following "Deploy to Azure" button to get started.
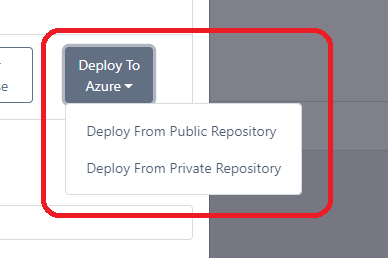
You may need a Microsoft Azure account.
You will be redirected to Azure after clicking this button.
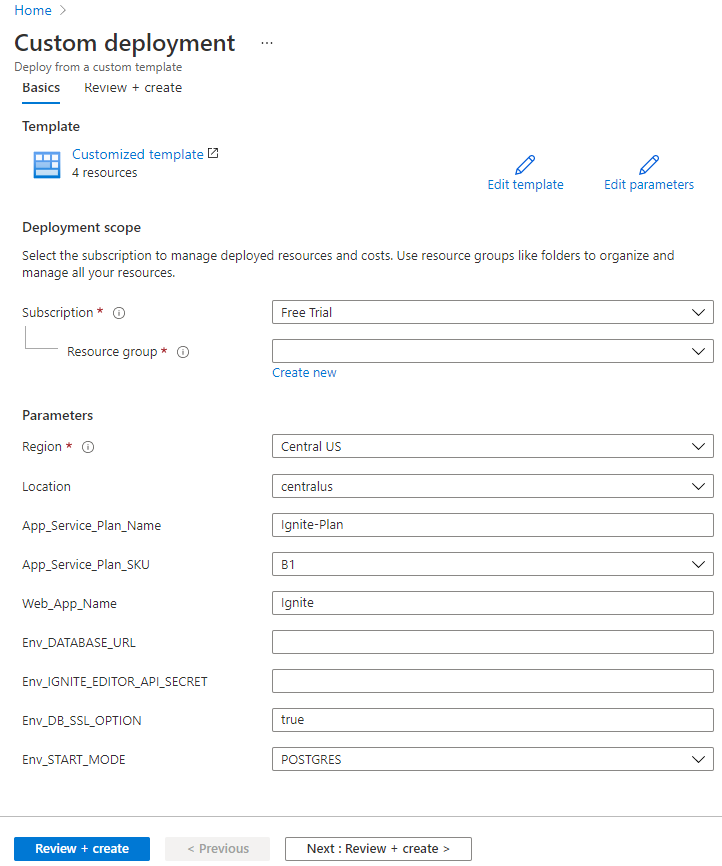
Below are required parameters details-
Subscription: Select your azure account subscription type that you want for this custom deployment. All resources in an Azure subscription are billed together.
Resource group: A resource group is a collection of resources that share the same lifecycle, permissions, and policies. You can select your existing resource group or can also create new one.
Region: Select a location for the resource group. For example, Central US. Not every resource is available in every region.
Location: Select a location for the storage account. For example, Central US.
App_Service_Plan_Name: Provide app service plan name
App_Service_Plan_SKU: Select the suitable Azure plan. For more information about Azure plan visit Azure Pricing Plans
Web_App_Name: Create a unique and suitable web application name. Your deployed application will be running with your web app name. for example, if Web_App_name is "myDemo" then application will be hosted in URL
ENV_DATABASE_URL: This URL includes protocol, user credentials, host and port. Refer to database credential
ENV_IGNITE_EDITOR_API_SECRET: This API key is found within the Ignite Dashboard when registering an app. Refer to Get Ignite Keys
ENV_DB_SSL_OPTION: If your database supports or requires SSL, it is recommended to turn this on
ENV_START_MODE: Select desired start mode (Required for git-based application development)
Observation 1
If someone else is using the same web app name then during deployment, you will get error like below-


Observation 2
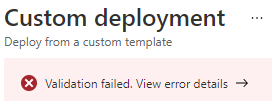
If there is any validation issue, you will get the status like below–

Observation 3:
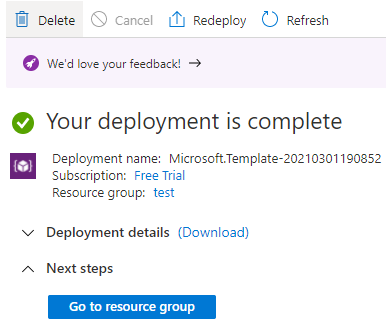
Once deployment completed you will get message as below–
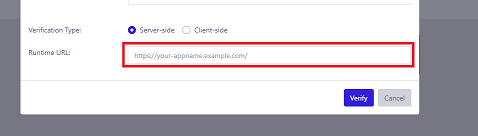
Step4: Finish IgniteConnex Runtime URL
Once azure application will be deployed successfully you will get the application url like https://myDemo.azurewebsites.net/
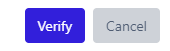
Go back to Runtime regisration step and paste the runtime url and click on "Verify"
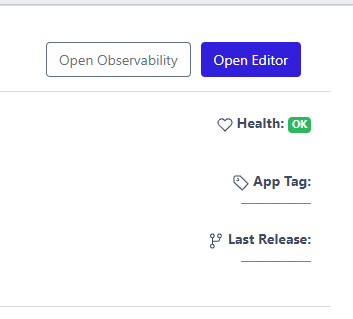
- Click Open Editor button on your application in the Dashboard and start execution.