Heroku + Github
1. Visit
https://dashboard.heroku.com/apps
Click on button “New” to create new application in Heroku, and select option “Create new pipeline”.
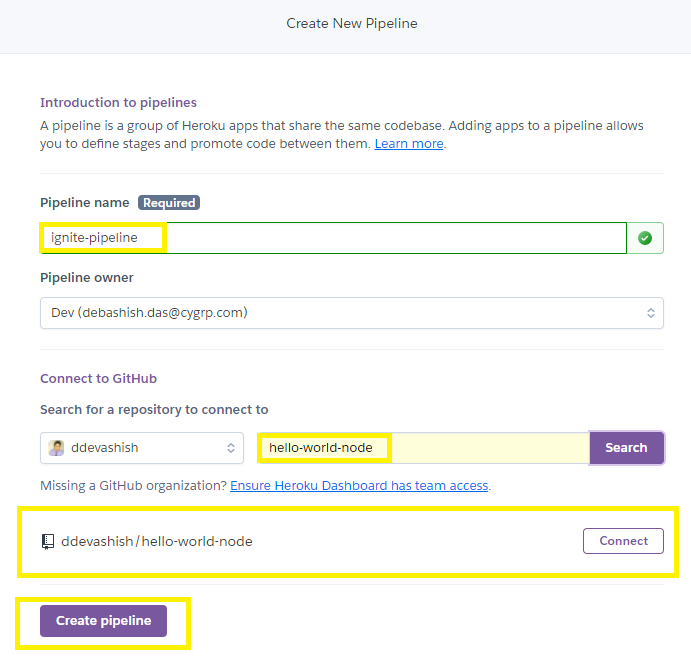
![](https://igniteconnexpublicsa.blob.core.windows.net/public/projects/igcnx/docs/static/assets/docs/deploy-to-heroku/new-app.png)
2. Pipeline name
Provide suitable name for your pipeline, select your repository and the click on button “Create pipeline”.
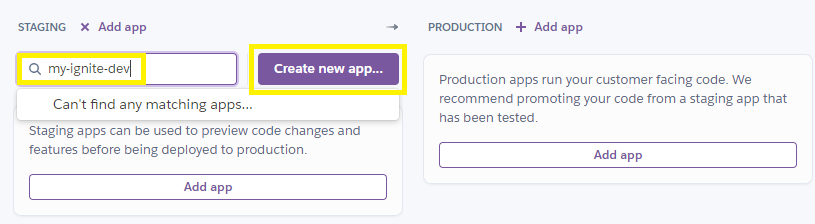
![](https://igniteconnexpublicsa.blob.core.windows.net/public/projects/igcnx/docs/static/assets/docs/deploy-to-heroku/add-new-pipeline.png)
3. Add app
Click on “Add app” and select or create new app
![](https://igniteconnexpublicsa.blob.core.windows.net/public/projects/igcnx/docs/static/assets/docs/deploy-to-heroku/configure-pipeline-dev.png)
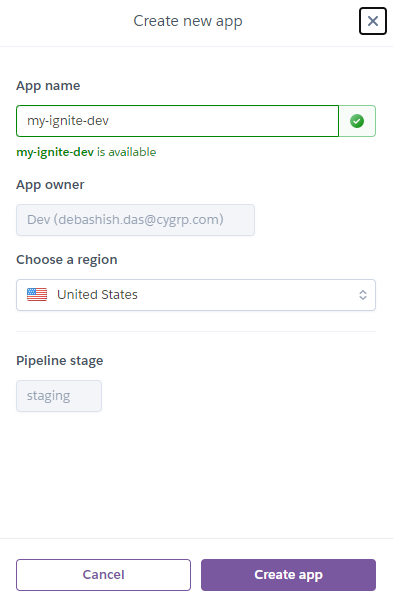
4. Verify app name availability
Verify app name is available and then create app.
![](https://igniteconnexpublicsa.blob.core.windows.net/public/projects/igcnx/docs/static/assets/docs/deploy-to-heroku/add-new-app.png)
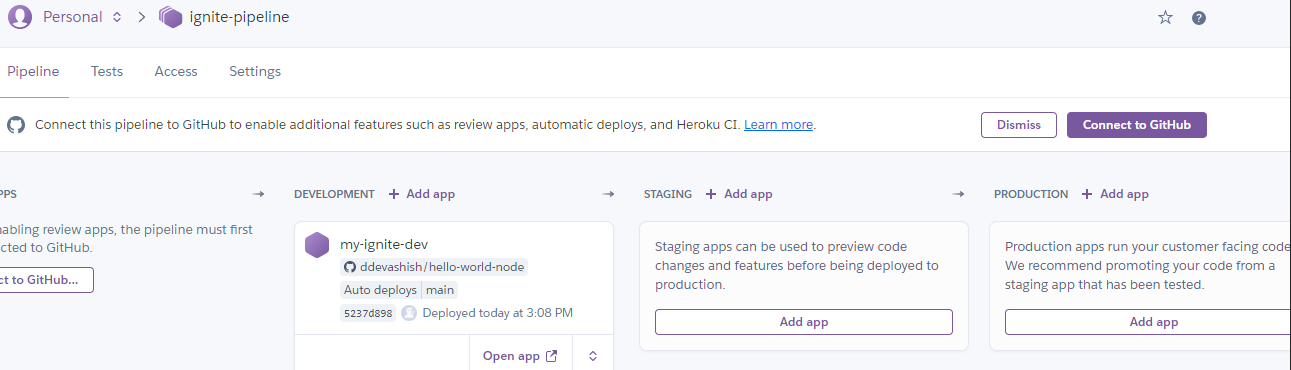
5. Find newly created app
You can find the newly app will be associated with the pipeline, you can move app to development environment.
![](https://igniteconnexpublicsa.blob.core.windows.net/public/projects/igcnx/docs/static/assets/docs/deploy-to-heroku/added-new-app-in-pipeline.png)
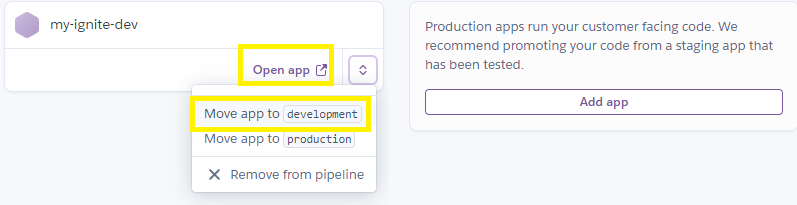
6. Check development environment
You can check that app has moved to the “Development”.
![](https://igniteconnexpublicsa.blob.core.windows.net/public/projects/igcnx/docs/static/assets/docs/deploy-to-heroku/app-moved-to-dev-environment.png)
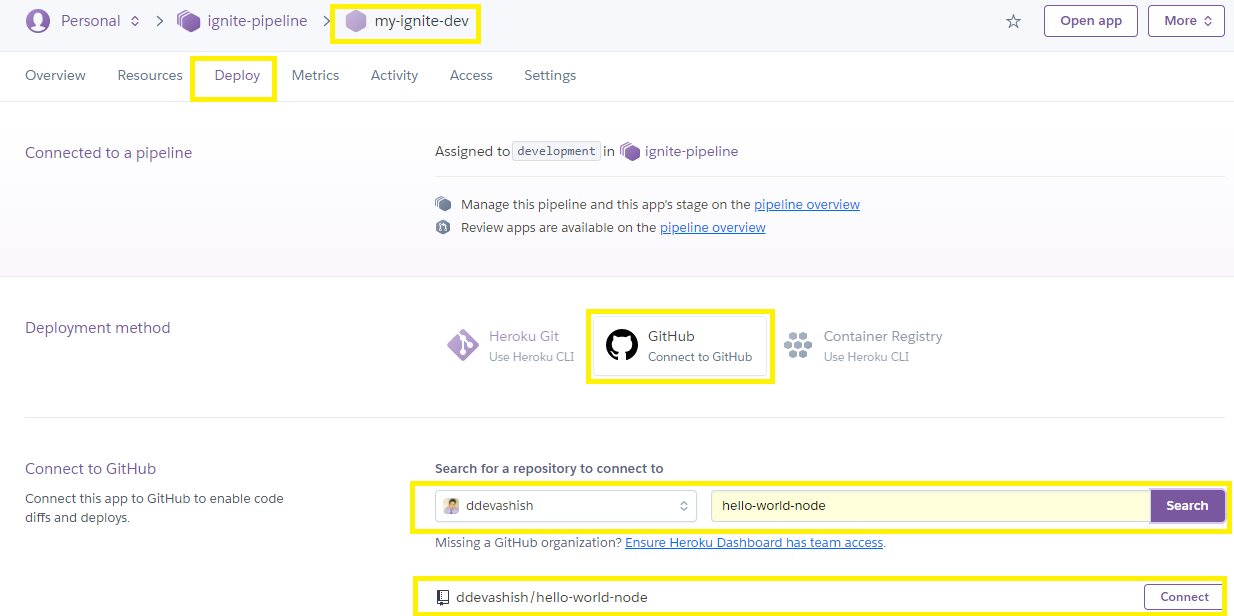
7. Set development environment repository
Click on application that you created, and the select tab “Deploy”.
![](https://igniteconnexpublicsa.blob.core.windows.net/public/projects/igcnx/docs/static/assets/docs/deploy-to-heroku/app-configure-for-dev-environment.png)
8. Enable automatic deployment
Enable automatic deployment for the specific branch.
![](https://igniteconnexpublicsa.blob.core.windows.net/public/projects/igcnx/docs/static/assets/docs/deploy-to-heroku/app-enable-automatic-deployment.png)
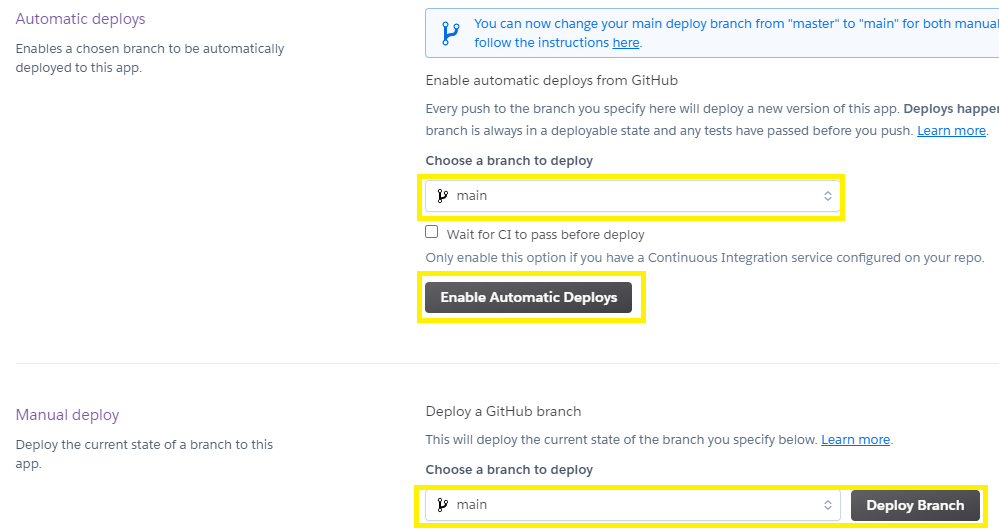
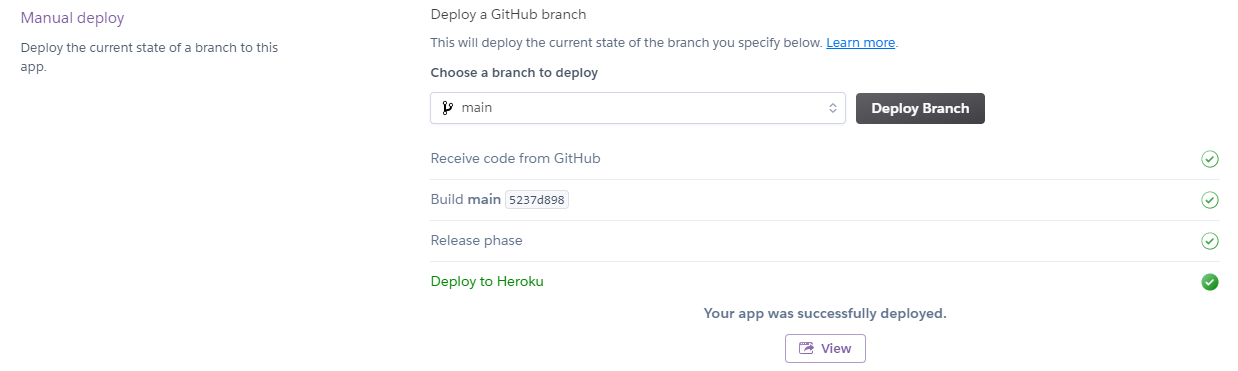
9. Manually deploy app
Click on button "Deploy Branch" for manually deploy the application.
![](https://igniteconnexpublicsa.blob.core.windows.net/public/projects/igcnx/docs/static/assets/docs/deploy-to-heroku/app-manually-deploy.png)
10. Check pipeline
Now click back to your pipeline.
![](https://igniteconnexpublicsa.blob.core.windows.net/public/projects/igcnx/docs/static/assets/docs/deploy-to-heroku/app-pipeline-dev-configured.png)
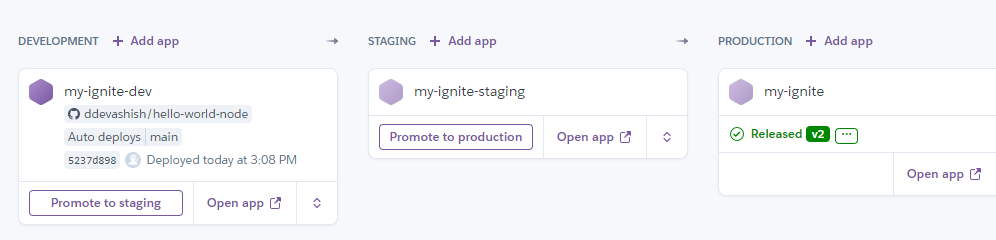
11. Set staging and production environment
Add app for Staging and Production in the similar way.
![](https://igniteconnexpublicsa.blob.core.windows.net/public/projects/igcnx/docs/static/assets/docs/deploy-to-heroku/app-added-apps-in-pipeline.png)
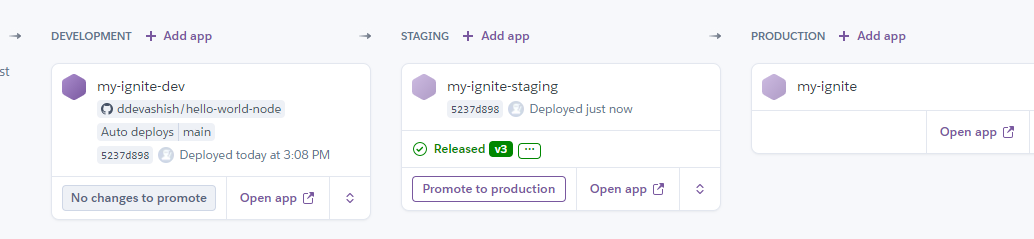
12. Move from development to staging
To move changes from development environment to staging just click on button “Promote to staging”.
![](https://igniteconnexpublicsa.blob.core.windows.net/public/projects/igcnx/docs/static/assets/docs/deploy-to-heroku/app-promote-dev-to-staging.png)
13. Verify staging
You can see the changes have been promoted to staging. Now you can click on button “Promote to production”
![](https://igniteconnexpublicsa.blob.core.windows.net/public/projects/igcnx/docs/static/assets/docs/deploy-to-heroku/app-promoted-to-stagging.png)
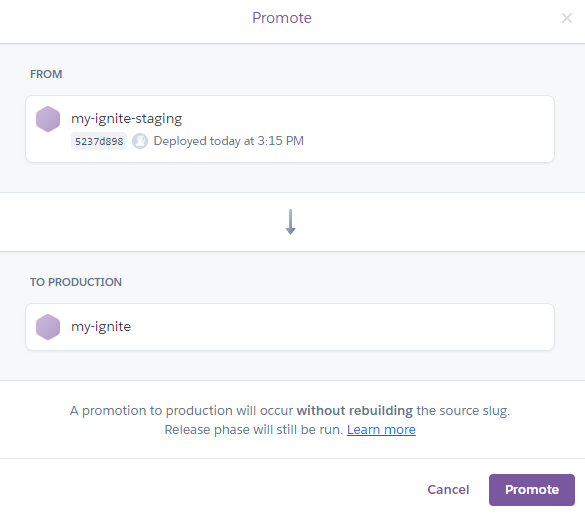
14. Move from staging to production
To move changes from staging environment to production just click on button “Promote to production.
![](https://igniteconnexpublicsa.blob.core.windows.net/public/projects/igcnx/docs/static/assets/docs/deploy-to-heroku/app-promote-staging-to-production.png)
15. Verify production
You can see the changes have been promoted to production.
![](https://igniteconnexpublicsa.blob.core.windows.net/public/projects/igcnx/docs/static/assets/docs/deploy-to-heroku/app-promoted-to-production.png)
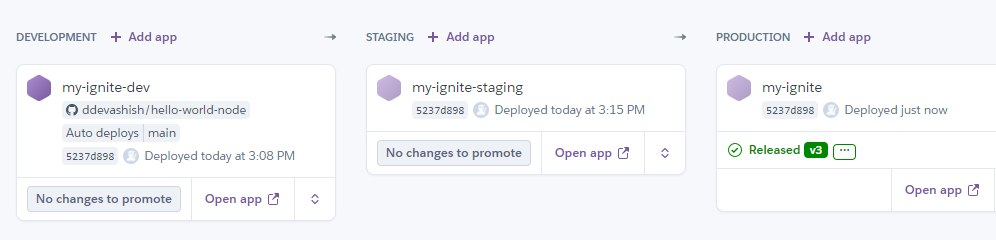
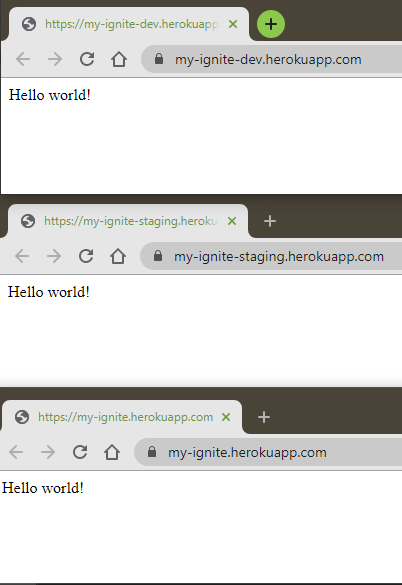
16. Verify application under each environment
Click on button “Open app” under each environment. You can see the application for different environment.
![](https://igniteconnexpublicsa.blob.core.windows.net/public/projects/igcnx/docs/static/assets/docs/deploy-to-heroku/app-running-in-different-environment.png)